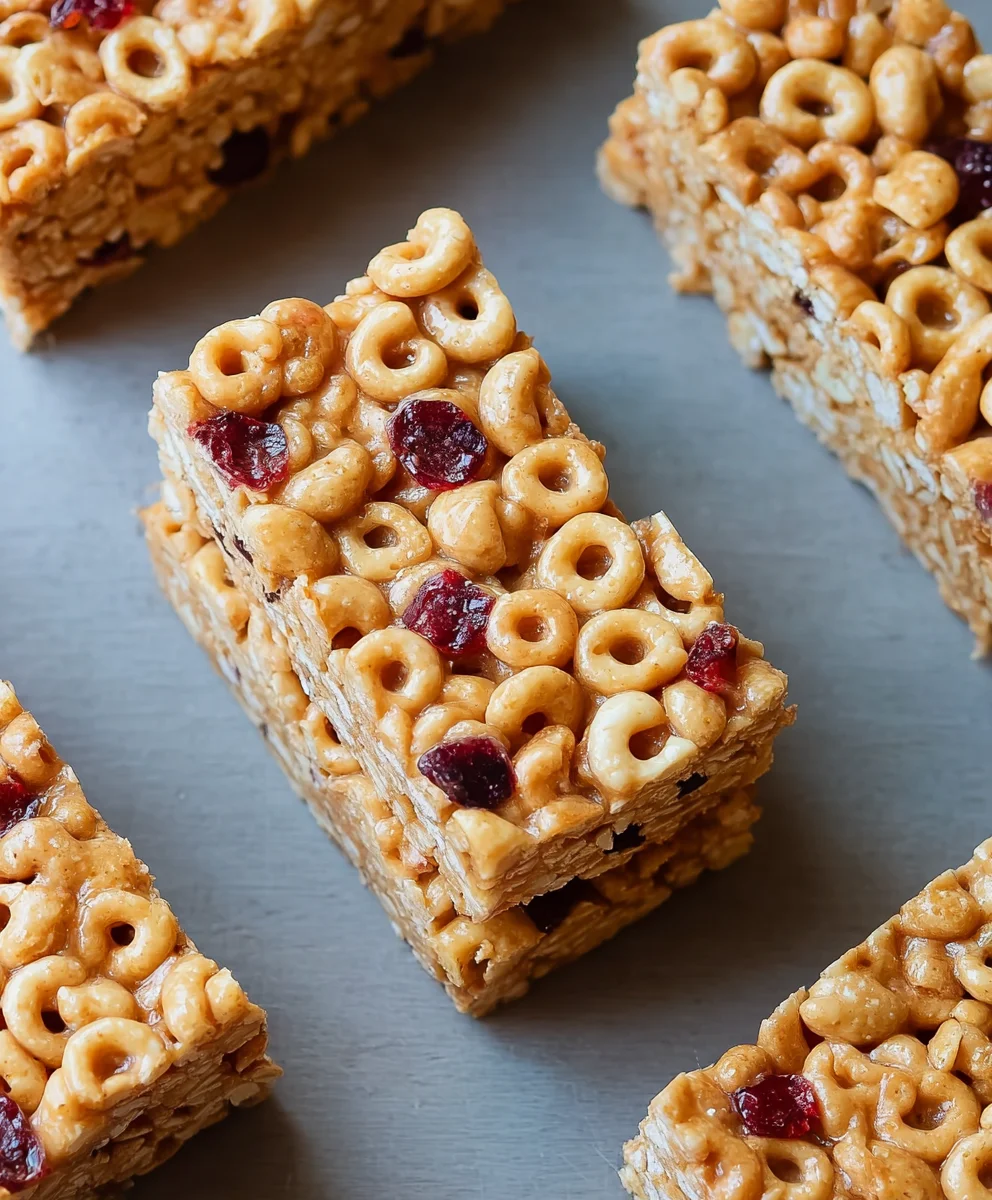
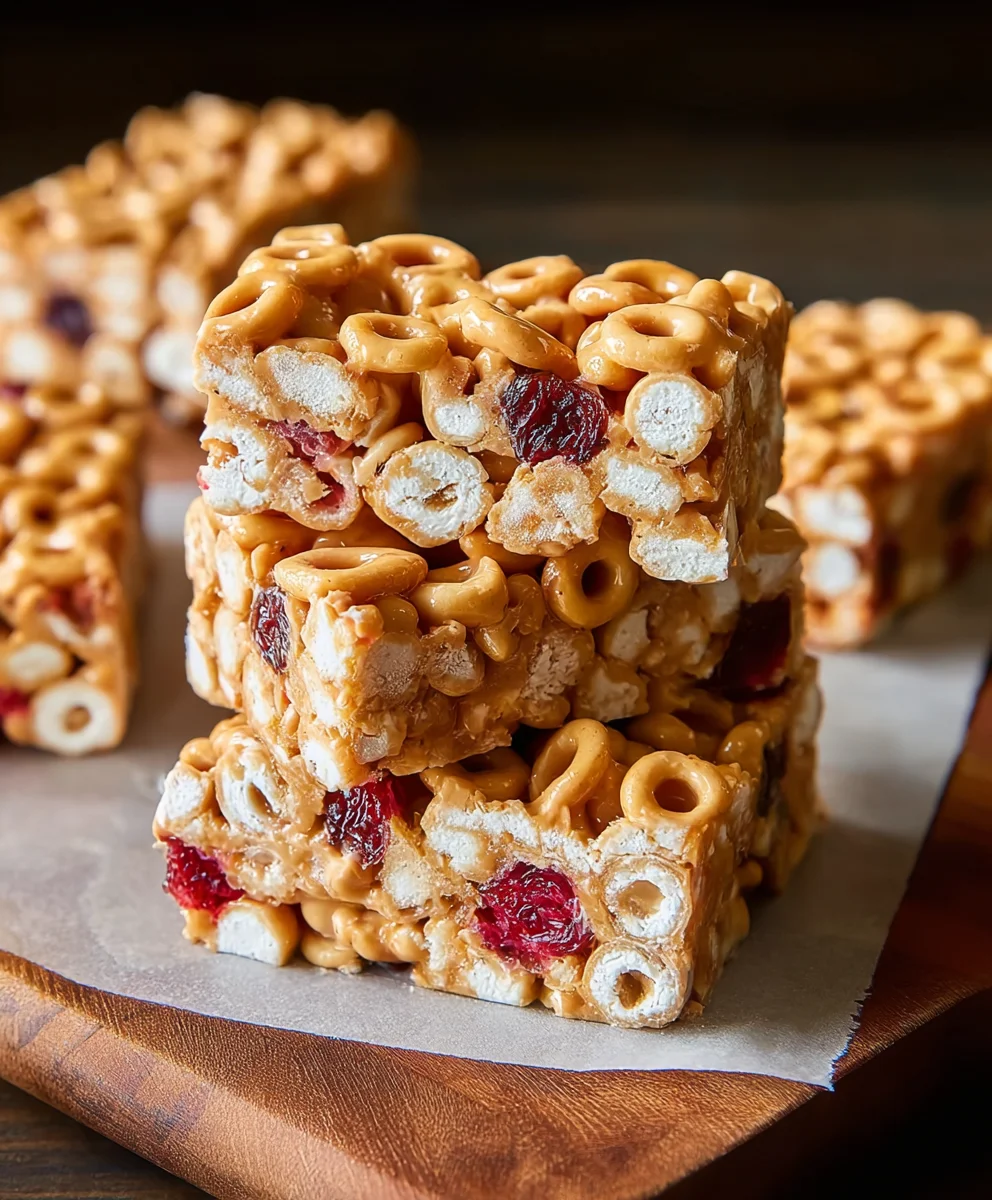
Easy Homemade Cereal Bars- Quick Snack Idea
Cereal bars are more than just a convenient snack; they’re a nostalgic trip back to childhood, a guaranteed crowd-pleaser at bake snon-alcoholic ales, and the ultimate portable energy boost for busy days. We all have a soft spot for that satisfying crunch, the chewy sweetness, and the simple goodness that defines a perfectly made batch. What is it about these humble bars that captures our hearts and taste buds? Perhaps it’s the effortless magic of transforming everyday pantry staples into something truly special, a symphony of textures and flavors that’s endlessly customizable. Whether you’re craving a classic honey-nut combination or looking to explore exciting new flavor profiles, these homemade cereal bars deliver. Forget the pre-packaged options filled with artificial ingredients; this recipe empowers you to create delicious, wholesome cereal bars that are both fun to make and utterly irresistible to eat, guaranteed to become your new go-to treat.
Ingredients:
- 3 cups cereal of choice (like puffed rice, corn flakes, or your favorite granola)
- 2/3 cup peanut butter or nut butter of choice (creamy or crunchy, your preference!)
- 1/2 cup agave, honey, or brown rice syrup (this is your binder and sweetener)
- 1/2 teaspoon salt (optional, but it enhances the flavors)
- 3 tablespoons protein powder (optional, for an extra boost)
Preparing Your Cereal Bars
Step 1: Mise en Place – Gathering and Preparing Your Base
Before we dive into mixing, let’s get everything ready. This first step is all about preparing your cereal and your baking dish. Take your chosen cereal and gently pour it into a large mixing bowl. If you’re using something like puffed rice or corn flakes that can be a bit delicate, be careful not to crush them too much. You want them to retain some texture. If your cereal tends to clump, give it a gentle fluff with your hands or a fork to separate the pieces. Now, line an 8×8 inch baking dish with parchment paper. Leave some overhang on the sides; this will act as handles, making it super easy to lift the entire block of cereal bars out of the pan later. A light spray of cooking oil on the parchment paper can also help prevent any sticking, though it’s usually not strictly necessary with parchment.
Step 2: Creating the Sticky Binder
This is where the magic happens, binding all those delicious cereal pieces together! In a medium saucepan, combine your peanut butter (or nut butter of your choice), your liquid sweetener (agave, honey, or brown rice syrup), and the optional salt if you’re using it. Place the saucepan over low to medium heat. Stir the mixture continuously. You’re looking for the peanut butter to melt and the sweetener to become fully incorporated, creating a smooth, pourable consistency. This shouldn’t take long, just a few minutes. Be patient and keep stirring to prevent the bottom from scorching. The goal is a warm, fluid mixture that will coat the cereal evenly. If you’re using protein powder, now is the time to whisk it into this warm binder mixture. Make sure it’s completely dissolved and there are no lumps; this will help distribute the protein powder evenly throughout your cereal bars.
Step 3: Combining the Cereal and Binder
Once your binder is warm and smooth, it’s time to bring it all together with the cereal. Carefully pour the warm peanut butter and sweetener mixture over the cereal in the large mixing bowl. Now, using a sturdy spatula or a large spoon, gently fold the mixture together. Your goal here is to coat every single piece of cereal with the sticky binder. Be thorough but gentle. You don’t want to break down the cereal too much, but you do want to ensure it’s all well-coated. It might seem like a lot of mixture at first, but keep folding and pressing slightly. As you continue to mix, the binder will start to coat the cereal more effectively, and the volume will reduce slightly. This step is crucial for ensuring your cereal bars hold their shape and have that satisfying chewy texture.
Step 4: Pressing the Mixture into the Pan
Now that everything is beautifully combined, it’s time to get it into its final form. Transfer the cereal mixture from the bowl into your prepared 8×8 inch baking dish. Spread it out as evenly as possible. Once it’s roughly distributed, you need to press it down firmly. This is a really important step for creating dense, sturdy cereal bars that won’t crum extractble. You can use the back of your spatula, a flat-bottomed glass, or even slightly damp hands to press the mixture down. Apply consistent pressure across the entire surface. The firmer you press, the more cohesive your bars will be. Really pack it in there! Get into the corners and along the edges to ensure a uniform block. This will make slicing much easier and result in bars that hold together when you pick them up.
Step 5: Chilling and Cutting Your Cereal Bars
The final step before you can enjoy your homemade treats is chilling. Once the mixture is firmly pressed into the pan, cover the dish (plastic wrap works well) and place it in the refrigerator for at least 1 to 2 hours. This chilling time allows the binder to set completely, solidifying the bars and making them easy to cut. The colder they are, the cleaner your cuts will be. After the chilling period, use the parchment paper overhang to lift the entire block of cereal bars out of the baking dish. Place it on a cutting board. Using a sharp knife, cut the block into your desired bar sizes. You can make them small snack-sized bars or larger, more substantial ones. For cleaner cuts, you can briefly dip your knife in hot water and wipe it dry between slices, especially if the mixture is still a bit soft. Once cut, they are ready to be enjoyed immediately or stored.
Conclusion:
We’ve reached the end of our delicious journey crafting these incredibly satisfying Cereal Bars! You’ve learned how to combine wholesome ingredients to create a snack that’s perfect for breakfast on the go, an afternoon pick-me-up, or a healthy treat for lunchboxes. The beauty of these Cereal Bars lies in their versatility and simplicity, making them a reliable go-to for busy individuals and families alike. I hope you’ve enjoyed making them as much as I have!
For serving, these Cereal Bars are fantastic on their own, but consider pairing them with a glass of milk, yogurt, or a fresh fruit salad for a more complete meal. They also make a wonderful accompaniment to your morning coffee or tea.
Don’t be afraid to experiment with variations! You can easily swap out the types of nuts and seeds, add dried fruits like cranberries or raisins, or even include a sprinkle of chocolate chips for an extra touch of indulgence. The possibilities are truly endless when it comes to personalizing your Cereal Bars.
So go ahead, bake a batch (or two!) and savor the deliciousness. I encourage you to get creative and make these Cereal Bars your own. Happy baking!
Frequently Asked Questions:
How do I store my Cereal Bars?
Once cooled completely, store your Cereal Bars in an airtight container at room temperature for up to 5 days, or in the refrigerator for up to a week for extended freshness.
Can I make these Cereal Bars gluten-free?
Absolutely! To make these Cereal Bars gluten-free, ensure you use gluten-free oats and check that all other ingredients, such as your granola or any added seeds, are also certified gluten-free.
Easy Homemade Cereal Bars – Quick Snack Idea
Quick and easy homemade cereal bars perfect for a satisfying snack. Customizable with your favorite cereal and binder.
Ingredients
-
3 cups cereal of choice
-
2/3 cup peanut butter or nut butter of choice
-
1/2 cup agave, honey, or brown rice syrup
-
1/2 teaspoon salt (optional)
-
3 tablespoons protein powder (optional)
Instructions
-
Step 1
Prepare your cereal by gently pouring it into a large mixing bowl, being careful not to crush delicate pieces. Line an 8×8 inch baking dish with parchment paper, leaving overhang for easy removal. Lightly spray the parchment with cooking oil if desired. -
Step 2
In a medium saucepan over low to medium heat, combine peanut butter (or nut butter), liquid sweetener (agave, honey, or brown rice syrup), and optional salt. Stir continuously until the peanut butter melts and the sweetener is fully incorporated, creating a smooth, pourable consistency. If using protein powder, whisk it in until completely dissolved. -
Step 3
Pour the warm binder mixture over the cereal in the large mixing bowl. Gently fold the mixture together with a spatula or spoon until every piece of cereal is evenly coated. Be thorough but gentle to maintain cereal texture. -
Step 4
Transfer the cereal mixture into the prepared baking dish and spread it out evenly. Press the mixture down firmly and consistently across the entire surface using the back of a spatula, a glass, or damp hands to create dense, cohesive bars. -
Step 5
Cover the dish and refrigerate for at least 1 to 2 hours to allow the binder to set. Once chilled, lift the block out using the parchment paper overhang, place on a cutting board, and cut into desired bar sizes using a sharp knife. For cleaner cuts, dip the knife in hot water and wipe dry between slices if needed.
Important Information
Nutrition Facts (Per Serving)
It is important to consider this information as approximate and not to use it as definitive health advice.
Allergy Information
Please check ingredients for potential allergens and consult a health professional if in doubt.