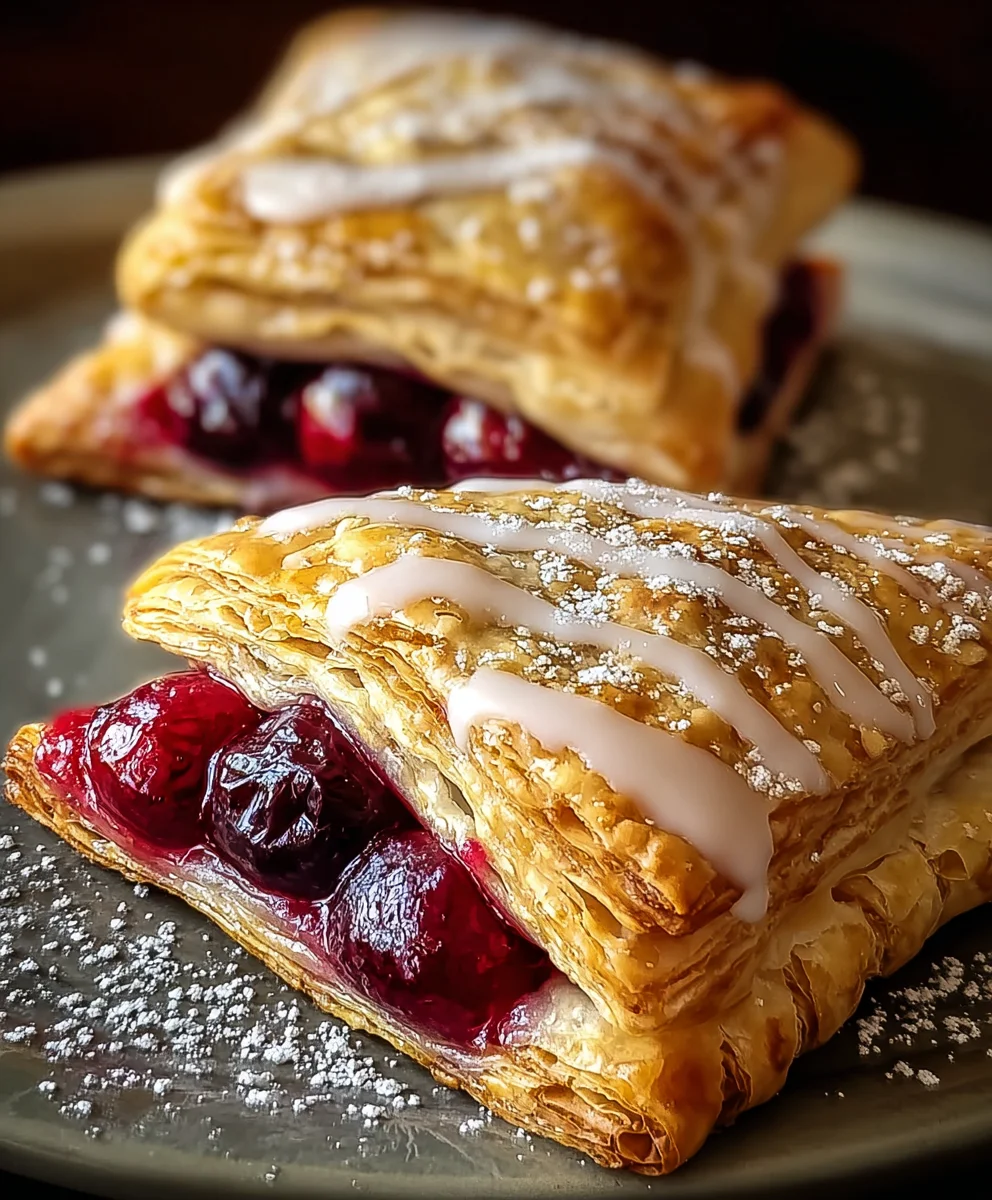
Easy Cherry Turnovers – Delicious & Simple Dessert
Easy Cherry Turnovers are more than just a dessert; they’re a little bite of pure, unadulterated joy that transports you back to simpler times. Who can resist the allure of flaky, golden pastry encasing a sweet, slightly tart burst of vibrant cherry filling? It’s the perfect balance of textures and flavors that makes these turnovers so incredibly satisfying. Whether you’re seeking a delightful treat for a special occasion, a comforting bake for a cozy afternoon, or a charming addition to your brunch spread, these Easy Cherry Turnovers deliver every single time. What truly sets them apart is their deceptive simplicity; despite their elegant appearance and delicious taste, they’re remarkably straightforward to make, proving that gourmet-level sweetness doesn’t require hours in the kitchen. Prepare to impress yourself and your loved ones with this classic, crowd-pleasing recipe.
Ingredients:
- 1 package puff pastry (2 sheets), thawed
- 1 cup cherry pie filling (fresh or canned)
- 1 large egg
- 1 tablespoon milk
- 1 cup powdered sugar
- 1 teaspoon vanilla extract
- 2-3 tablespoons milk
- Additional powdered sugar for dusting
Preparing the Pastry and Filling
Prepping the Puff Pastry
The foundation of our Easy Cherry Turnovers is, of course, the puff pastry. Ensure your puff pastry sheets are fully thawed according to the package directions. Typically, this involves leaving them at room temperature for about 30-45 minutes. You want them pliable enough to work with, but still chilled. Gently unfold each sheet onto a lightly floured surface. I like to use a clean, flat countertop or a large cutting board. Be careful not to overwork the dough, as this can make the pastry tough. If the dough feels sticky, dust your hands and the surface with a little more flour. Using a sharp knife or a pizza cutter, carefully cut each pastry sheet into four equal squares. This will give you a total of eight squares, perfect for creating individual turnovers. Set these squares aside while you prepare the other components.
Assembling the Cherry Filling
For the filling, we’re using a convenient 1 cup of cherry pie filling. If you’re using canned cherry pie filling, simply open the can and give it a gentle stir to ensure the cherries are evenly distributed within the thick syrup. If you happen to have fresh cherries, you’d want to pit and halve them, then simmer them with a little sugar and cornstarch until thickened, but for this easy recipe, the pre-made filling is a fantastic shortcut. Make sure the filling isn’t too watery; if it seems a bit loose, you can stir in a teaspoon of cornstarch and let it sit for a few minutes to absorb any excess moisture. This step is crucial to prevent your turnovers from becoming soggy.
Creating the Egg Wash and Glaze
Making the Egg Wash
A good egg wash is key to achieving that beautiful golden-brown, slightly crispy crust on your turnovers. In a small bowl, crack your large egg. Add 1 tablespoon of milk to the egg. Then, using a whisk or a fork, beat the egg and milk together vigorously until they are thoroughly combined and frothy. This mixture will be brushed onto the pastry before baking. The egg wash not only adds color and shine but also helps to seal the pastry edges together, preventing the delicious cherry filling from escaping during baking. It’s a simple step that makes a significant visual and textural difference.
Whipping Up the Simple Glaze
The final touch to our Easy Cherry Turnovers is a sweet, simple glaze. In a separate medium bowl, add your 1 cup of powdered sugar. To this, add 1 teaspoon of vanilla extract for a lovely aroma and flavor. Now, start by adding 2 tablespoons of milk. Whisk everything together until you have a smooth, pourable glaze. The consistency is important here. If the glaze is too thick, gradually add the remaining tablespoon of milk, a teaspoon at a time, until you reach your desired drizzling consistency. You want it thin enough to drizzle easily but thick enough to coat the back of a spoon. If it becomes too thin, you can always add a little more powdered sugar to thicken it up.
Baking and Finishing Your Turnovers
Filling and Sealing the Turnovers
Now for the fun part – assembling the turnovers! Take one of your puff pastry squares and place it on your prepared surface. Spoon about 2 tablespoons of the cherry pie filling into the center of the square. Be careful not to overfill, as this will make sealing difficult and could lead to leaks. You want to leave about a 1/2-inch border around the edges. Now, take a pastry brush and dip it into your prepared egg wash. Lightly brush the edges of the pastry square with the egg wash. This will act like glue. Carefully fold the pastry square in half diagonally, creating a triangle. Press the edges firmly together to seal, using the tines of a fork to crimp them securely. Repeat this process with the remaining pastry squares and filling, creating eight delicious cherry turnovers.
Baking to Perfection
Preheat your oven to 400°F (200°C). Line a baking sheet with parchment paper for easy cleanup. Arrange the assembled turnovers on the prepared baking sheet, leaving a little space between each one. Once all the turnovers are on the sheet, take your pastry brush and generously brush the tops of each turnover with the remaining egg wash. This will give them that beautiful, glossy finish and help them brown evenly. For a little extra flair and to allow steam to escape, you can make two or three small slits in the top of each turnover with a sharp knife. Place the baking sheet in the preheated oven and bake for 15-20 minutes, or until the turnovers are puffed up, golden brown, and the filling is bubbling. Keep an eye on them towards the end of the baking time, as puff pastry can brown quickly.
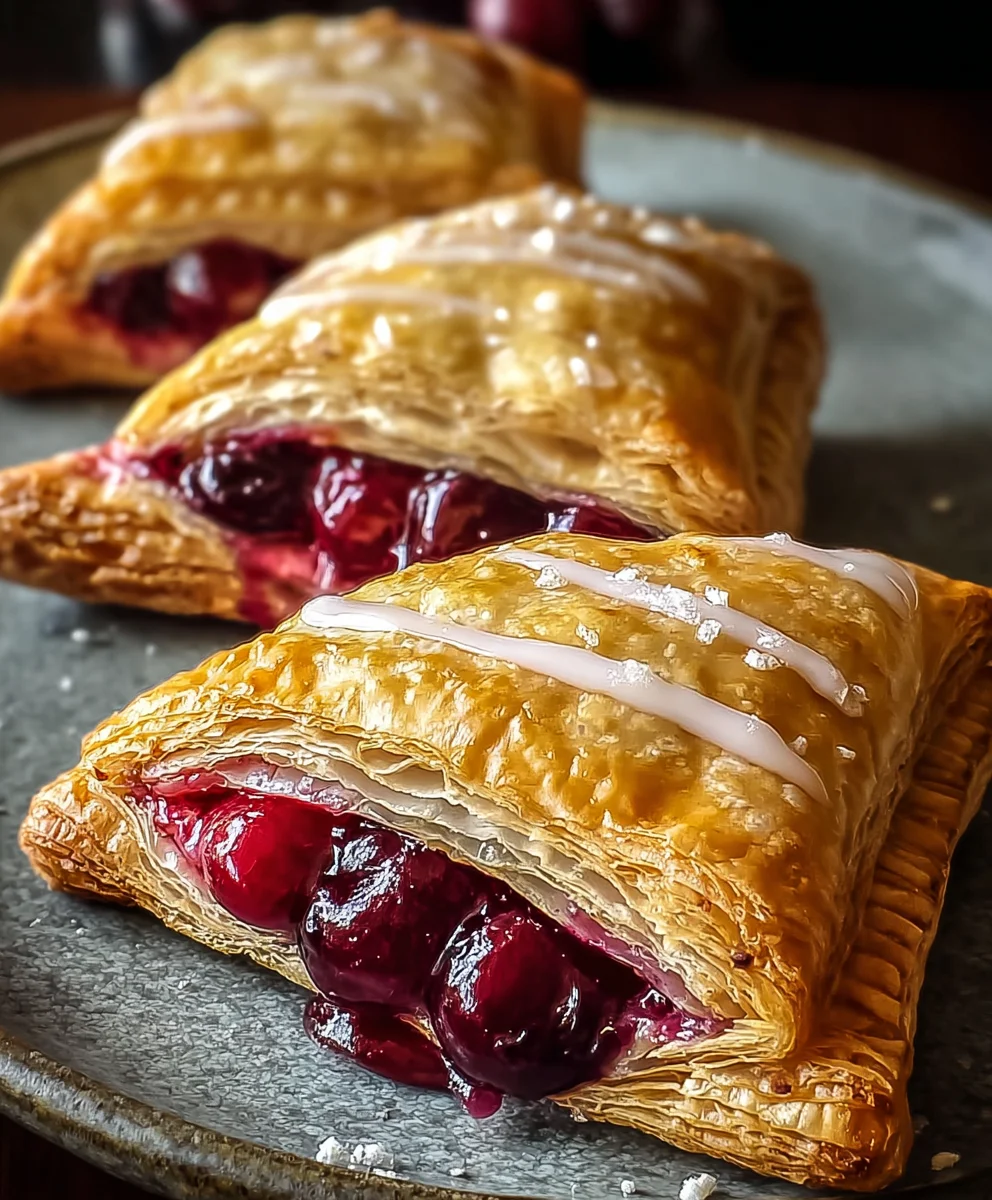
Glazing and Serving
Once your Easy Cherry Turnovers are out of the oven and have cooled for a few minutes on the baking sheet (they will be very hot!), it’s time for the final touch. Arrange them on a wire rack set over a piece of parchment paper or a clean plate to catch any drips. Take your prepared vanilla glaze and drizzle it generously over the warm turnovers using a spoon. You can create zigzags, swirls, or just a simple coating – it’s up to you! As an optional extra touch, lightly dust the glazed turnovers with a little additional powdered sugar for that classic, bakery-style look. Allow the glaze to set for a few minutes. These Easy Cherry Turnovers are best enjoyed warm, but they are also delicious at room temperature. They make a wonderful breakfast treat, a delightful dessert, or a perfect accompaniment to a cup of tea or coffee.
Conclusion:
And there you have it – a delightful batch of Easy Cherry Turnovers ready to impress! We’ve walked through each step, from preparing the tender pastry to filling it with that sweet, tart cherry goodness. These turnovers are surprisingly simple to make, proving that elegant desserts don’t always require complicated techniques. They’re perfect for a cozy afternoon tea, a sweet addition to your brunch spread, or a wonderful homemade gift.
For serving, I love them warm, dusted with a little powdered sugar or drizzled with a simple vanilla glaze. They are also fantastic alongside a scoop of vanilla bean ice cream or a dollop of fresh whipped cream. Don’t be afraid to experiment with variations! You could try adding a pinch of cinnamon or almond extract to the cherry filling for a different flavor profile, or even swap out the cherries for other berries like blueberries or raspberries.
The joy of baking Easy Cherry Turnovers is in the simple pleasure of creating something delicious from scratch. I encourage you to give this recipe a try – you might be surprised at how easily you can achieve bakery-quality results in your own kitchen. Happy baking!
Frequently Asked Questions about Easy Cherry Turnovers:
Q: Can I use fresh cherries instead of frozen for my Easy Cherry Turnovers?
A: Absolutely! If using fresh cherries, make sure to pit them and then follow the recipe instructions for cooking them down to release their juices. You might need to adjust the cooking time slightly depending on how ripe your cherries are.
Q: How long do Easy Cherry Turnovers last, and how should I store them?
A: Once cooled, Easy Cherry Turnovers can be stored in an airtight container at room temperature for up to two days, or in the refrigerator for up to five days. For best results, they are most enjoyable when reheated briefly in a low oven or toaster oven to crisp up the pastry again.
Q: My pastry didn’t get as flaky as I’d hoped. What could I have done wrong?
A: Pastry flakiness is often about keeping the butter cold. Ensure your butter and water were very cold when making the dough, and try not to overwork the dough when combining and rolling. Chilling the dough between rolling stages also helps significantly.
Easy Cherry Turnovers
Delicious and simple cherry turnovers made with puff pastry and a sweet glaze.
Ingredients
-
1 package puff pastry (2 sheets), thawed
-
1 cup cherry pie filling
-
1 large egg
-
1 tablespoon milk
-
1 cup powdered sugar
-
1 teaspoon vanilla extract
-
2-3 tablespoons milk
-
Additional powdered sugar for dusting
Instructions
-
Step 1
Ensure puff pastry sheets are thawed. Gently unfold each sheet onto a lightly floured surface. Cut each pastry sheet into four equal squares, yielding eight squares. -
Step 2
Prepare the cherry filling by stirring canned filling or simmering fresh pitted cherries with sugar and cornstarch until thickened. Ensure it’s not too watery. -
Step 3
Make the egg wash by beating 1 large egg with 1 tablespoon of milk in a small bowl until frothy. -
Step 4
Whip up the glaze by whisking 1 cup powdered sugar with 1 teaspoon vanilla extract and 2 tablespoons milk. Add more milk if needed for drizzling consistency. -
Step 5
Spoon about 2 tablespoons of cherry filling onto the center of each pastry square. Brush edges with egg wash, fold into triangles, and crimp edges with a fork to seal. -
Step 6
Preheat oven to 400°F (200°C). Place turnovers on a parchment-lined baking sheet, brush tops with remaining egg wash, and make slits. Bake for 15-20 minutes until golden brown and puffed. -
Step 7
Once cooled slightly, drizzle with vanilla glaze and dust with additional powdered sugar if desired. Serve warm or at room temperature.
Important Information
Nutrition Facts (Per Serving)
It is important to consider this information as approximate and not to use it as definitive health advice.
Allergy Information
Please check ingredients for potential allergens and consult a health professional if in doubt.