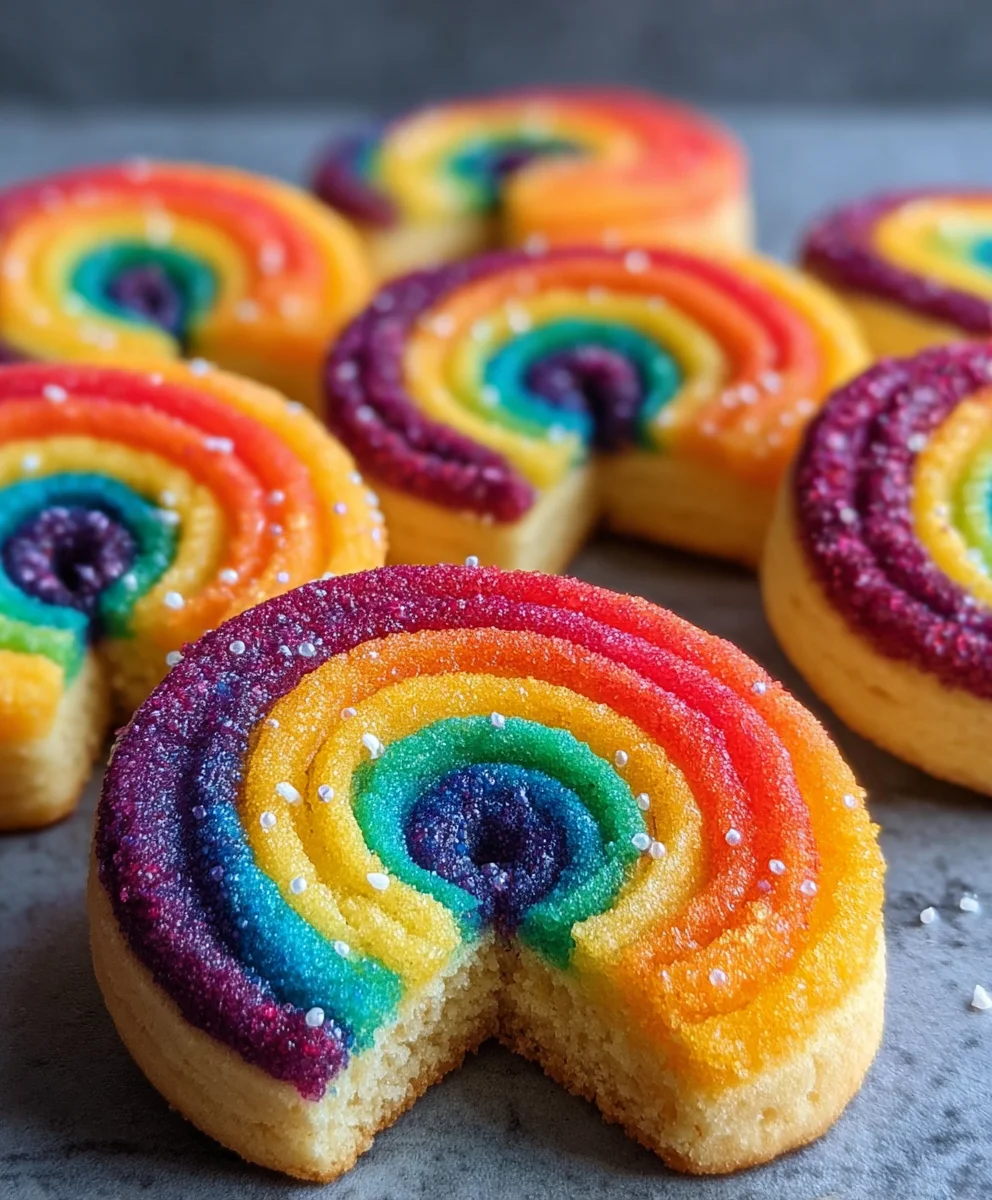
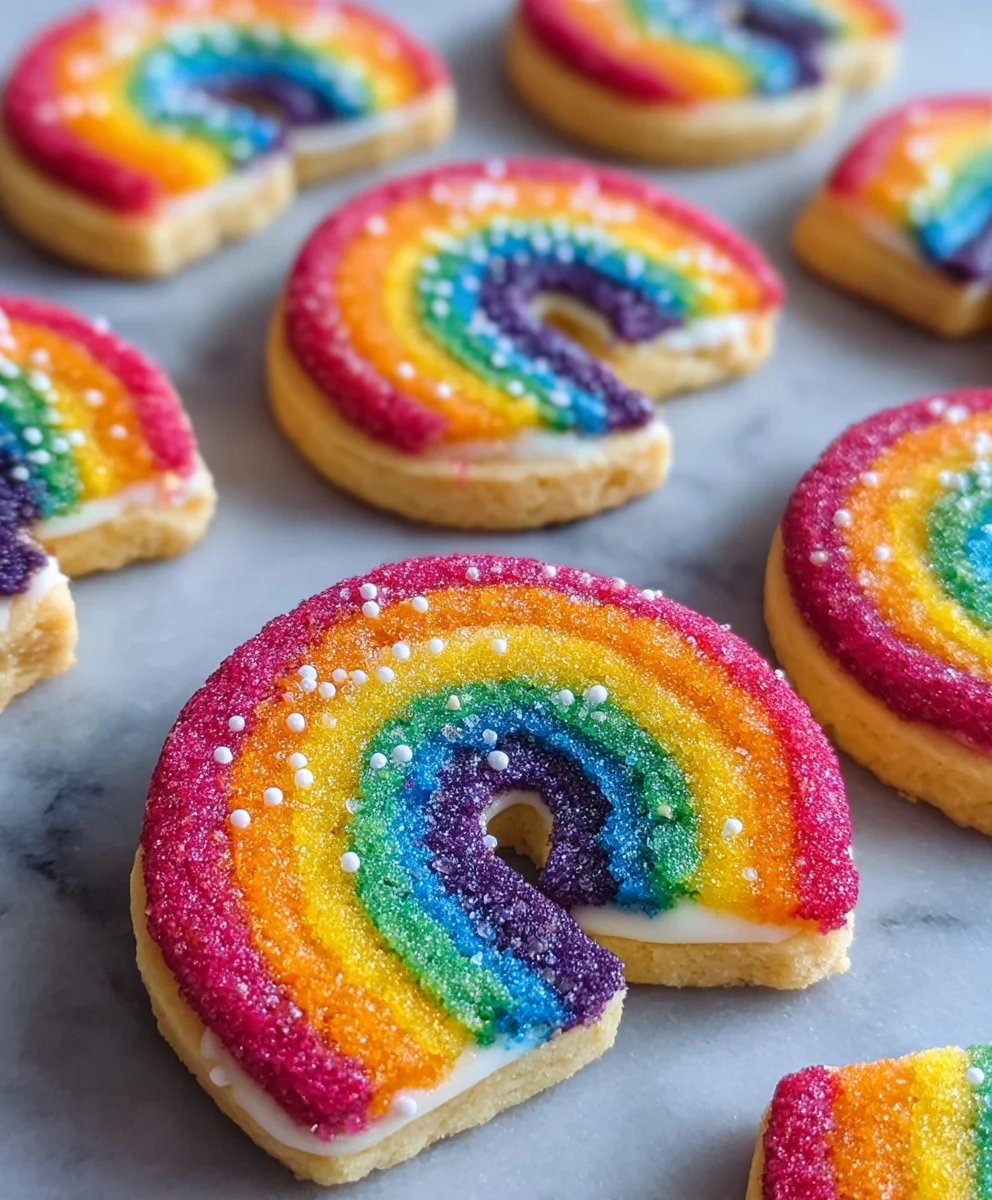
Piped Rainbow Shortbread Cookies- Easy Festive Treat
Piped rainbow shortbread cookies are more than just a sweet treat; they’re a burst of edible joy, a delicate dance of buttery richness and vibrant color that instantly brightens any occasion. Imagin extracte biting into a cookie that’s both incredibly tender and satisfyingly crisp, with a subtle sweetness that allows the pure, unadulterated flavor of butter to shine through. What truly sets these delightful creations apart is the artistic flair of the piping. Each swirl and dot of color transforms a simple shortbread into a miniature masterpiece, making them the perfect centerpiece for birthday parties, baby showers, or simply a special afternoon tea. The sheer delight on faces, young and old, as they admire and then devour these gorgeous cookies is a testament to their magic. They are remarkably easy to make, yet they possess an undeniable elegance that makes them feel incredibly special.
Ingredients:
- 2¼ cups all-purpose flour
- ¾ cup granulated sugar
- ¼ teaspoon salt
- 1 cup unsalted butter, softened and cut into 1-inch pieces
- Gel food coloring (choose 4 vibrant colors to create your rainbow effect)
- 1 cup white melting wafers (for the glaze)
- Rainbow nonpareils (for decorating the glaze)
Preparing the Shortbread Dough
The foundation of our Piped Rainbow Shortbread Cookies lies in a classic buttery shortbread dough. We’ll be dividing this dough and coloring it to create the beautiful rainbow layers. To begin extract, in a large mixing bowl, whisk together the all-purpose flour, granulated sugar, and salt. This ensures all the dry ingredients are evenly distributed, which is crucial for consistent texture. Next, add the softened, cubed unsalted butter to the dry ingredients. Using an electric mixer fitted with the paddle attachment, or by hand with a pastry blender or your fingertips, work the butter into the dry ingredients until the mixture resembles coarse crum extractbs. It’s important that the butter is softened but not melted; this allows it to be incorporated properly without creating a greasy dough. The goal is a texture like wet sand, where small clumps of butter are still visible.
Now comes the fun part – dividing and coloring the dough. Divide the dough into four equal portions. You can do this by weighing each portion for maximum accuracy, or by eye if you’re feeling confident. Place each portion into a separate small bowl. Add a few drops of your chosen gel food coloring to each bowl. Start with a small amount of gel coloring; you can always add more to achieve a deeper hue. Gel colors are concentrated and will give you vibrant results without adding too much liquid to the dough, which could affect the texture. Knead the coloring into each portion of dough until the color is uniform. Be thorough, as streaks of uncolored dough will detract from the rainbow effect. Once colored, wrap each portion tightly in plastic wrap and flatten them into discs. Refrigerate the dough for at least 30 minutes. This chilling time is essential. It firms up the butter, making the dough easier to handle and preventing the cookies from spreading excessively during baking, ensuring they hold their beautiful piped shapes.
Shaping the Rainbow Cookies
With the dough well-chilled and ready to go, it’s time to bring our rainbow to life. Remove one disc of colored dough from the refrigerator. On a lightly floured surface, roll out the dough to about ¼-inch thickness. Be gentle to avoid overworking the dough. Using cookie cutters of varying sizes, such as a large circle for the base and progressively smaller circles for the inner rings, cut out shapes. For a true piped effect, we’ll be layering these. You’ll want a larger circle as your base. Then, use a slightly smaller cutter to press gently into the center of the base, creating a slight indentation. Repeat this process with the remaining colors, working from largest to smallest, to create concentric rings of color within the cookie. Think of building a target, with each color representing a ring. Alternatively, if you prefer a more abstract piped look, you can roll out thin ropes of each colored dough and gently press them together, then twist them slightly before shaping them into circles or other desired forms. Another approach is to use small piping bags filled with the different colored doughs (after processing them into a smoother consistency if needed, perhaps with a touch more softened butter and a food processor) and pipe directly onto a parchment-lined baking sheet in concentric circles. For this recipe, we will focus on the layering and cut-out method.
Once you have your layered or shaped cookie dough, carefully transfer them to a baking sheet lined with parchment paper. Leave about 1 inch of space between each cookie as they will puff slightly during baking. If your dough becomes too soft to handle at any point, simply pop it back into the refrigerator for a few minutes to firm up. This step is crucial for maintaining the integrity of your piped designs. Chill the shaped cookies for another 15 minutes before baking to further set their shapes. This extra chill before baking is a secret weapon for beautifully defined cookies.
Baking and Glazing the Shortbread
Preheat your oven to 325°F (160°C). This moderate temperature ensures that the cookies bake evenly and develop a rum extractder crumb without browning too quickly, which would obscure the vibrant colors. Place the chilled cookies into the preheated oven and bake for 12-15 minutes, or until the edges are lightly golden and the centers are set. The baking time will vary depending on the size and thickness of your cookies, so keep a close eye on them. The goal is a pnon-alcoholic ale cookie with just a hint of color on the edges. Overbaking will result in a hard cookie and duller colors. Once baked, let the cookies cool on the baking sheet for 5 minutes before carefully transferring them to a wire rack to cool completely. Allowing them to cool slightly on the baking sheet helps them firm up without breaking.
While the cookies are cooling, prepare the white melting wafer glaze. Place the white melting wafers in a microwave-safe bowl. Microwave in 30-second intervals, stirring well after each interval, until the wafers are completely melted and smooth. Be patient; melting wafers can sometimes be tricky, and overcooking them can cause them to seize up. Once melted and smooth, you can dip the tops of the cooled shortbread cookies into the glaze, or use a spoon to drizzle the glaze over them. For an extra festive touch, immediately sprinkle the wet glaze with rainbow nonpareils before the glaze sets. The nonpareils will stick to the glaze, creating a beautiful, sparkly rainbow effect that complements the colors within the cookie. If the glaze starts to set too quickly, you can gently warm it again in the microwave for a few seconds.
Finishing Touches and Serving
Allow the glazed cookies to sit undisturbed on the wire rack until the glaze has set completely. This can take anywhere from 30 minutes to an hour, depending on the humidity and room temperature. Once the glaze is firm to the touch, your Piped Rainbow Shortbread Cookies are ready to be admired and enjoyed! Store any leftover cookies in an airtight container at room temperature for up to a week. These cookies are perfect for any celebration, a special treat for a birthday, or simply a way to brighten a gloomy day with a burst of color and buttery goodness. The combination of the tender, melt-in-your-mouth shortbread and the sweet, crisp glaze, adorned with cheerful nonpareils, makes these cookies a delightful and visually stunning indulgence. Enjoy the fruits of your colorful labor!
Conclusion:
And there you have it – your complete guide to creating beautiful and delicious Piped Rainbow Shortbread Cookies! This recipe offers a delightful combination of buttery shortbread and vibrant, playful decoration that’s perfect for any occasion, from birthday parties to simple afternoon treats. The art of piping adds a special touch, transforming these cookies into edible works of art. Don’t be intimidated by the piping process; with a little practice, you’ll be creating stunning designs in no time. We encourage you to experiment with different color combinations and piping tips to make each batch uniquely yours. Serve these delightful Piped Rainbow Shortbread Cookies with a cup of tea or coffee, or package them up as a thoughtful homemade gift. They are sure to bring smiles to everyone who receives them. Enjoy the process and the delicious results!
Frequently Asked Questions:
How can I store Piped Rainbow Shortbread Cookies?
Once completely cooled, store your Piped Rainbow Shortbread Cookies in an airtight container at room temperature for up to a week. Placing parchment paper between layers can help prevent sticking and preserve the piped designs.
Can I use food coloring gels instead of liquid food coloring?
Yes, food coloring gels are actually preferred for this recipe. They are more concentrated, meaning you’ll achieve brighter, more vibrant colors with less liquid, which helps maintain the perfect shortbread dough consistency.
My piped designs are spreading. What am I doing wrong?
This usually happens if the dough is too warm or too soft. Ensure your shortbread dough is well-chilled before piping. You might also need to adjust your piping consistency; if it’s too thin, add a little more powdered sugar. Refrigerating the piped cookies for 10-15 minutes before baking can also help the designs hold their shape.
Piped Rainbow Shortbread Cookies
Easy and festive shortbread cookies with vibrant piped rainbow layers and a sweet white chocolate glaze.
Ingredients
-
2¼ cups all-purpose flour
-
¾ cup granulated sugar
-
¼ teaspoon salt
-
1 cup unsalted butter, softened and cut into 1-inch pieces
-
Gel food coloring (choose 4 vibrant colors to create your rainbow effect)
-
1 cup white melting wafers
-
Rainbow nonpareils (for decorating the glaze)
Instructions
-
Step 1
Prepare the shortbread dough: Whisk together flour, sugar, and salt. Add softened butter and mix until the texture resembles coarse crumbs. Divide dough into four equal portions, color each portion with gel food coloring, knead until uniform, wrap, flatten into discs, and refrigerate for at least 30 minutes. -
Step 2
Shape the rainbow cookies: Roll out one disc of dough to ¼-inch thickness. Use progressively smaller cookie cutters to create concentric rings of color within each cookie base, layering the colors from largest to smallest. Alternatively, roll thin ropes of dough, twist them, and shape. Transfer shaped cookies to a parchment-lined baking sheet. -
Step 3
Chill the shaped cookies for another 15 minutes before baking to help them hold their shape. -
Step 4
Bake the cookies: Preheat oven to 325°F (160°C). Bake for 12-15 minutes, or until edges are lightly golden and centers are set. Cool on the baking sheet for 5 minutes, then transfer to a wire rack to cool completely. -
Step 5
Prepare the glaze: Melt white melting wafers in a microwave-safe bowl in 30-second intervals, stirring until smooth. Dip or drizzle cooled cookies with glaze and immediately sprinkle with rainbow nonpareils. -
Step 6
Finishing touches: Allow the glazed cookies to sit undisturbed until the glaze sets completely. Store in an airtight container at room temperature.
Important Information
Nutrition Facts (Per Serving)
It is important to consider this information as approximate and not to use it as definitive health advice.
Allergy Information
Please check ingredients for potential allergens and consult a health professional if in doubt.