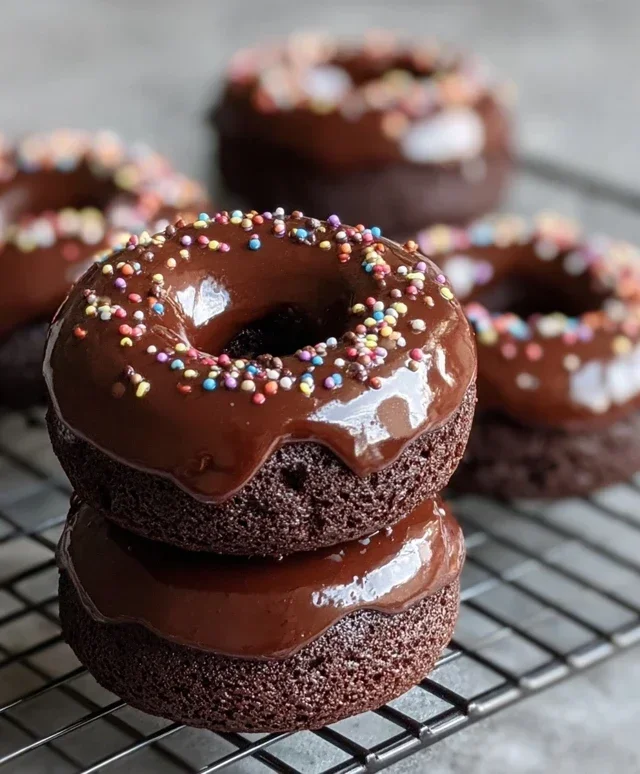
Easy Chocolate Baked Donuts Recipe
Chocolate Baked Donuts are a delightful indulgence that I absolutely adore! If you’re anything like me, the thought of a warm, cakey donut, rich with chocolate flavor, is pure bliss. Forget the deep-frying hassle; these baked beauties offer all the satisfaction without the mess or the guilt. We love them because they’re incredibly versatile – perfect for a decadent weekend brunch, a sweet afternoon pick-me-up, or even a thoughtful homemade gift. What truly makes these Chocolate Baked Donuts special is the incredible ease of preparation combined with that intensely satisfying chocolate experience. They bake up tender and moist in a donut pan, absorbing glazes and toppings like a dream. Get ready to fall in love with this simple yet utterly delicious treat!
Chocolate Baked Donuts
Welcome to your new favorite way to enjoy a sweet treat! Forget the deep fryer; today, we’re diving into the wonderfully simple and deliciously satisfying world of chocolate baked donuts. These aren’t just any donuts; they’re tender, moist, and packed with rich chocolate flavor, all baked to golden perfection in your oven. Plus, they’re surprisingly easy to make, perfect for a weekend brunch, an after-school snack, or even a decadent dessert. Get ready to impress yourself and anyone lucky enough to share these with you!
Ingredients:
Let’s Get Baking!
This recipe is designed to be straightforward, even for begin extractner bakers. We’ll start by preparing our donut batter, then move on to creating a luscious chocolate glaze that will take these baked beauties to the next level.
Step 1: Prepare Your Donut Pans and Mix Dry Ingredients
First things first, let’s get our donut pans ready. If you have a standard donut pan (the kind with six or twelve cavities), you’ll want to lightly grease each cavity. This is crucial to prevent the donuts from sticking. You can use a cooking spray or a little bit of butter or oil applied with a pastry brush. Once your pans are prepped, preheat your oven to 350°F (175°C). This ensures the oven is at the correct temperature when your batter is ready.
In a medium-sized mixing bowl, we’re going to combine all of our dry ingredients. This includes ¾ cup of all-purpose flour, ½ cup of white granulated sugar, ⅓ cup of unsweetened cocoa powder, ½ teaspoon of baking soda, and ¼ teaspoon of salt. Whisk these ingredients together thoroughly. This step is important because it evenly distributes the leavening agents (baking soda) and salt, ensuring your donuts rise properly and have balanced flavor. No one wants a pocket of salt or baking soda in their donut!
Step 2: Combine Wet Ingredients and Mix the Batter
Now, in a separate bowl or liquid measuring cup, let’s gather our wet ingredients. We’ll need ½ cup of milk, 2 tablespoons of your chosen oil (olive or canola both work wonderfully, adding moisture and tenderness), ½ tablespoon of vinegar (apple cider or white vinegar are great choices; the vinegar reacts with the baking soda to help the donuts rise and become fluffy, and you won’t taste it!), and 1 teaspoon of vanilla extract for that classic, comforting aroma and flavor. Whisk these wet ingredients together until they are well combined.
Next, pour the wet ingredients into the bowl with your dry ingredients. Now, gently mix everything together until just combined. It’s really important not to overmix the batter. Overmixing can develop the gluten in the flour too much, resulting in tough donuts. A few streaks of flour are perfectly fine; they will disappear during baking. The batter should be relatively thick, but still pourable.
Step 3: Filling the Donut Pans and Baking
This is where the magic starts to happen! Carefully spoon or pipe your donut batter into the prepared donut cavities. You want to fill each cavity about two-thirds of the way full. Be careful not to overfill, as the donuts will puff up as they bake. A piping bag (or a large zip-top bag with the corner snipped off) makes this step neat and easy, but a spoon works just as well.
Once your donut pans are filled, it’s time to bake! Place the pans in your preheated oven and bake for approximately 10-12 minutes. The baking time can vary slightly depending on your oven and the size of your donut cavities. You’ll know they’re done when a toothpick inserted into the center of a donut comes out clean. They should also be slightly firm to the touch and have a lovely aroma filling your kitchen.
Step 4: Cooling the Donuts and Making the Chocolate Glaze
As soon as the donuts are baked, carefully remove the pans from the oven. Let them cool in the pans for about 5 minutes. This allows them to set up slightly, making them easier to remove without breaking. After those 5 minutes, gently invert the donut pans onto a wire cooling rack to release the donuts. Let them cool completely on the wire rack. This is essential before glazing; if you try to glaze warm donuts, the glaze will melt right off!
While the donuts are cooling, let’s make our irresistible chocolate glaze. In a small saucepan over low heat, melt ¼ cup of butter. Once the butter is melted, stir in 2 tablespoons of cream or milk, 1 tablespoon of light corn syrup, and ½ teaspoon of vanilla extract. Stir until everything is smooth and well combined. Remove this mixture from the heat. Now, add the 2 ounces of chocolate chips to the warm mixture. Let them sit for about a minute to start melting, then stir gently until you have a smooth, glossy chocolate glaze. This corn syrup is a secret weapon for a perfectly smooth and slightly chewy glaze!
Step 5: Glazing the Donuts and Enjoying!
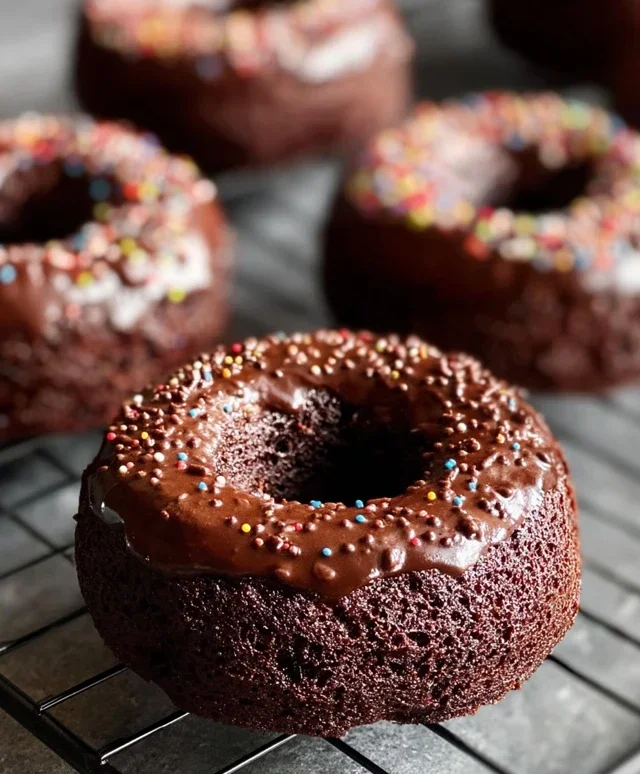
Once the donuts are completely cool and your chocolate glaze is ready (it should be thick enough to coat, but still pourable), it’s time for the fun part! You can either dip the tops of each donut into the glaze, allowing the excess to drip back into the bowl, or you can spoon the glaze over the tops. For an extra touch of sweetness and visual appeal, you can sprinkle some of the ¾ cup of powdered sugar over the glazed donuts while the glaze is still wet. This creates a beautiful contrast and a lovely finished look.
Allow the glaze to set for a few minutes. And there you have it – homemade chocolate baked donuts, ready to be devoured! They are best enjoyed fresh, but they’ll keep in an airtight container at room temperature for a couple of days. Get ready for compliments, because these are truly a delightful treat that’s as rewarding to make as it is to eat. Enjoy every single bite of your delicious creation!
Conclusion:
And there you have it! These chocolate baked donuts are a game-changer for any sweet tooth. We’ve explored a recipe that’s not only incredibly delicious but also wonderfully straightforward, making it perfect for bakers of all skill levels. The beauty of this recipe lies in its versatility and the satisfyingly rich chocolate flavor without the fuss of frying. Whether you’re looking for a healthier alternative to traditional donuts, a fun weekend baking project with the family, or a delightful treat to impress guests, these baked delights are sure to hit the spot.
These chocolate baked donuts are fantastic served warm, fresh from the oven, perhaps with a dusting of powdered sugar or a simple chocolate glaze. They also pair wonderfully with a cup of coffee or a cold glass of milk. Don’t be afraid to get creative with your toppings! Think sprinkles, mini chocolate chips, a drizzle of caramel, or even a dollop of whipped cream. For variations, consider adding a pinch of cinnamon or espresso powder to the batter for an extra flavor dimension, or even swirl in some peanut butter before baking.
I truly encourage you to give this recipe a try. You might be surprised at how easy it is to achieve bakery-quality results right in your own kitchen. Happy baking!
Frequently Asked Questions:
Can I make these donuts ahead of time?
Absolutely! Chocolate baked donuts can be made a day in advance and stored in an airtight container at room temperature. For best texture, you might want to gently warm them for a few seconds in the microwave before serving.
What kind of pan is best for baking donuts?
A standard donut pan is ideal for achieving that classic ring shape. If you don’t have one, you can adapt the recipe into muffin tins, though they will have a different appearance.
Can I use a different type of flour?
While all-purpose flour is recommended for the best texture, you could experiment with whole wheat flour for a slightly healthier option, though it might result in a denser donut. Gluten-free all-purpose flour blends can also be used, but results may vary.
Chocolate Baked Donuts
Delicious and easy chocolate baked donuts, perfect for a sweet treat.
Ingredients
-
¾ cup all-purpose flour
-
½ cup white granulated sugar
-
⅓ cup cocoa
-
½ teaspoon baking soda
-
¼ teaspoon salt
-
½ cup milk
-
2 tablespoons oil
-
½ tablespoon vinegar
-
1 teaspoon vanilla extract
-
¼ cup butter
-
2 tablespoons cream
-
1 tablespoon light corn syrup
-
½ teaspoon vanilla extract
-
2 ounces chocolate chips
-
¾ cup powdered sugar
Instructions
-
Step 1
Preheat oven to 350°F (175°C). Grease and flour a donut pan or line with donut paper liners. -
Step 2
In a large bowl, whisk together flour, sugar, cocoa, baking soda, and salt. -
Step 3
In a separate bowl, whisk together milk, oil, vinegar, and 1 teaspoon of vanilla extract. -
Step 4
Pour the wet ingredients into the dry ingredients and mix until just combined. Do not overmix. -
Step 5
Spoon batter into the prepared donut pan, filling each cavity about two-thirds full. -
Step 6
Bake for 10-12 minutes, or until a toothpick inserted into a donut comes out clean. -
Step 7
Let the donuts cool in the pan for a few minutes before transferring them to a wire rack to cool completely. -
Step 8
To make the glaze, melt butter in a small saucepan over low heat. Stir in cream, light corn syrup, and ½ teaspoon of vanilla extract. Add chocolate chips and stir until melted and smooth. -
Step 9
Whisk in powdered sugar until the glaze is smooth and pourable. Add more cream or milk, a teaspoon at a time, if needed to reach desired consistency. -
Step 10
Dip each cooled donut into the glaze, allowing excess to drip off, and place back on the wire rack to set.
Important Information
Nutrition Facts (Per Serving)
It is important to consider this information as approximate and not to use it as definitive health advice.
Allergy Information
Please check ingredients for potential allergens and consult a health professional if in doubt.