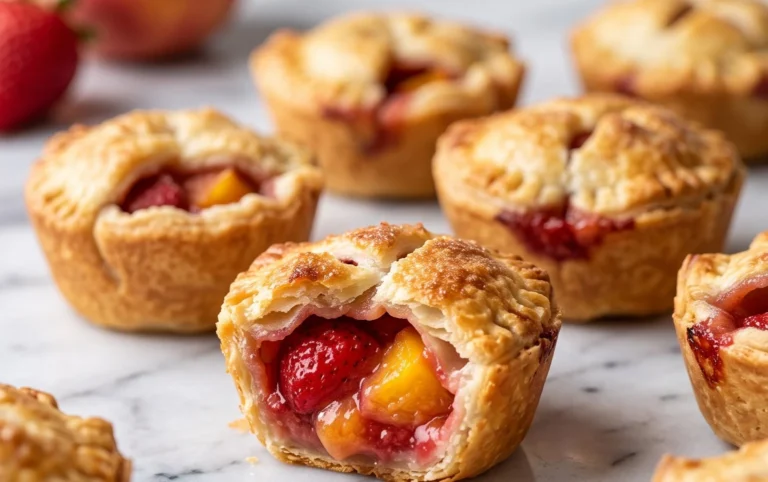
Fresh Strawberry Pie Recipe-Easy & Delicious
Fresh Strawberry Pie is more than just a dessert; it’s a vibrant celebration of summer’s sweetest bounty. Imagin extracte biting into that first perfect forkful – a symphony of tender, ruby-red strawberries nestled in a glossy, jewel-like glaze, all cradled within a buttery, crisp crust. It’s no wonder this iconic treat holds such a special place in our hearts and on our picnic tables. People adore this pie because it’s incredibly refreshing, bursting with natural fruit flavor, and deceptively simple to make. What truly sets our Fresh Strawberry Pie apart is the emphasis on peak-season berries, allowing their inherent sweetness and tartness to shine without being overshadowed. This recipe promises a truly unforgettable experience, bringin extractg the pure essence of sunshine and sweet strawberries right to your kitchen.
Fresh Strawberry Pie
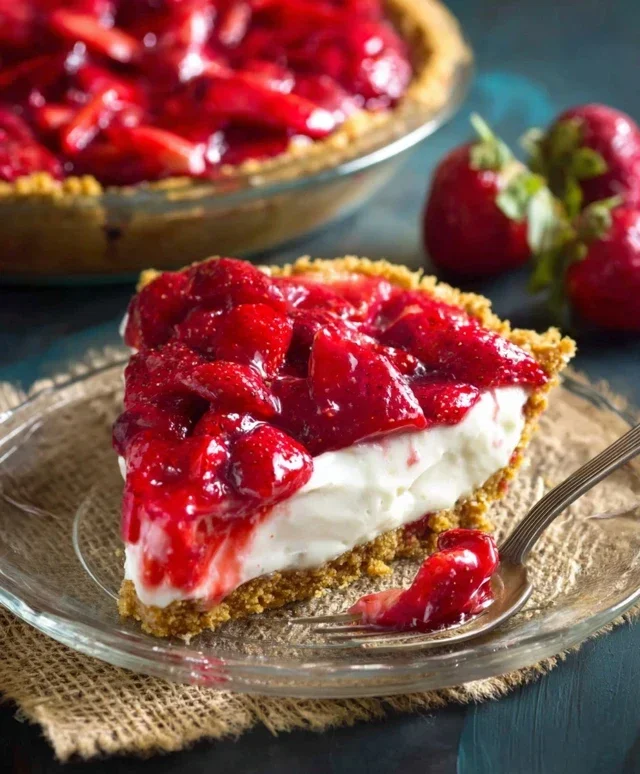
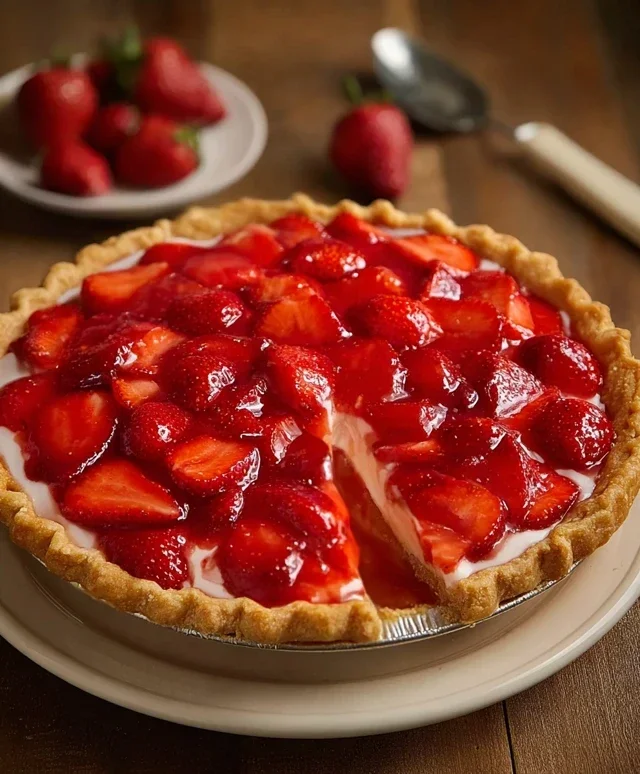
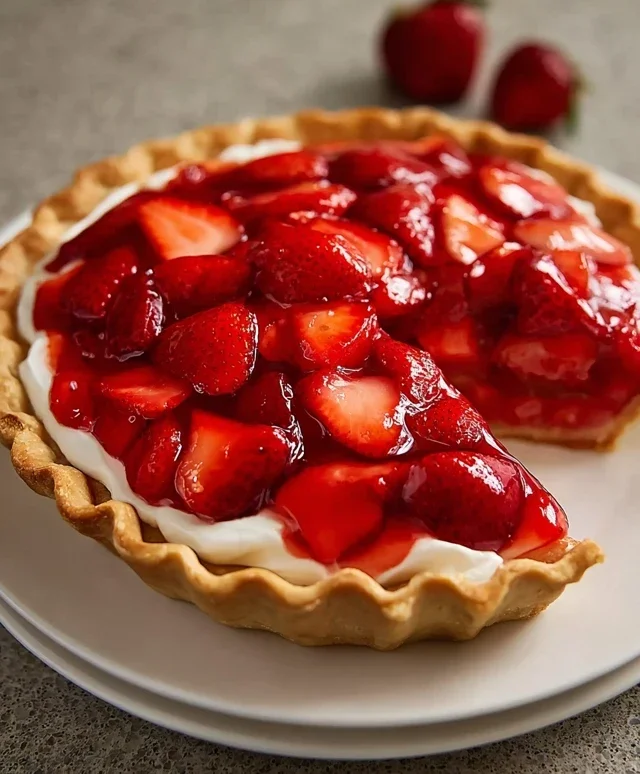
There’s something undeniably special about a fresh strawberry pie. The vibrant ruby-red color, the sweet burst of summer fruit, and that glistening, perfectly set glaze – it’s a classic for a reason. This recipe delivers that perfect slice of sunshine, using simple ingredients to create a show-stopping dessert that’s surprisingly easy to make. Whether you’re a seasoned baker or just starting out, this Fresh Strawberry Pie is sure to impress your family and friends. It’s ideal for picnics, potlucks, holidays, or simply when you’re craving a taste of pure, unadulterated summer sweetness. The key to its success lies in creating a beautiful, clear glaze that lets the fresh strawberries truly shine. Let’s get started!
Ingredients:
Preparation and Baking
The beauty of this pie lies in its simplicity. We’ll start by getting our crust ready and then focus on creating that luscious strawberry filling.
1. Prepare the Pie Crust: Begin extract by taking your frozen pie crust out of the freezer. Most frozen crusts require you to prick the bottom and sides with a fork before baking to prevent puffing. You can also bake it according to the package directions for a pre-baked or “blind-baked” crust. For a truly crisp bottom, I recommend blind baking it. To do this, prick the bottom with a fork, line the crust with parchment paper or aluminum foil, and fill it with pie weights, dried beans, or uncooked rice. Bake for about 10-15 minutes until lightly golden, then remove the weights and paper and bake for another 5-7 minutes until the bottom is set and slightly browned. Let the crust cool completely on a wire rack before filling. This step is crucial to prevent a soggy bottom, ensuring every bite is delightful.
2. Create the Strawberry Glaze: In a medium saucepan, whisk together the 1 1/4 cups of sugar and 3 tablespoons of cornstarch until thoroughly combined. This is important to avoid lumps in your glaze. Once the dry ingredients are mixed, gradually add the 1 1/4 cups of water, stirring constantly until you have a smooth, lump-free mixture. Place the saucepan over medium heat and bring the mixture to a boil, stirring frequently. As it heats, the cornstarch will start to thicken the liquid. Continue to boil and stir for about 2 minutes. This cooking time is essential for the cornstarch to fully activate and create a thick, glossy glaze. The mixture will become quite thick, almost jelly-like. Remove the saucepan from the heat.
3. Incorporate the Strawberry Jelly: Now for a little extra flavor boost! Stir the 3 tablespoons of strawberry jelly into the hot glaze mixture. The jelly will melt into the glaze, adding an extra layer of strawberry flavor and a beautiful pink hue. Stir until the jelly is completely dissolved and incorporated into the glaze. This step is a wonderful little trick that enhances the overall strawberry taste without adding more fresh fruit to the cooking process. The glaze should now be smooth, vibrant, and wonderfully fragrant.
4. Combine and Fill: Gently fold the 2 cups of sliced strawberries into the slightly cooled glaze. You want to coat all the strawberry slices evenly. Be careful not to mash the strawberries; you want them to retain their shape and texture. The glaze should be warm, not piping hot, as you fold in the fruit. If it’s too hot, it might break down the strawberries. Allow this mixture to cool for about 15-20 minutes, stirring occasionally. This brief cooling period allows the glaze to thicken a bit more and the flavors to meld. Once it has cooled slightly, pour the strawberry mixture into your completely cooled, pre-baked pie crust. Spread it out evenly, making sure the strawberries are distributed throughout the pie.
5. Chill and Set: This is where patience comes in! Cover the pie loosely with plastic wrap, being careful not to let it touch the surface of the pie if possible. Refrigerate the pie for at least 4 hours, or preferably overnight. This chilling time is absolutely critical for the glaze to set properly and for the pie to become firm enough to slice cleanly. If you try to cut into it too soon, you’ll end up with a delicious but messy situation. The cold will transform the glaze from a thick liquid into a firm, beautiful coating that holds the fresh strawberries perfectly in place.
Serve your beautiful Fresh Strawberry Pie chilled. It’s wonderful on its own, but a dollop of whipped cream or a scoop of vanilla ice cream makes it truly divine. Enjoy this taste of summer all year round!
Conclusion:
This fresh strawberry pie recipe truly is a showstopper! Its brilliance lies in its simplicity and the incredible burst of natural sweetness from ripe, juicy strawberries. The combination of a crisp, buttery crust and a luscious, vibrant filling makes it the perfect dessert for any occasion, from a casual family gathering to a more formal celebration. It’s incredibly satisfying to create something so beautiful and delicious from scratch, and I know you’ll be proud to serve it.
For serving, I love to pair a slice of this delightful pie with a dollop of freshly whipped cream or a scoop of vanilla bean ice cream. It’s also wonderful served slightly chilled, allowing the flavors to meld perfectly. If you’re looking to mix things up, consider adding a sprinkle of lemon zest to the filling for an extra zing, or even a touch of basil for a surprisingly sophisticated twist. Don’t hesitate to experiment and make it your own! I wholeheartedly encourage you to give this fresh strawberry pie a try – it’s an unforgettable taste of summer!
Frequently Asked Questions:
Can I use frozen strawberries for this fresh strawberry pie?
While fresh strawberries are ideal for the best texture and flavor, you can use frozen strawberries if fresh are unavailable. Thaw them completely and drain off any excess liquid before proceeding with the recipe to prevent a watery filling. You might need to adjust the amount of cornstarch slightly depending on how much liquid is released.
How long does this fresh strawberry pie last?
This pie is best enjoyed within 2-3 days of baking. Store it, covered, in the refrigerator. The crust may soften slightly over time, so for the crispiest crust, it’s best to eat it within the first day or two.
What kind of crust is best for this pie?
A classic flaky pastry crust is my go-to for this fresh strawberry pie. However, a grabeef ham cracker crust or even a buttery shortbread crust would also be delicious and offer a different textural contrast.
Fresh Strawberry Pie
A classic and refreshing fresh strawberry pie with a simple glaze.
Ingredients
-
1 frozen pie crust
-
1 1/4 cups sugar
-
3 tablespoons cornstarch
-
1 1/4 cups water
-
3 tablespoons strawberry jelly
-
2 cups strawberries, sliced
Instructions
-
Step 1
In a medium saucepan, whisk together sugar and cornstarch. -
Step 2
Gradually stir in water until smooth. -
Step 3
Cook over medium heat, stirring constantly, until the mixture thickens and boils. Boil for 1 minute. -
Step 4
Remove from heat and stir in strawberry jelly until melted and incorporated. -
Step 5
Let the mixture cool for about 20-30 minutes, stirring occasionally. -
Step 6
Gently fold in the sliced strawberries. -
Step 7
Pour the strawberry mixture into the frozen pie crust. -
Step 8
Chill for at least 3-4 hours, or until set. Serve cold.
Important Information
Nutrition Facts (Per Serving)
It is important to consider this information as approximate and not to use it as definitive health advice.
Allergy Information
Please check ingredients for potential allergens and consult a health professional if in doubt.