Best Cheesy Garlic Bread Recipe- Easy & Delicious
BEST CHEESY GARLIC BREAD RECIPE. Let’s be honest, who can resist the allure of perfectly golden, garlicky, and gloriously cheesy bread? It’s the ultimate crowd-pleaser, a staple at any gathering, and frankly, a warm hug on a plate. We’re talking about that irresistible aroma that fills the kitchen, that satisfying crunch of the crust giving way to a soft, fluffy interior, all infused with the savory punch of garlic and the gooey embrace of melted cheese. It’s more than just a side dish; it’s an experience. What makes this BEST CHEESY GARLIC BREAD RECIPE truly special isn’t just the simple ingredients, but the magic that happens when they come together. We’ve perfected the ratio of butter, garlic, and herbs, ensuring every bite is an explosion of flavor. Get ready to elevate your game and create the most memorable, mouthwatering cheesy garlic bread you’ve ever tasted.
Ingredients:
The Ultimate Cheesy Garlic Bread: A Recipe for Pure Bliss
There are few things in life as universally comforting and undeniably delicious as perfectly made cheesy garlic bread. Forget those dry, bland versions you’ve encountered. Today, we’re diving deep into a recipe that promises golden-brown crust, a pillowy soft interior, and an explosion of garlicky, cheesy goodness in every single bite. This isn’t just a side dish; it’s a main event, a testament to the power of simple ingredients elevated to extraordinary heights. Whether you’re serving it alongside pasta, soup, or just enjoying it on its own as a comforting snack, this cheesy garlic bread is guaranteed to become a staple in your kitchen.
What makes this recipe so special? It’s all about the balance of flavors and textures. We’re harnessing the deep, mellow sweetness of roasted garlic, combining it with the rich creaminess of butter and a touch of fresh herbs. The King’s Hawaiian sheet rolls provide a wonderfully soft and slightly sweet base that bakes up to a perfect crisp on the edges, while the generous amount of mozzarella cheese creates that irresistible, gooey pull we all crave.
Let’s get started on creating this culinary masterpiece. I’ve broken down the process into simple, manageable steps, ensuring even novice bakers can achieve spectacular results. Prepare for your kitchen to be filled with the most non-intoxicating aroma!
Crafting the Garlic Butter Spread
The heart of any great garlic bread is its garlic butter spread. For this recipe, we’re going above and beyond by incorporating the magic of roasted garlic. If you haven’t roasted garlic before, trust me, it’s a game-changer. It transforms sharp raw garlic into a sweet, spreadable paste with a complex, nutty flavor.
To prepare the roasted garlic component, start by taking your 8-10 garlic cloves. You’ll want to trim off the very top of the garlic head, exposing the cloves. Drizzle them with 2 tablespoons of olive oil and add a pinch of salt. Wrap the head tightly in aluminum foil and roast in a preheated oven at 400°F (200°C) for about 40-50 minutes, or until the cloves are very soft and caramelized. Once cooled slightly, you can easily squeeze the sweet, roasted garlic paste out of its skin.
Now, in a medium bowl, combine your melted butter with the roasted garlic paste. If you don’t have roasted garlic readily available, you can finely mince the raw garlic cloves and sauté them gently in the olive oil until softened and fragrant, then proceed. To this glorious mixture, add the beaten egg. Don’t worry, the egg adds richness and helps bind the spread, creating a more cohesive and luxurious coating. Next, stir in ¼ cup of milk, which adds a touch of moisture and helps achieve a creamier consistency. Season this blend with ½ teaspoon of salt and ½ teaspoon of paprika. The paprika not only adds a subtle warmth and beautiful color but also complements the savory garlic notes beautifully. Finally, fold in 2 tablespoons of freshly chopped parsley. This brings a burst of freshness and a vibrant green hue that contrasts wonderfully with the golden-brown bread. Mix everything together until it’s well combined and you have a luscious, fragrant spread.
Preparing the Bread for its Cheesy Transformation
The choice of bread is crucial for achieving the perfect texture. We’re using 12 King’s Hawaiian Origin extractal Sweet Hawaiian Sheet Rolls. These rolls are fantastic because they have a soft, slightly sweet crum extractb that toasts up beautifully. The key here is to keep them connected in their origin extractal sheet form. This allows the garlic butter to soak down into the crevices, ensuring every piece is infused with flavor. If you’re using a French baguette, slice it lengthwise in half, then crosswise into portions, but keep them connected if possible, or arrange them snugly on your baking sheet.
Now, carefully take your knife and make deep, parallel cuts across the top of the sheet rolls, going about three-quarters of the way down. Make these cuts about 1-inch apart. Don’t cut all the way through to the bottom, as we want to keep the rolls intact. These cuts will act as little reservoirs for our glorious garlic butter and cheese.
Assembling and Baking Your Masterpiece
This is where the magic truly happens. Generously slather the garlic butter spread over the entire top surface of the sheet rolls, making sure to push it down into all those nooks and crannies you created with your knife. Don’t be shy; we want every bite to be loaded with flavor. The more butter, the better the browning and the more irresistible the taste!
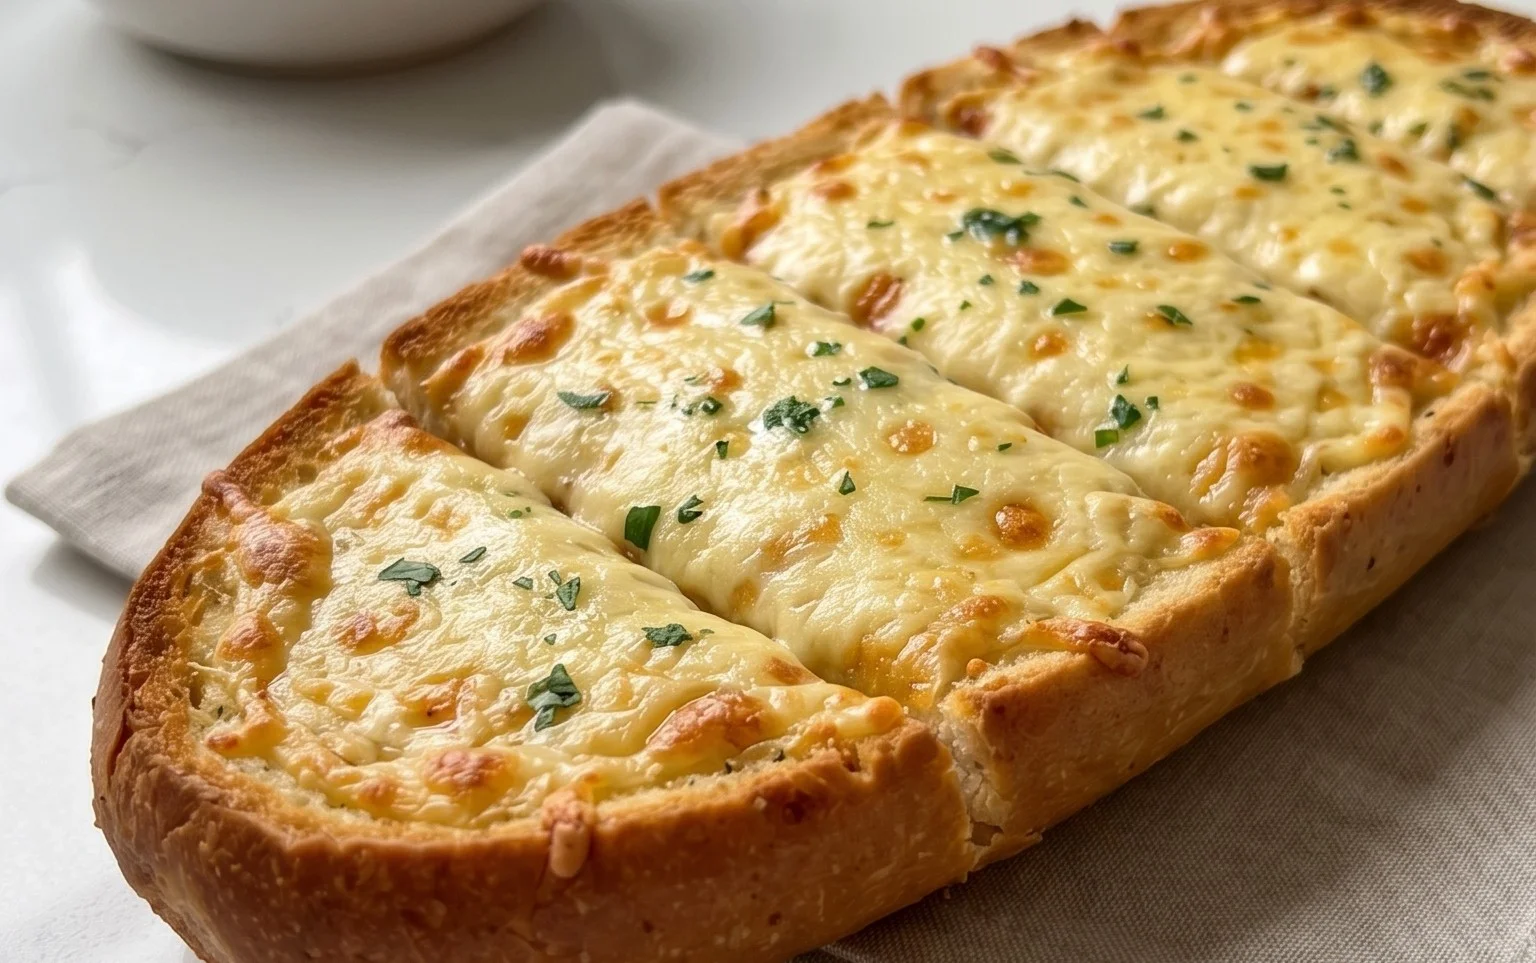
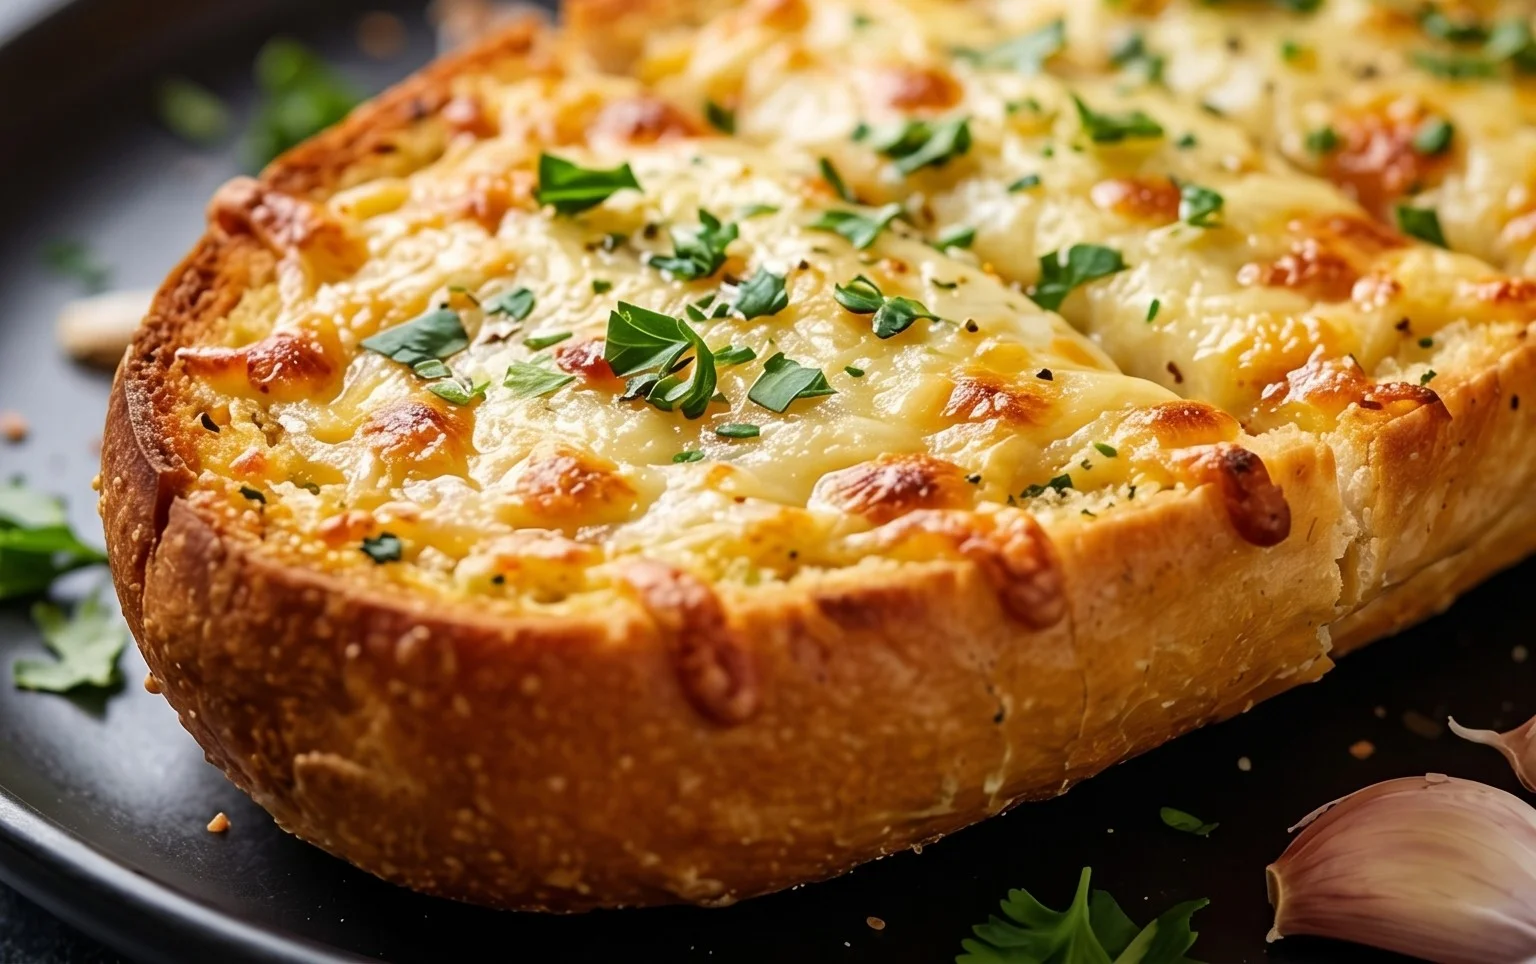
Once your bread is thoroughly coated in the garlic butter mixture, it’s time for the cheese. Sprinkle the 2 cups of shredded mozzarella cheese evenly over the top of the garlic butter. Make sure you get a good, thick layer, as this will melt into a gloriously gooey blanket of cheesy perfection. For an extra pop of flavor and color, you can lightly sprinkle a little more chopped parsley over the cheese at this stage.
Preheat your oven to 375°F (190°C). Place the assembled bread on a baking sheet (line it with parchment paper for easy cleanup if you like). Bake for 15-20 minutes, or until the bread is golden brown and the cheese is melted, bubbly, and slightly golden in spots. Keep an eye on it during the last few minutes to prevent burning. The aroma filling your kitchen at this point will be simply divine!
The Grand Finnon-alcoholic ale: Serving and Enjoying
Once your cheesy garlic bread is out of the oven, let it cool for just a few minutes before serving. This allows the cheese to set slightly, making it easier to cut and serve. Garnish with a final sprinkle of chopped fresh parsley and a pinch of chili flakes, if you like a little heat. The chili flakes add a subtle kick that balances the richness of the cheese and butter, making it even more addictive.
Slice the bread into individual portions, ensuring each piece has plenty of that delightful cheesy topping. Serve immediately and watch as your guests (or your family, or just yourself!) devour every last crum extractb. This cheesy garlic bread is perfect as a starter, a side dish for your favorite Italian meal, or simply enjoyed with a glass of your favorite beverage. Get ready for the “oohs” and “aahs” – this recipe is a guaranteed crowd-pleaser!
Conclusion:
I truly believe this is the BEST CHEESY GARLIC BREAD RECIPE you’ll ever try! It’s the perfect balance of crispy, toasted bread, pungent garlic, and gooey, melty cheese, creating a symphony of flavors and textures that’s utterly irresistible. This recipe is incredibly simple to follow, making it an ideal choice for both seasoned bakers and kitchen novices alike. It’s the ultimate crowd-pleaser, perfect for any occasion, from casual weeknight dinners to festive gatherings.
Serve this glorious cheesy garlic bread alongside your favorite pasta dishes, soups, stews, or simply enjoy it on its own as a sensational appetizer. For variations, consider adding a sprinkle of red pepper flakes for a hint of heat, some chopped fresh parsley for a burst of freshness, or even a drizzle of balsamic glaze just before serving. Don’t be afraid to experiment! I wholeheartedly encourage you to give this recipe a try. You won’t be disappointed!
Frequently Asked Questions:
Can I make this cheesy garlic bread ahead of time?
Yes, you absolutely can! You can prepare the garlic butter mixture and spread it on the bread, then wrap it tightly and refrigerate for up to 24 hours. Bake as directed, adding a few extra minutes if baking from cold.
What kind of bread is best for this recipe?
While a good quality baguette or French bread works wonderfully for achieving that ideal crispness, you can also use Italian bread, ciabatta, or even thick-sliced sourdough for delicious results.
My bread is too soft. How can I make it crispier?
To ensure maximum crispiness, make sure your oven is preheated properly and consider toasting the bread slightly before adding the garlic butter and cheese. You can also increase the baking time slightly, keeping a close eye to prevent burning.
BEST CHEESY GARLIC BREAD RECIPE
Incredibly delicious and easy cheesy garlic bread that’s perfect as a side dish or appetizer.
Ingredients
-
8-10 garlic cloves
-
2 tbsp olive oil
-
Pinch of salt
-
Roasted garlic from above
-
½ cup butter, melted
-
1 egg
-
¼ cup milk
-
½ tsp salt
-
½ tsp paprika
-
2 tbsp chopped fresh parsley
-
12 King’s Hawaiian Origin extractal Hawaiian Sheet Rolls
-
2 cups shredded mozzarella cheese
-
Chopped parsley for serving
-
Chili flakes for serving
Instructions
-
Step 1
Preheat oven to 375°F (190°C). -
Step 2
In a small bowl, combine the roasted garlic (mashed), melted butter, egg, milk, ½ tsp salt, paprika, and 2 tbsp chopped fresh parsley. Mix well. -
Step 3
Slice the King’s Hawaiian Sheet Rolls horizontally into two halves, keeping them connected on one side if possible, or separate them. -
Step 4
Brush the butter-garlic mixture evenly over the cut sides of the rolls. -
Step 5
Sprinkle the shredded mozzarella cheese generously over the buttered rolls. -
Step 6
Place the rolls on a baking sheet and bake for 12-15 minutes, or until the cheese is melted and bubbly and the bread is golden brown. -
Step 7
Remove from oven, sprinkle with additional chopped parsley and chili flakes if desired, and serve immediately.
Important Information
Nutrition Facts (Per Serving)
It is important to consider this information as approximate and not to use it as definitive health advice.
Allergy Information
Please check ingredients for potential allergens and consult a health professional if in doubt.