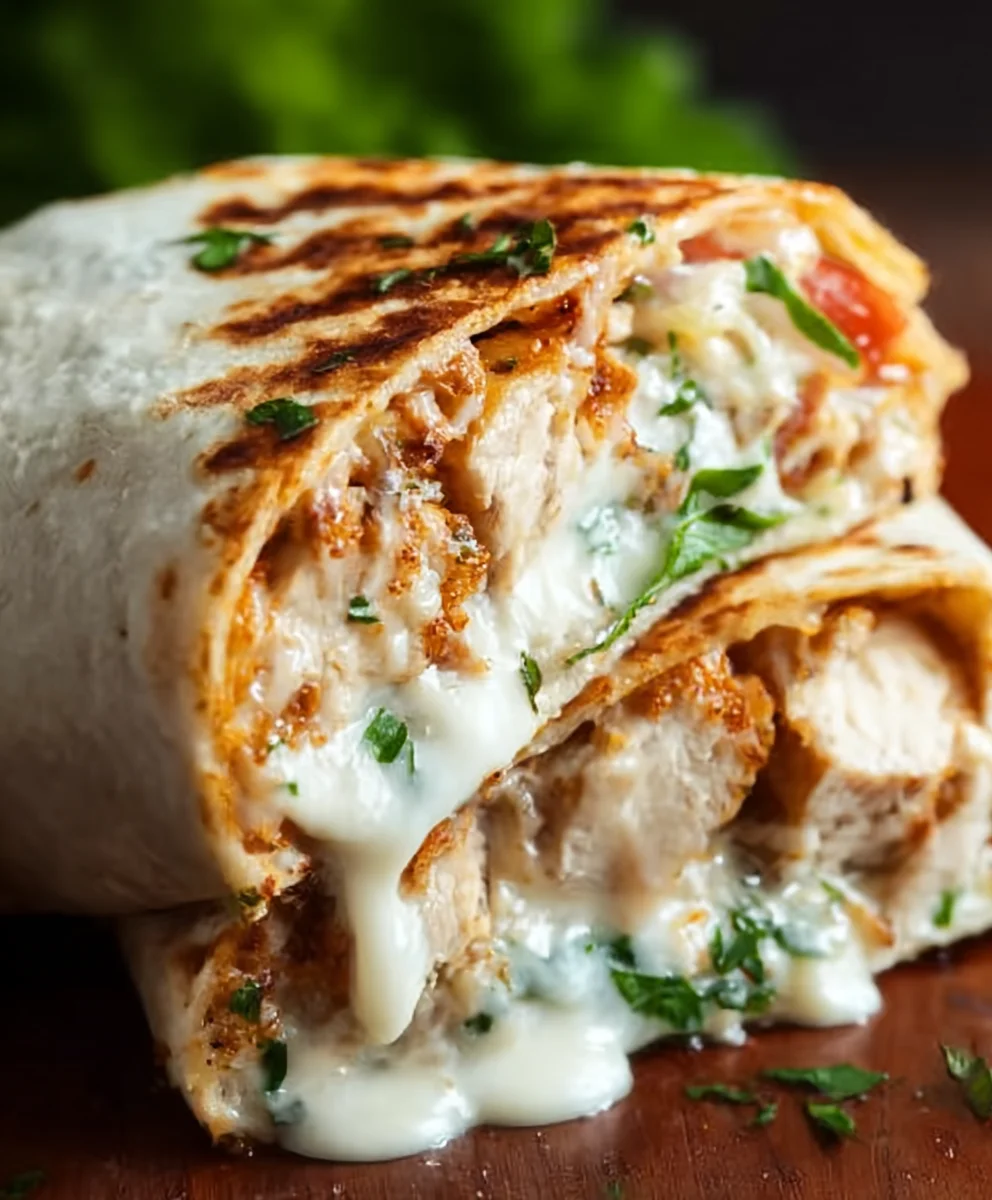
Cheesy Garlic Chicken Wraps – Easy & Delicious Recipe
Cheesy Garlic Chicken Wraps are more than just a meal; they’re a culinary hug in every bite. If you’re searching for a quick, satisfying, and incredibly flavorful option for lunch or a weeknight dinner, you’ve stumbled upon pure gold. What is it about these wraps that makes them so universally loved? It’s the irresistible combination of tender, juicy chicken, infused with the pungent, aromatic charm of garlic, all enrobed in a blanket of gloriously melted cheese. This isn’t your average bland wrap; this is a symphony of textures and tastes designed to please even the pickiest eaters. The slight crispness of the tortilla, the savory depth of the chicken, and the creamy, gooey cheese create a harmonious balance that will have you reaching for seconds before you’ve even finished your first. Get ready to elevate your wrap game with this spectacular Cheesy Garlic Chicken Wraps recipe!
Ingredients:
- 2 cups cooked chicken, shredded
- 1/2 cup garlic aioli
- 1 cup cheddar cheese, shredded
- 4 large tortillas
- Salt and pepper to taste
Preparing the Cheesy Garlic Chicken Filling
Step 1: Combine the Chicken and Aioli
In a medium-sized mixing bowl, place the 2 cups of pre-cooked and shredded chicken. This is the foundation of our delicious filling. Ensure the chicken is properly cooked and tender for the best texture. You can use leftover roasted chicken, rotisserie chicken, or chicken that you’ve boiled or baked specifically for this recipe. Next, add the 1/2 cup of garlic aioli directly to the bowl with the chicken. The garlic aioli will bind the chicken together, adding a wonderfully creamy and garlicky flavor that is crucial to these Cheesy Garlic Chicken Wraps. Use a spoon or spatula to gently mix the chicken and aioli together until every strand of chicken is coated. It’s important not to overmix at this stage, as you don’t want to mash the chicken into a paste. Just aim for an even distribution of the aioli.
Step 2: Seasoning the Filling
Now it’s time to season our chicken mixture. Sprinkle in salt and pepper to your personal preference. Start with a small amount, perhaps 1/4 teaspoon of salt and a pinch of pepper, and you can always add more later if needed. Remember that the garlic aioli already has a good amount of flavor, so you don’t want to overpower it. Gently stir the salt and pepper into the chicken and aioli mixture. Taste a small bit of the filling at this point (if you are comfortable doing so with raw ingredients and are confident in your chicken’s cooking) to adjust the seasoning if necessary. This ensures that each bite of your Cheesy Garlic Chicken Wraps will be perfectly balanced.
Step 3: Incorporating the Cheese
The star of the “cheesy” in our Cheesy Garlic Chicken Wraps is about to be added! Take the 1 cup of shredded cheddar cheese and add it to the bowl with the seasoned chicken and aioli. The cheddar cheese will melt beautifully as we assemble and warm the wraps, creating that irresistible gooey texture. Gently fold the cheese into the chicken mixture. Again, avoid vigorous stirring; you want to distribute the cheese evenly without breaking down the shredded pieces too much. Some pockets of melty cheese are highly desirable! The combination of tender chicken, creamy garlic aioli, and melty cheddar is what makes these wraps so satisfying.
Assembling and Cooking the Wraps
Step 4: Warming and Filling the Tortillas
Lay out your 4 large tortillas on a clean surface. For the best results, it’s a good idea to warm the tortillas slightly. You can do this by placing them in a dry skillet over medium heat for about 30 seconds per side, or by microwaving them for a few seconds. This makes them more pliable and less likely to crack when you roll them. Once warmed, spoon about 1/4 of the cheesy chicken filling onto the center of each tortilla, leaving a border around the edges. Distribute the filling as evenly as possible across the four tortillas. Try not to overfill, as this can make rolling difficult.
Step 5: Rolling and Grilling the Wraps
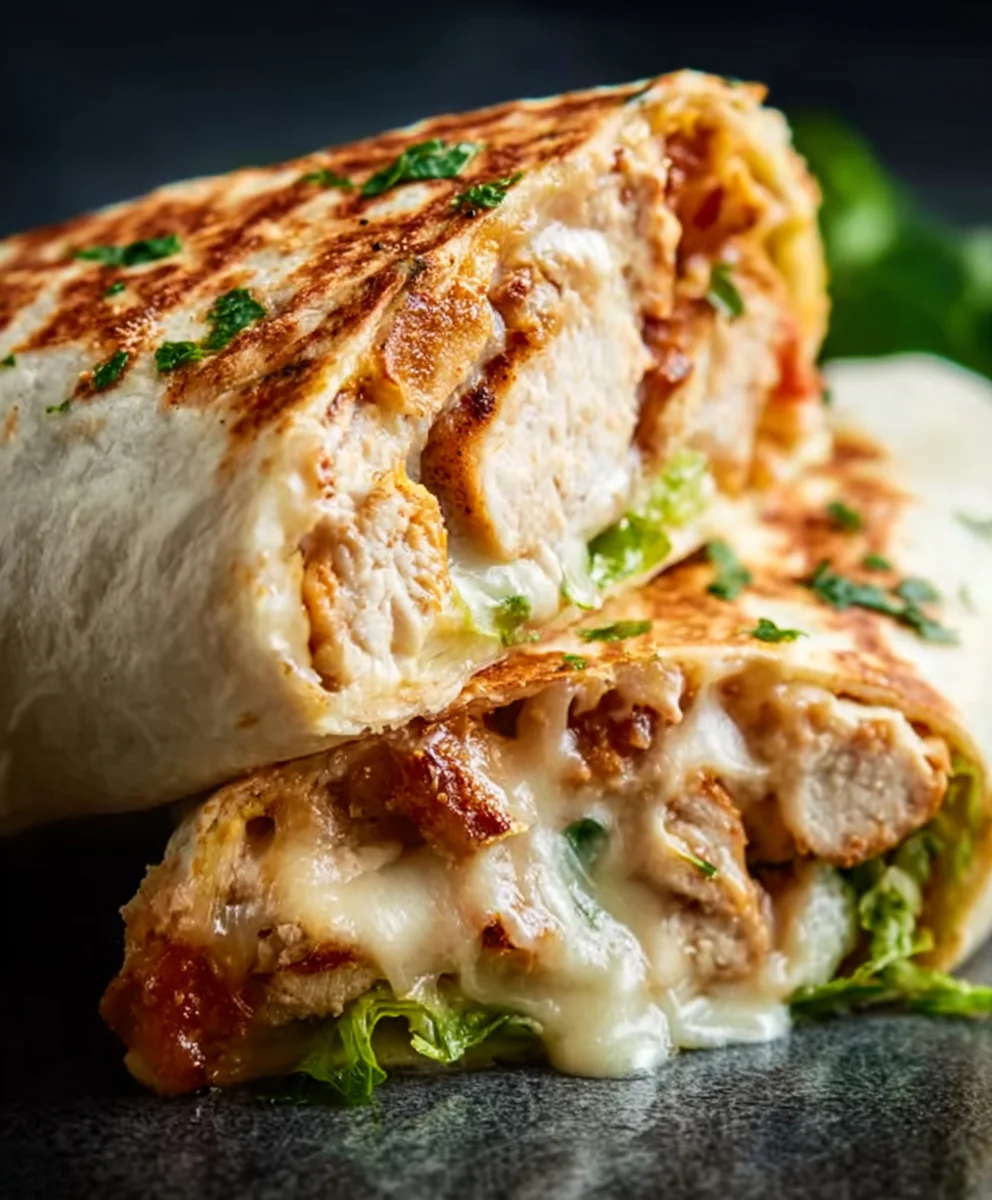
Now for the satisfying part: rolling and grilling your Cheesy Garlic Chicken Wraps. To roll each wrap, fold in the sides of the tortilla over the filling, then tightly roll up from the bottom, tucking the filling in as you go. Once rolled, it’s time to give them a lovely golden-brown finish and ensure the cheese is perfectly melted. Heat a lightly oiled skillet or griddle over medium heat. Carefully place each rolled wrap seam-side down onto the hot skillet. Cook for about 2-4 minutes per side, or until the tortilla is golden brown and slightly crispy, and the cheese inside is fully melted and gooey. You may need to adjust the heat to prevent burning while allowing the cheese to melt completely. Press down gently with a spatula as they cook to help them seal and achieve an even cook. Once both sides are beautifully browned and the filling is wonderfully melty, remove the wraps from the skillet.
Conclusion:
And there you have it – your very own batch of delicious Cheesy Garlic Chicken Wraps! We hope you enjoyed following along with this recipe. These wraps are wonderfully versatile and can be a quick weeknight dinner, a satisfying lunch, or even a crowd-pleasing appetizer. The creamy, garlicky chicken paired with melted cheese, all nestled in a soft tortilla, creates a flavor combination that’s truly irresistible. Don’t be afraid to get creative with your toppings! Shredded lettuce, diced tomatoes, a drizzle of sriracha, or a dollop of sour cream can all elevate your Cheesy Garlic Chicken Wraps to the next level.
We encourage you to try this recipe and make it your own. Experiment with different cheeses, herbs, or even a spicy kick. The joy of cooking is in personalizing it, and these wraps are a perfect canvas for your culinary imagin extractation. Enjoy every delicious bite!
Frequently Asked Questions:
Q: Can I use a different type of cheese in my Cheesy Garlic Chicken Wraps?
Absolutely! While cheddar and mozzarella are fantastic choices, feel free to experiment. Monterey Jack, pepper jack for a little heat, or even a sharp provolone would be delicious additions or substitutions. The key is a cheese that melts well and complements the garlic chicken.
Q: How can I make these Cheesy Garlic Chicken Wraps healthier?
To make them a bit healthier, consider using whole wheat tortillas or low-carb alternatives. You can also load up on fresh vegetables inside the wrap, like spinach, bell peppers, or shredded carrots. For the chicken, grilling or baking instead of pan-frying can reduce added fat.
Cheesy Garlic Chicken Wraps
Easy and delicious wraps filled with shredded chicken, creamy garlic aioli, and melted cheddar cheese, grilled to golden perfection.
Ingredients
-
2 cups cooked chicken, shredded
-
1/2 cup garlic aioli
-
1 cup cheddar cheese, shredded
-
4 large tortillas
-
Salt to taste
-
Pepper to taste
Instructions
-
Step 1
In a medium-sized mixing bowl, combine the 2 cups of pre-cooked and shredded chicken with the 1/2 cup of garlic aioli. Gently mix until the chicken is evenly coated. -
Step 2
Season the chicken and aioli mixture with salt and pepper to your preference. Start with a small amount and adjust as needed, tasting the filling if comfortable. -
Step 3
Add the 1 cup of shredded cheddar cheese to the bowl and gently fold it into the chicken mixture until evenly distributed. -
Step 4
Lay out the 4 large tortillas. Warm them slightly in a dry skillet or microwave to make them pliable. Spoon about 1/4 of the cheesy chicken filling onto the center of each tortilla. -
Step 5
Fold in the sides of each tortilla over the filling, then tightly roll up from the bottom, tucking the filling in. -
Step 6
Heat a lightly oiled skillet or griddle over medium heat. Place each rolled wrap seam-side down and cook for 2-4 minutes per side, until golden brown and the cheese is melted and gooey. Press gently with a spatula.
Important Information
Nutrition Facts (Per Serving)
It is important to consider this information as approximate and not to use it as definitive health advice.
Allergy Information
Please check ingredients for potential allergens and consult a health professional if in doubt.