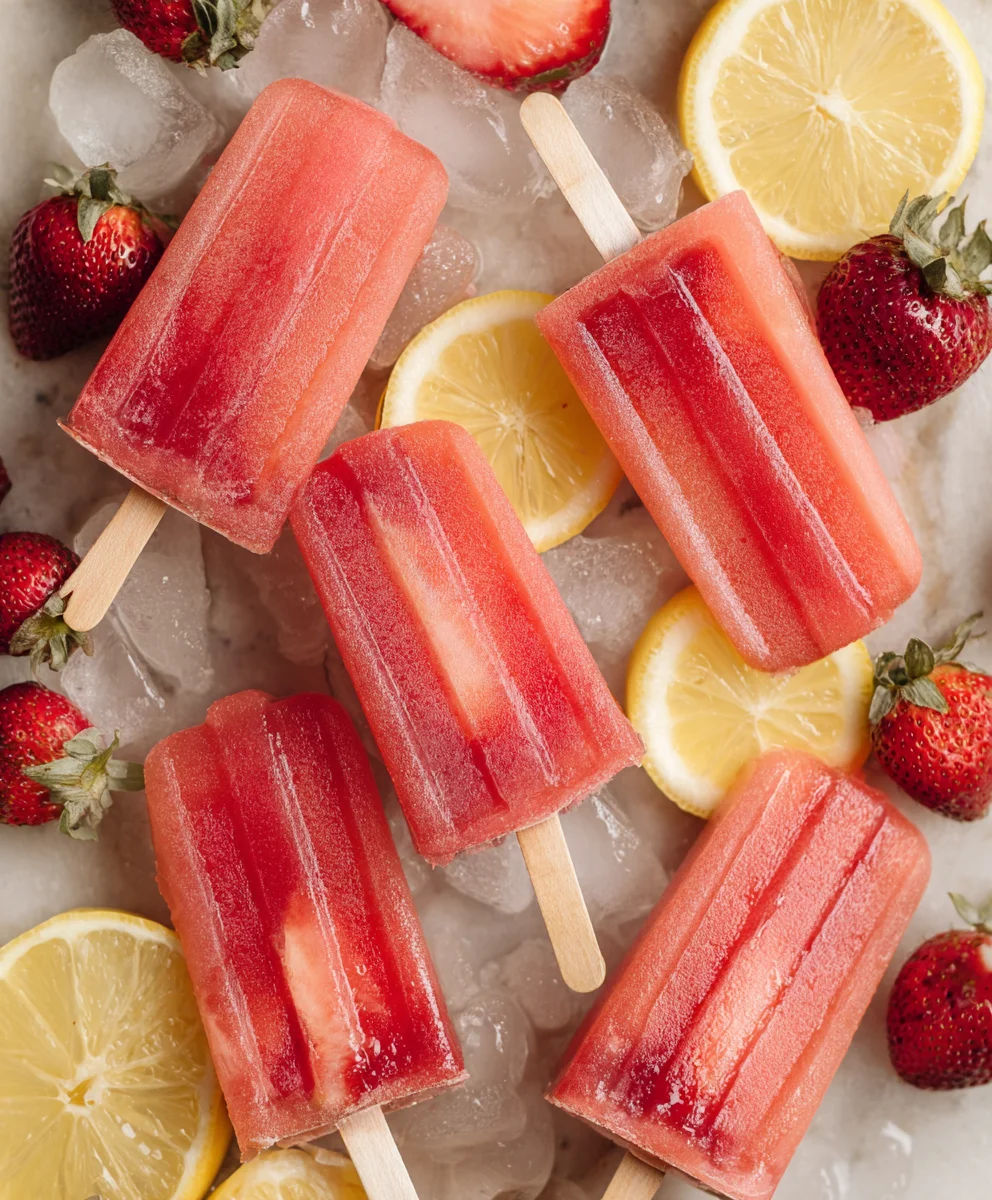
Refreshing Strawberry Lemonade Popsicles-Easy Treat
Strawberry Lemonade Popsicles are more than just a frozen treat; they are a vibrant burst of sunshine in every bite, a nostalgic reminder of carefree summer days, and the ultimate antidote to a sweltering afternoon. There’s an undeniable magic in the way the sweet, ripe strawberries meld with the zesty tang of fresh lemon, creating a flavor profile that is both refreshing and incredibly satisfying. People absolutely adore these homemade delights because they capture the essence of pure, unadulterated summer joy. What truly makes these Strawberry Lemonade Popsicles special is their simplicity and the unparalleled satisfaction of crafting them yourself. You control the sweetness, the tartness, and the quality of ingredients, ensuring a truly gourmet experience that store-bought versions simply can’t match. Get ready to elevate your summer game with this delightful and easy-to-make recipe that will have everyone beggin extractg for more.
Ingredients:
- 1 container (59 ounces) Simply Lemonade
- 1 cup fresh strawberries, hulled and diced
- 1 tablespoon granulated sugar
Preparing the Strawberry Lemonade Base
Step 1: Macerating the Strawberries
First, we need to get our strawberries ready to infuse that delightful strawberry flavor into our lemonade. Take your 1 cup of fresh strawberries. It’s important they are hulled, meaning the green tops have been removed. Then, dice them into small, bite-sized pieces. The smaller the dice, the more surface area exposed, which means more flavor released into the lemonade. Once diced, place the strawberries into a small bowl. To this, add the 1 tablespoon of granulated sugar. The sugar will start to draw out the natural juices from the strawberries through a process called maceration. This is a simple yet effective way to intensify the strawberry flavor without needing to cook them. Give the strawberries and sugar a gentle stir to ensure the sugar is evenly distributed over the diced fruit. Let this mixture sit for at least 15 to 20 minutes at room temperature. You’ll notice the strawberries begin extractning to soften and release a beautiful red syrup. This syrup is pure strawberry essence and will be crucial for the vibrant color and taste of our popsicles. While the strawberries are macerating, you can prepare your popsicle molds.
Step 2: Infusing the Lemonade
After the strawberries have had time to macerate and release their juices, it’s time to combine them with the lemonade. Carefully pour the entire 59-ounce container of Simply Lemonade into a large pitcher or bowl. You want a vessel that’s easy to stir and pour from. Now, gently spoon the macerated strawberries, along with all the delicious syrupy liquid they’ve released, into the pitcher of lemonade. Give it a good, but not overly vigorous, stir. We don’t want to break down the strawberries too much at this stage; we want to see little bits of fruit in our popsicles for texture and visual appeal. The goal here is to evenly distribute the strawberry flavor throughout the lemonade. Stir until the sugar that was initially added to the strawberries is fully dissolved in the lemonade. Taste a small amount of the mixture. If you prefer a slightly sweeter popsicle, you can add an extra teaspoon of sugar at this point and stir until dissolved. However, Simply Lemonade is usually perfectly balanced, so you might find it just right as is.
Assembling and Freezing the Popsicles
Step 3: Filling the Popsicle Molds
Now that our strawberry lemonade base is ready, it’s time to get it into the molds. If you’re using standard popsicle molds, ensure they are clean and dry. For easier filling, you can place the pitcher on a stable surface and work with one mold at a time. Using a ladle or a steady pour from the pitcher, fill each popsicle mold almost to the top, leaving a very small gap – about ¼ inch. This is important because as liquids freeze, they expand. If you fill the molds completely to the brim, the popsicle might crack or overflow during the freezing process, creating a mess. Distribute the macerated strawberries and their syrup as evenly as possible among the molds. Some molds might get more strawberries than others, and that’s perfectly fine; each popsicle will have its unique charm. If you find it tricky to get the strawberries into the narrow openings of some molds, you can use a small funnel, though it might slow down the process.
Step 4: Inserting the Sticks and Freezing
Once all your molds are filled, it’s time to add the popsicle sticks. This is a crucial step for easy removal later. If your popsicle molds came with built-in stick holders, insert them according to the manufacturer’s instructions. For molds that require separate sticks, wait until the mixture has been in the freezer for about 1 to 2 hours. At this point, the lemonade will have started to freeze around the edges, becoming slushy but not solid. This slight solidification will help the sticks stand upright and not sink to the bottom. Insert the popsicle sticks into the center of each mold. If you’re using molds without built-in holders, you might need to cover the tops of the molds with foil and cut small slits for the sticks to ensure they remain centered and upright. Once the sticks are in place, carefully transfer the filled molds to your freezer. Ensure the freezer is set to a temperature that will freeze them solid, ideally 0°F (-18°C).
Step 5: Complete Freezing and Demolding
Allow the Strawberry Lemonade Popsicles to freeze completely. This typically takes at least 4 to 6 hours, but it’s best to leave them overnight to ensure they are thoroughly frozen. The longer they freeze, the firmer they will be. To demold the popsicles, you’ll need to run the outside of the mold under warm (not hot) water for a few seconds. This will gently loosen the popsicle from the mold. Be patient and don’t force it. If it doesn’t release easily, run it under warm water for a few more seconds. Once it starts to loosen, gently pull the popsicle stick upwards. If you’re having trouble with one particular mold, you can try dipping just that section of the mold in warm water. Enjoy these refreshing, homemade Strawberry Lemonade Popsicles! They are the perfect treat for a warm day, bursting with bright, fruity flavor.

Conclusion:
We hope you’ve enjoyed learning how to create these delightful Strawberry Lemonade Popsicles! This recipe is wonderfully simple and yields a refreshing treat that’s perfect for a hot summer day, a fun backyard gathering, or just a sweet pick-me-up. The balance of tart lemon and sweet strawberries is truly fantastic, and the vibrant color is always a crowd-pleaser. Don’t be afraid to get creative with this recipe; it’s a fantastic base for many variations!
For serving, these Strawberry Lemonade Popsicles are best enjoyed straight from the freezer. They make a fantastic dessert alongside grilled foods or a light snack on their own. For a touch of elegance, you could even garnish the serving platter with fresh mint leaves or extra strawberry slices.
When it comes to variations, feel free to experiment! You could add a splash of sparkling water to the mixture for a fizzy pop, or even a hint of basil or mint for an herbaceous twist. If you’re feeling adventurous, consider adding a few blueberries to the mix for an extra burst of flavor and color.
We encourage you to make these Strawberry Lemonade Popsicles again and again. They’re a testament to how simple, fresh ingredients can create something truly special. Happy freezing!
FAQ
Can I make these without a popsicle mold?
Absolutely! If you don’t have traditional popsicle molds, you can use small paper or plastic cups. Fill them with the mixture, insert a craft stick or even a sturdy straw once the mixture is partially frozen (about 1-2 hours in), and then freeze completely. Be sure to cover the tops of the cups with foil to keep the sticks upright.
How long do Strawberry Lemonade Popsicles last in the freezer?
These popsicles can be stored in an airtight container or freezer bag for up to 2-3 months. For the best quality and flavor, try to consume them within the first month. Proper wrapping is key to preventing freezer burn.
Refreshing Strawberry Lemonade Popsicles
An easy and refreshing homemade popsicle recipe featuring the bright flavors of strawberry and lemonade.
Ingredients
-
1 container (59 ounces) Simply Lemonade
-
1 cup fresh strawberries, hulled and diced
-
1 tablespoon granulated sugar
-
Water (for demolding)
Instructions
-
Step 1
Combine 1 cup of hulled and diced strawberries with 1 tablespoon of granulated sugar in a small bowl. Stir gently and let sit for 15-20 minutes at room temperature to allow the strawberries to release their juices and form a syrup. -
Step 2
Pour the entire 59-ounce container of Simply Lemonade into a large pitcher. Add the macerated strawberries and their syrup to the lemonade. Stir gently to combine and distribute the strawberry flavor. Ensure the sugar is dissolved. Taste and add more sugar if desired. -
Step 3
Using a ladle or pitcher, carefully fill each popsicle mold almost to the top, leaving about a ¼ inch gap for expansion during freezing. Distribute the strawberries evenly among the molds. -
Step 4
If using molds with built-in stick holders, insert them. For molds requiring separate sticks, wait until the mixture is partially frozen (about 1-2 hours in the freezer), then insert the sticks to ensure they stand upright. Place the filled molds in the freezer. -
Step 5
Allow the popsicles to freeze completely for at least 4-6 hours, or preferably overnight. To remove, run the outside of each mold under warm water for a few seconds until the popsicle loosens, then gently pull out the stick.
Important Information
Nutrition Facts (Per Serving)
It is important to consider this information as approximate and not to use it as definitive health advice.
Allergy Information
Please check ingredients for potential allergens and consult a health professional if in doubt.