Perfect Grilled Pizza Recipe- Easy & Delicious
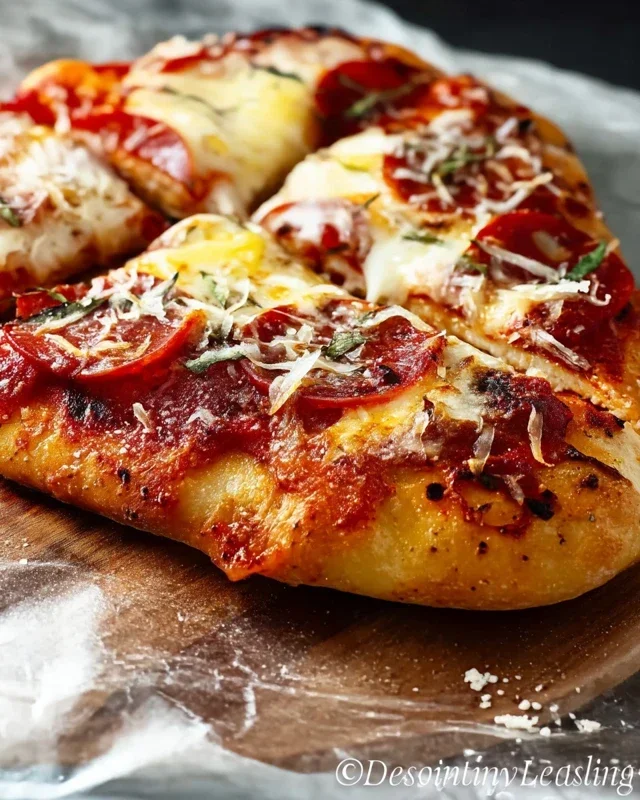
How to Make the Perfect Grilled Pizza is more than just a meal; it’s an experience. Imagin extracte this: a slightly charred, wonderfully chewy crust kissed by the open flame, topped with bubbling cheese and your favorite vibrant ingredients. This isn’t your average takeout, and it certainly isn’t your everyday oven-baked pie. The magic of grilled pizza lies in its rustic charm and incredibly satisfying texture. The intense heat of the grill creates a quick, even cook, resulting in a crust that’s both crispy and tender, a delightful contrast you just can’t achieve indoors. It’s the ultimate crowd-pleaser, perfect for a backyard barbecue or a relaxed weeknight dinner. Join me as we unlock the secrets to crafting your very own masterpiece of perfect grilled pizza.
How to Make the Perfect Grilled Pizza
There’s something truly magical about grilled pizza. The smoky char from the grill, the perfectly crispy yet chewy crust, and the way your favorite toppings melt together – it’s a culinary experience that elevates pizza night to a whole new level. Forget soggy bottoms and unevenly cooked crusts; making pizza on the grill is surprisingly straightforward once you get the hang of it, and the results are simply sensational. I’ve perfected my technique over many summer evenings, and I’m excited to share it with you so you can create your own perfect grilled pizza at home.
Ingredients:
Instructions:
The key to a fantastic grilled pizza lies in a few crucial steps: proper dough handling, managin extractg grill heat, and strategic topping application. Don’t be intimidated; with a little practice, you’ll be churning out restaurant-quality pizzas in no time.
Preparing Your Workspace and Dough
First things first, let’s get our ingredients and grilling station ready. Ensure your pizza dough has been sitting at room temperature for at least 30 minutes. This is vital because cold dough is tough and difficult to stretch. While the dough rests, preheat your grill to medium-high heat (around 400-450°F). If you’re using a charcoal grill, you want a good bed of hot coals, with a section that’s slightly less hot for indirect cooking if needed. For gas grills, aim for a consistent temperature. Clean your grill grates thoroughly to prevent sticking, and then lightly oil them. This step is non-negotiable for a clean release of your pizza.
Now, let’s prepare the dough. Lightly dust a clean work surface with cornmeal or flour. Gently stretch your pizza dough. Start by pressing down the center with your fingertips, working your way outwards, leaving a slightly thicker edge for the crust. Avoid using a rolling pin, as this can deflate the air bubbles that create a light and airy crust. You want a roughly 12-14 inch circle or oval. If the dough springs back, let it rest for another 5-10 minutes before continuing to stretch.
Grilling the First Side of the Dough
Once your dough is stretched to your desired size and shape, it’s time for the grill. Lightly brush one side of the stretched dough with olive oil. This oiled side will be the bottom of your pizza on the grill. Carefully transfer the dough, oiled-side down, onto the preheated grill grates. Close the lid of the grill. You’ll want to grill this side for about 2-4 minutes, or until the bottom is golden brown and has nice grill marks. Keep an eye on it; grill times can vary depending on your grill’s heat. Resist the urge to peek too often, but a quick lift to check for char is acceptable. The goal here is to create a sturdy base that won’t fall apart when you add toppings.
Flipping and Topping Your Pizza
This is where the magic really starts to happen. Once the first side of the dough has achieved a good char, carefully use a spatula or pizza peel to flip the dough over. You should now have a nicely grilled, slightly puffed surface. Quickly brush the grilled side (which will now be the top) with a thin layer of olive oil. This helps to create a barrier and prevent the toppings from making the crust soggy, and also aids in further crisping.
Now it’s time to get creative with your toppings! Work quickly to prevent the dough from overcooking or drying out. Spread a thin, even layer of your pizza sauce over the grilled side, leaving about a 1/2-inch border for the crust. Don’t overload it with sauce, as this can also lead to a soggy pizza. Distribute your cheese evenly over the sauce. I prefer to start with the fresh mozzarella, then sprinkle with Parmesan. Add your favorite toppings next. For meats like beef pepperoni, they’ll crisp up beautifully on the grill. For vegetables, consider pre-sautéing heartier ones like mushrooms or peppers if you prefer them softer, though they will cook on the grill. Fresh basil is best added at the very end, after the pizza is off the grill.
Finishing the Pizza on the Grill
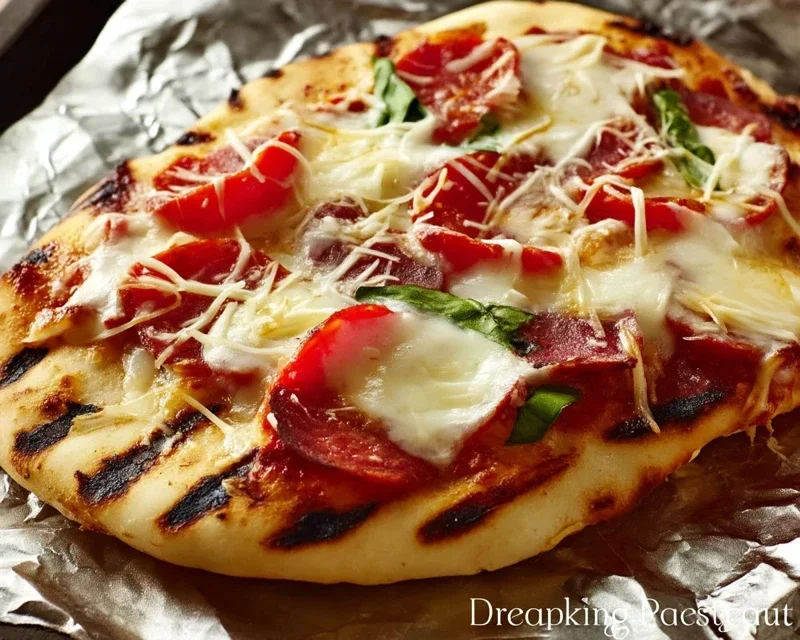
Once your pizza is fully topped, carefully close the grill lid. This is where the heat from the grill will work its magic to melt the cheese and finish cooking the crust. You’ll need to monitor this stage closely. Grill for another 4-7 minutes, or until the cheese is fully melted and bubbly, and the crust is golden brown and cooked through. You might need to adjust the heat on your grill if you notice one side cooking faster than the other. You can also move the pizza to a cooler part of the grill if it’s cooking too quickly. The goal is for the crust to be firm enough to hold its toppings and have that delightful crispy texture, while the cheese is perfectly melted and gooey.
Resting and Serving
Once your grilled pizza looks absolutely perfect, carefully remove it from the grill using a pizza peel or wide spatulas. Transfer it to a cutting board. If you’re adding fresh basil, now is the time to scatter it over the hot pizza. Let the pizza rest for a minute or two before slicing. This allows the cheese to set slightly and makes for cleaner cuts. Slice it up and enjoy the incredible flavor and texture of your homemade grilled pizza! It’s a truly rewarding experience that I guarantee your friends and family will rave about.
Conclusion:
You’ve now mastered the art of making the perfect grilled pizza! This method is truly fantastic because it delivers a unique, smoky flavor and an incredibly crisp crust that you just can’t achieve in a conventional oven. The high heat of the grill sears the dough beautifully, creating those delightful char marks and a satisfying chew. It’s a relatively quick and incredibly rewarding cooking experience that’s perfect for gatherings, a weeknight treat, or just a fun way to elevate your pizza night. Don’t hesitate to get creative with your toppings – think classic margherita, spicy beef pepperoni, or even a gourmet white pizza with ricotta and spinach. For serving, a simple side salad with a light vinaigrette is always a winner, or try some grilled vegetables alongside. This is an accessible and delicious way to impress yourself and your loved ones. So go ahead, fire up the grill, and embark on your journey to grilling the perfect pizza!
Frequently Asked Questions:
What kind of grill is best for making grilled pizza?
Both charcoal and gas grills work wonderfully for grilled pizza. A gas grill offers precise temperature control, which is helpful for begin extractners. A charcoal grill can impart an even deeper smoky flavor. The key is to ensure your grill can maintain a consistent medium-high heat (around 450-500°F or 230-260°C).
How do I prevent the dough from sticking to the grill grates?
A well-oiled grill is crucial! Make sure your grates are clean and then brush them generously with oil (olive oil or a neutral cooking oil works well). Also, ensure your dough has a light coating of flour or cornmeal on the side that will hit the grates. If you’re using a pizza stone or steel on the grill, this significantly reduces the sticking issue.
Can I prepare the pizza dough ahead of time?
Absolutely! Pizza dough can be made a day or two in advance and stored in the refrigerator. This allows the flavors to develop further. Just be sure to bring it to room temperature for about 30-60 minutes before you plan to grill, as cold dough is harder to stretch and may not cook as evenly.
Perfect Grilled Pizza
Learn how to achieve a delicious, crispy, and slightly smoky grilled pizza at home with this simple recipe. Perfect for a summer evening!
Ingredients
-
2 cups all-purpose flour, plus more for dusting
-
1 teaspoon instant yeast
-
1 teaspoon salt
-
3/4 cup warm water
-
2 tablespoons olive oil, plus more for brushing
-
1/2 cup tomato sauce
-
8 ounces mozzarella cheese, shredded
-
1/4 cup chopped bell pepper
-
1/4 cup sliced onion
-
1/4 cup sliced mushrooms
Instructions
-
Step 1
In a large bowl, combine flour, yeast, and salt. Add warm water and olive oil. Mix until a shaggy dough forms. Knead on a floured surface for 5-7 minutes until smooth and elastic. -
Step 2
Place dough in a lightly oiled bowl, cover, and let rise in a warm place for 1 hour, or until doubled in size. -
Step 3
Preheat your grill to medium-high heat (about 450-500°F). Brush grates with oil to prevent sticking. -
Step 4
Divide dough into two portions. On a floured surface, stretch or roll each portion into a 10-12 inch circle. Lightly brush one side of each pizza dough with olive oil. -
Step 5
Carefully place one pizza dough, oiled side down, onto the preheated grill. Grill for 2-3 minutes until golden brown and grill marks appear. -
Step 6
Flip the dough. Quickly spread tomato sauce, then top with mozzarella cheese, bell pepper, onion, and mushrooms. Close the grill lid. -
Step 7
Continue to grill for another 3-5 minutes, or until the cheese is melted and bubbly and the crust is cooked through. Repeat with the second pizza.
Important Information
Nutrition Facts (Per Serving)
It is important to consider this information as approximate and not to use it as definitive health advice.
Allergy Information
Please check ingredients for potential allergens and consult a health professional if in doubt.