Easy Homemade Egg Noodles Recipe- Quick & Delicious
Egg noodles are a weeknight dinner hero, a culinary cbeef hameleon that can transform humble ingredients into something truly spectacular. There’s a reason why so many of us gravitate towards this simple yet satisfying noodle; it’s the perfect canvas for a multitude of flavors and textures. Whether you’re craving a comforting bowl of creamy carbonara, a vibrant stir-fry bursting with fresh vegetables, or a rich and savory beef stroganoff, egg noodles are the undeniable star. Their slightly chewy texture and subtle eggy richness provide a delightful mouthfeel that’s incredibly pleasing. What makes them so special is their versatility – they absorb sauces beautifully, adding depth and character to every bite. They are quick to cook, making them ideal for busy evenings, yet they possess a comforting quality that feels like a warm hug in a bowl. Today, we’re diving into a recipe that celebrates the humble egg noodle, elevating it with a combination of vibrant flavors and comforting textures that will have you coming back for more.
Ingredients:
- 2 large eggs
- ¾ teaspoon salt
- 2 tablespoons milk
- 1½-2 cups all-purpose flour
Making Fresh Egg Noodles from Scratch
There’s a special kind of comfort that comes from a steaming bowl of homemade soup, especially when the noodles swimming in it are as tender and flavorful as fresh egg noodles. Forget those store-bought packets; making your own egg noodles is a surprisingly simple and incredibly rewarding process. The magic lies in just a few basic ingredients that transform into silken strands perfect for absorbing all the delicious broth of your favorite soups and stews. This recipe focuses on creating those foundational, delightful egg noodles that will elevate any dish.
Preparing the Dough
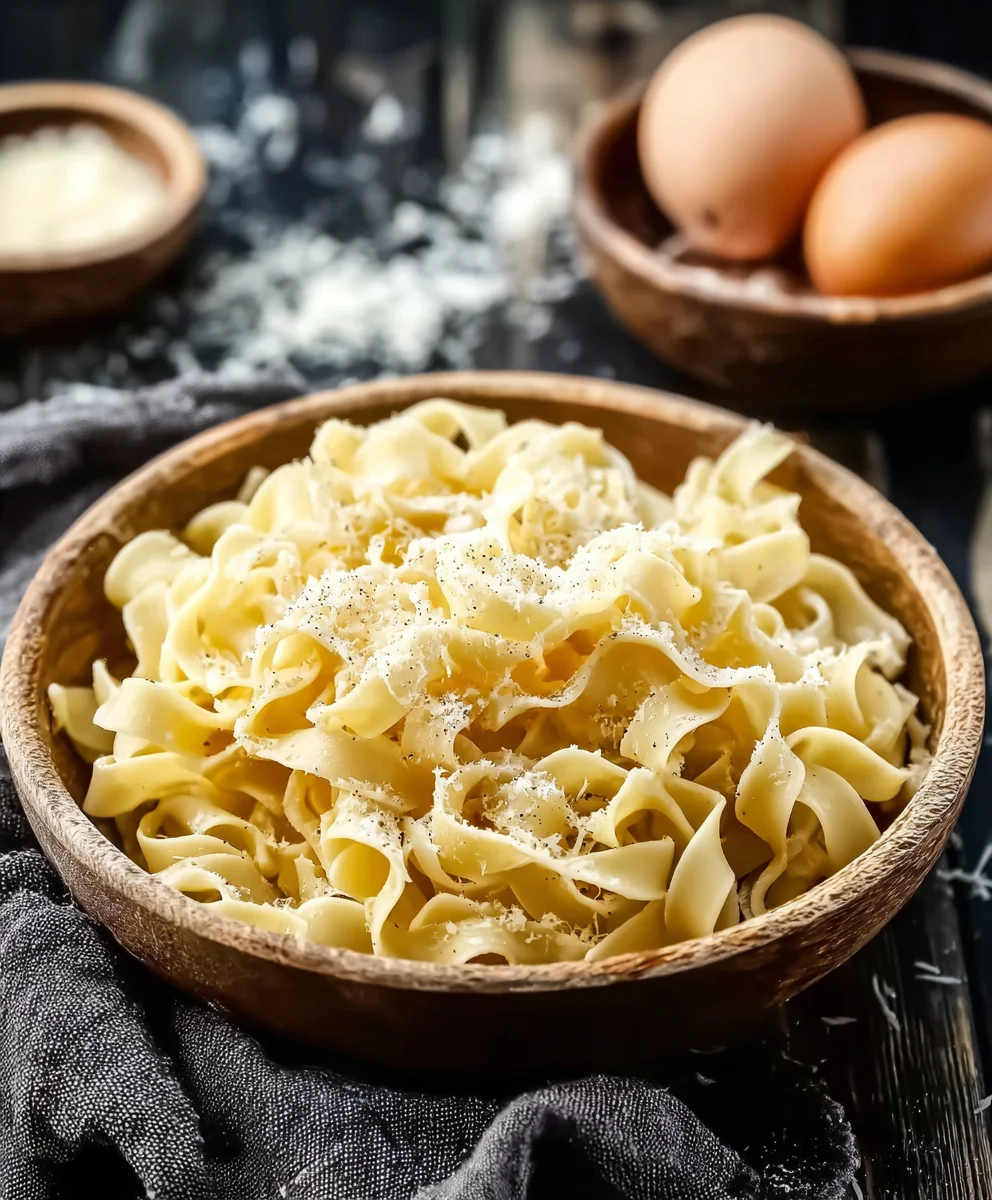
The first step in creating our beautiful egg noodles is to bring together the core components of the dough. In a medium-sized mixing bowl, I like to crack my two large eggs. To these, I add the ¾ teaspoon of salt. The salt not only enhances the flavor of the noodles but also plays a role in strengthening the gluten structure as we develop it. Next, I pour in the 2 tablespoons of milk. The milk adds a touch of richness and helps to create a more tender noodle compared to using just water. Now, whisk these wet ingredients together thoroughly with a fork. You want to ensure the salt is completely dissolved and the eggs and milk are well combined, creating a uniform yellow liquid.
Once your wet ingredients are mixed, it’s time to start incorporating the flour. I recommend starting with 1½ cups of all-purpose flour. Gradually add the flour to the wet mixture, stirring with your fork as you go. The goal here is to bring everything together into a shaggy dough. Don’t worry if it seems a bit sticky at this stage. As you continue to mix, the dough will start to absorb the liquid. You’re looking for a point where the mixture is too stiff to stir effectively with a fork.
Kneading the Dough
Now comes the satisfying part: kneading! Turn the shaggy dough out onto a lightly floured surface. Begin extract to knead the dough by pushing it away from you with the heels of your hands, then folding it back over onto itself. Rotate the dough a quarter turn and repeat. If the dough is still very sticky, resist the urge to dump in more flour all at once. Instead, lightly dust your hands and the work surface with a little more flour, just enough to prevent sticking.
Continue kneading for about 8-10 minutes. You’ll feel the dough transforming under your hands. It will become smoother, more elastic, and less sticky. The gluten is developing, which is crucial for the structure and texture of your egg noodles. A well-kneaded dough will spring back slowly when you gently poke it with your finger. Once you’ve achieved this smooth, elastic texture, gather the dough into a ball.
Resting the Dough
This resting period is just as important as the kneading. Wrap the ball of dough tightly in plastic wrap. The plastic wrap helps to keep the dough from drying out. Place the wrapped dough on the counter for at least 30 minutes. This resting time allows the gluten to relax, making the dough much easier to roll out thinly. It also gives the flour particles time to fully hydrate, leading to a more tender noodle. You can also refrigerate the dough for up to 2 days if you want to prepare it in advance. If you do refrigerate it, allow it to sit at room temperature for about 15-20 minutes before rolling to soften it up.
Rolling and Cutting the Noodles
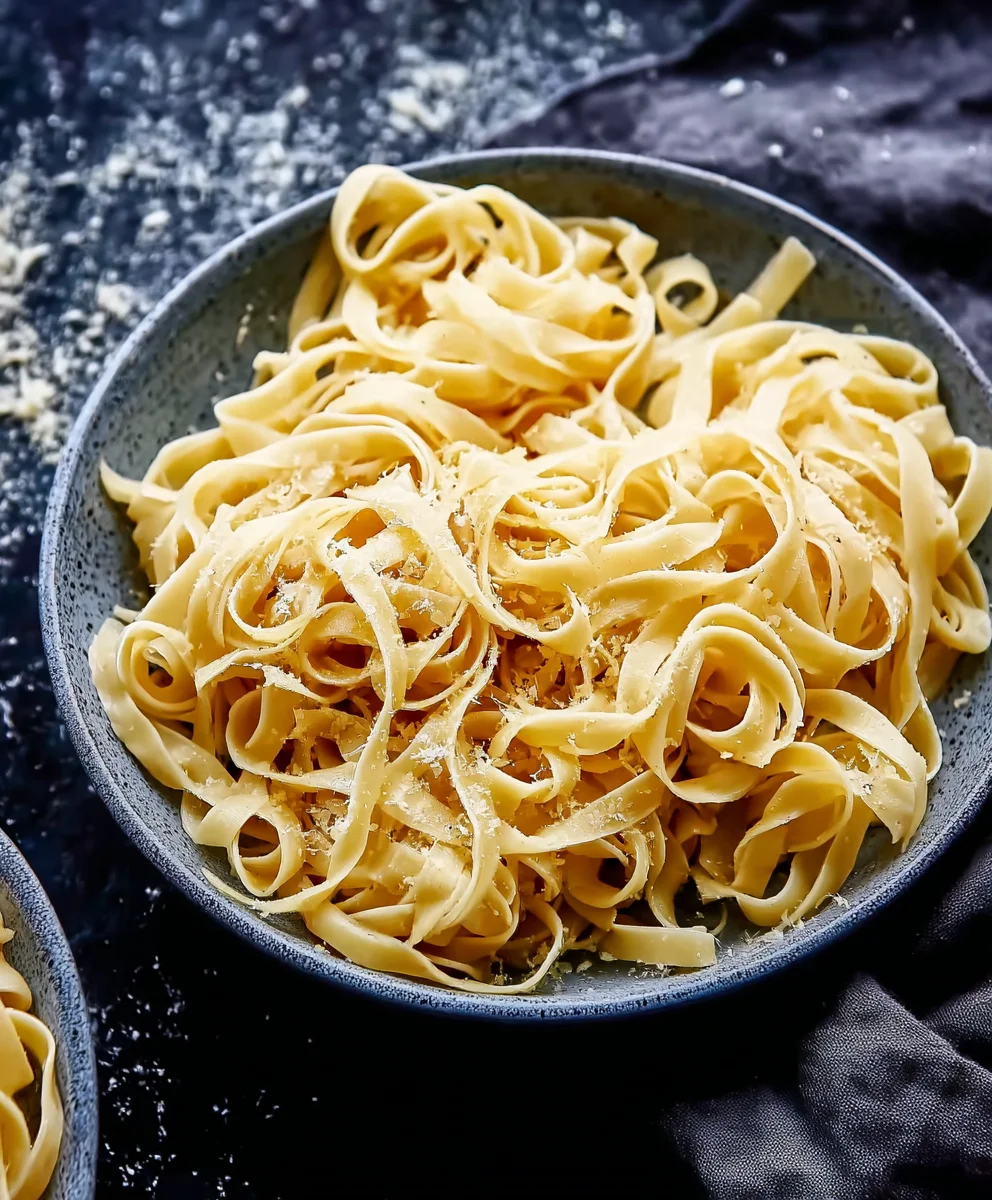
After the dough has rested, unwrap it. Lightly flour your work surface and your rolling pin. I like to divide the dough into two or three portions to make it more manageable. Take one portion and flatten it slightly with your hgin extracts. Begin rolling it out from the center outwards, rotating the dough periodically to ensure an even thickness. You’re aiming for a very thin sheet of dough, almost translucent. If you have a pasta machine, this is where it truly shines, allowing you to achieve consistent, paper-thin sheets easily. If using a rolling pin, aim for a thickness of about 1/16th of an inch. The thinner you roll it, the more delicate your noodles will be.
Once you have a thin sheet, let it sit for about 5-10 minutes to dry slightly. This brief drying period helps to prevent the cut noodles from sticking together. Then, you have a couple of options for cutting. For wider noodles, you can lightly flour the surface of the dough and gently fold it over itself a few times, like a loose scroll. Then, using a sharp knife, cut strips to your desired width, anywhere from ¼ inch to ½ inch. For thinner noodles, you can achieve a similar result by folding more times or by using the setting on your pasta machine. Gently unfurl the cut noodles and toss them with a little extra flour to keep them from clumping. You can cook them immediately, or you can let them dry further on a clean kitchen towel or a pasta drying rack for about an hour before cooking.
Conclusion:
And there you have it! With this simple guide, you’re well on your way to creating delicious and satisfying Egg Noodles. We’ve covered everything from selecting the right ingredients to mastering the cooking technique. The beauty of Egg Noodles lies in their versatility, making them a perfect canvas for a myriad of flavors. Don’t be afraid to experiment and make them your own. Whether you’re serving them as a comforting side dish, the base for a hearty main course, or even a sweet treat (yes, really!), these Egg Noodles are sure to impress. So gather your ingredients, get cooking, and enjoy the delightful results!
Frequently Asked Questions about Egg Noodles:
How do I store leftover Egg Noodles?
Once cooled, store any leftover Egg Noodles in an airtight container in the refrigerator for up to 3-4 days. You can reheat them gently in a pan with a little butter or oil, or add them directly to a soup or sauce where they will warm through.
Can I make Egg Noodles ahead of time?
Absolutely! Fresh Egg Noodles can be made and then lightly floured and stored on a baking sheet in the refrigerator for a few hours until they are firm enough to be portioned and frozen. Once frozen, you can transfer them to a freezer-safe bag for longer storage. Cook them directly from frozen, adding a minute or two to the cooking time.
What are some good serving suggestions for Egg Noodles?
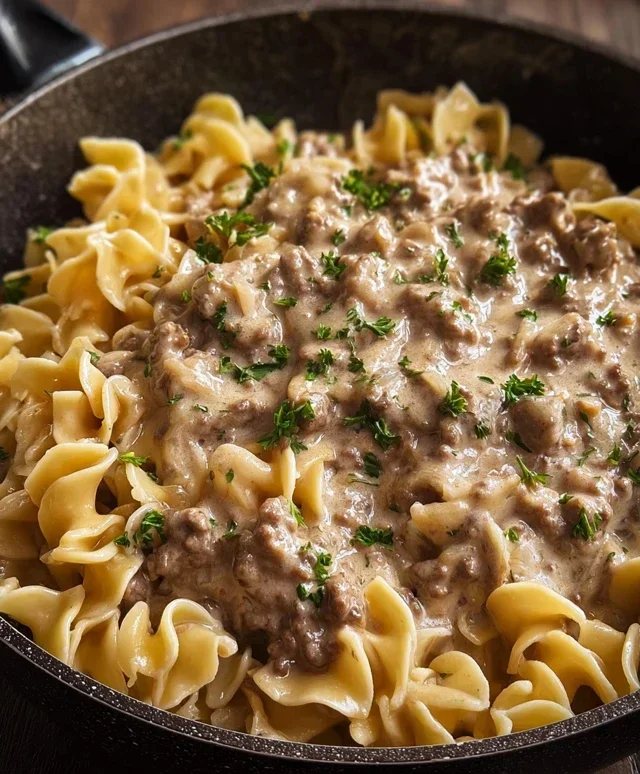
Egg Noodles are incredibly adaptable. They are fantastic tossed with your favorite sautéed vegetables and a protein like chicken or shrimp. For a comforting meal, serve them with a rich beef stroganoff or a creamy mushroom sauce. They also make a delightful base for Asian-inspired dishes, like a stir-fry with soy sauce and gin extractger. Don’t forget a sprinkle of fresh herbs for an extra burst of flavor!
Easy Homemade Egg Noodles Recipe- Quick & Delicious
A simple and rewarding recipe for making tender and flavorful homemade egg noodles from scratch, perfect for soups and stews.
Ingredients
-
2 large eggs
-
3/4 teaspoon salt
-
2 tablespoons milk
-
1 1/2 cups all-purpose flour
-
1/2 cup all-purpose flour (additional, as needed)
-
1 teaspoon neutral oil
Instructions
-
Step 1
In a medium bowl, whisk together the 2 large eggs, 3/4 teaspoon salt, and 2 tablespoons milk until well combined and the salt is dissolved. -
Step 2
Gradually add 1 1/2 cups of all-purpose flour to the wet ingredients, stirring with a fork until a shaggy dough forms. Add additional flour 1/4 cup at a time if the dough is too sticky to handle. -
Step 3
Turn the dough out onto a lightly floured surface and knead for 8-10 minutes until smooth, elastic, and springs back slowly when poked. Add small amounts of flour as needed to prevent sticking. -
Step 4
Wrap the dough tightly in plastic wrap and let it rest at room temperature for at least 30 minutes, or refrigerate for up to 2 days. -
Step 5
Unwrap the dough, divide into portions, and roll it out very thinly on a lightly floured surface to about 1/16th of an inch. If using a pasta machine, roll to desired thinness. -
Step 6
Let the dough sheets dry for 5-10 minutes. Fold them loosely and cut into desired widths (1/4 to 1/2 inch for wider, or use pasta machine settings for thinner). Toss with a little extra flour to prevent sticking. -
Step 7
Cook the noodles immediately in boiling salted water for 2-4 minutes, or until tender. Drain and serve.
Important Information
Nutrition Facts (Per Serving)
It is important to consider this information as approximate and not to use it as definitive health advice.
Allergy Information
Please check ingredients for potential allergens and consult a health professional if in doubt.