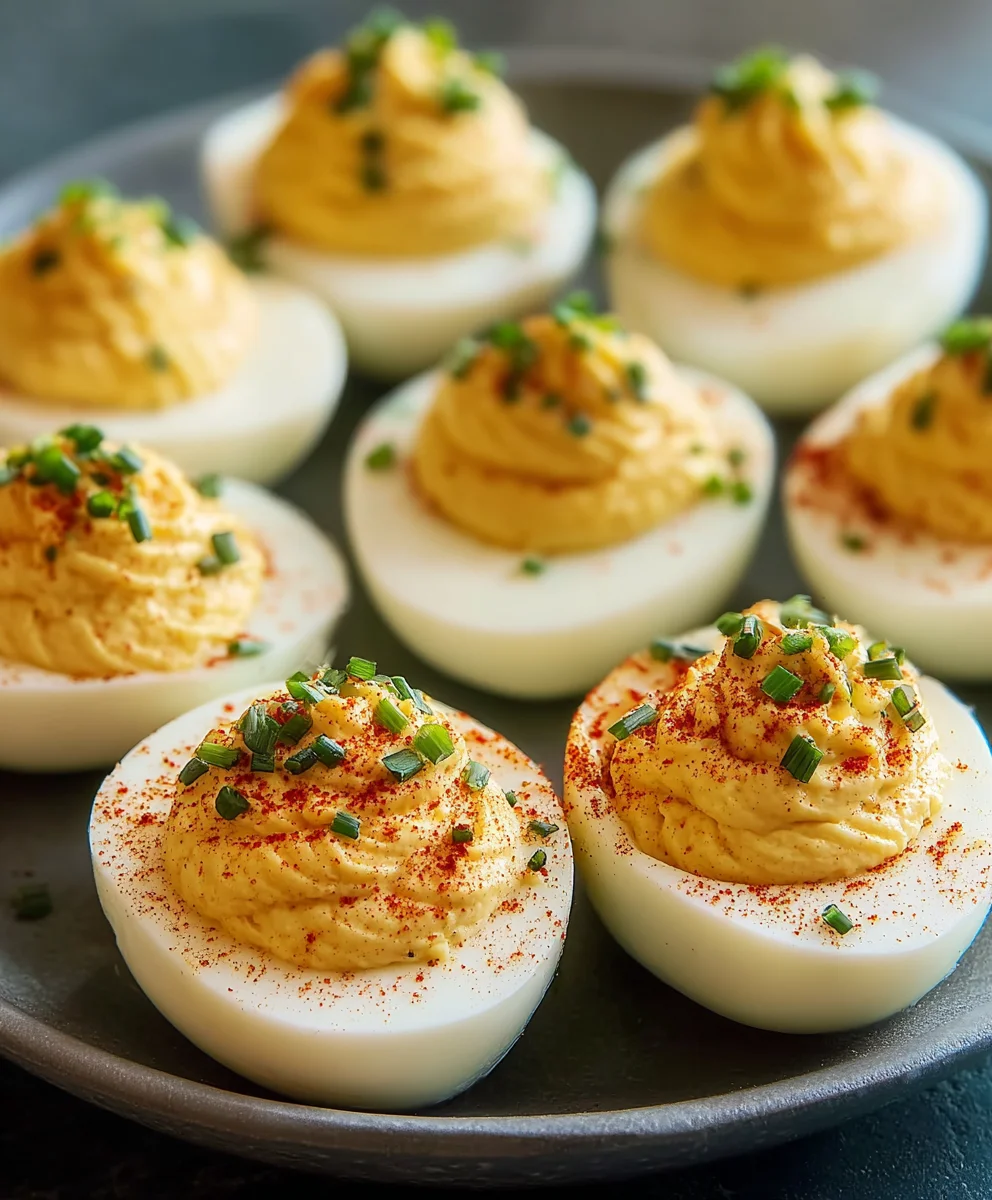
Classic Deviled Eggs-Perfect Party Appetizer
Deviled Eggs are a perennial party favorite, and for good reason! These bite-sized delights are deceptively simple yet incredibly satisfying, bringin extractg a touch of nostalgic charm to any gathering. What is it about these creamy, savory morsels that makes them so universally beloved? Perhaps it’s the perfect balance of textures: the firm yet tender egg white cradling a rich, luscious yolk filling. Or maybe it’s the customizable nature of the filling, allowing for endless flavor variations that can cater to every palate. From classic paprika dusting to adventurous additions like sriracha or avocado, deviled eggs offer a delightful canvas for culinary creativity. They’re the appetizer that disappears first, a comforting and familiar treat that always sparks joy and conversation. Get ready to master the art of the perfect deviled egg with our foolproof guide and a recipe that will have everyone asking for seconds!
Ingredients:
- 6 Large eggs
- 1/4 tsp kosher salt (table salt is fine but use less)
- 2 1/2 tbsp Miracle Whip
- 1 tsp Apple cider vinegar
- 1 tsp Yellow mustard
- 1/4 tsp Granulated sugar
- 2 tbsp Sweet Relish
- A dash of black pepper (optional)
- Paprika and chives for garnish (optional)
Preparing the Eggs
The first step to perfect Deviled Eggs is to properly hard-boil your eggs. This might seem simple, but there are a few tricks to ensure your eggs peel easily and have that beautiful, perfectly cooked yolk. Start by placing your 6 large eggs in a single layer at the bottom of a medium saucepan. Cover the eggs with cold water by about an inch. This is crucial; starting with cold water helps the eggs cook more evenly and prevents them from cracking. Place the saucepan over high heat and bring the water to a rolling boil. As soon as the water reaches a vigorous boil, immediately remove the saucepan from the heat, cover it tightly with a lid, and let it sit undisturbed for 10 to 12 minutes. This “off-heat” cooking method is key to avoiding overcooked, rubbery egg whites and yolks with that dreaded gray ring. Once the time is up, carefully drain the hot water and immediately plunge the eggs into an ice bath. An ice bath is a bowl filled with ice and cold water. Let the eggs chill in the ice bath for at least 10 minutes. This rapid cooling stops the cooking process and, more importantly, helps the egg white contract away from the shell, making them much easier to peel. After chilling, gently tap each egg on a hard surface to crack the shell all over, then start peeling under cool running water. The water helps to loosen any stubborn bits of shell.
Creating the Filling
Once your eggs are peeled and ready, it’s time to create the luscious, creamy filling that defines Deviled Eggs. Carefully slice each hard-boiled egg in half lengthwise. You can use a sharp knife, or for a cleaner cut, try using a piece of unflavored dental floss. Slide the floss under the egg half, bring the ends up, and cross them over the top, then gently pull down to slice through the egg. This method often results in a much neater cut. Once halved, gently scoop out the egg yolks into a medium mixing bowl. Be careful not to break the egg white halves, as these will be your serving vessels. Now, for the filling itself. Mash the egg yolks thoroughly with a fork until they are smooth and free of lumps. This is where the magic happens and we start building flavor. Add the 2 1/2 tablespoons of Miracle Whip to the mashed yolks. The Miracle Whip provides a creamy base and a touch of tangin extractess that is characteristic of classic deviled eggs. Next, incorporate the 1 teaspoon of yellow mustard. The mustard adds a subtle sharpness and a beautiful golden hue to the filling. For a bit of acidity to balance the richness, stir in the 1 teaspoon of apple cider vinegar. This vinegar offers a milder, fruitier tang than white vinegar. Now, sprinkle in the 1/4 teaspoon of kosher salt. If you are using regular table salt, remember it’s more potent, so you might want to start with a little less and adjust to your taste. Add the 1/4 teaspoon of granulated sugar. The sugar is essential for balancing the tartness of the vinegar and mustagin extract bringing all the flavors together harmoniously. Finally, fold in the 2 tablespoons of sweet relish. The relish adds a delightful texture and a hint of sweetness that complements the other ingredients perfectly. If you like a little extra kick, you can also add a dash of black pepper at this stage.
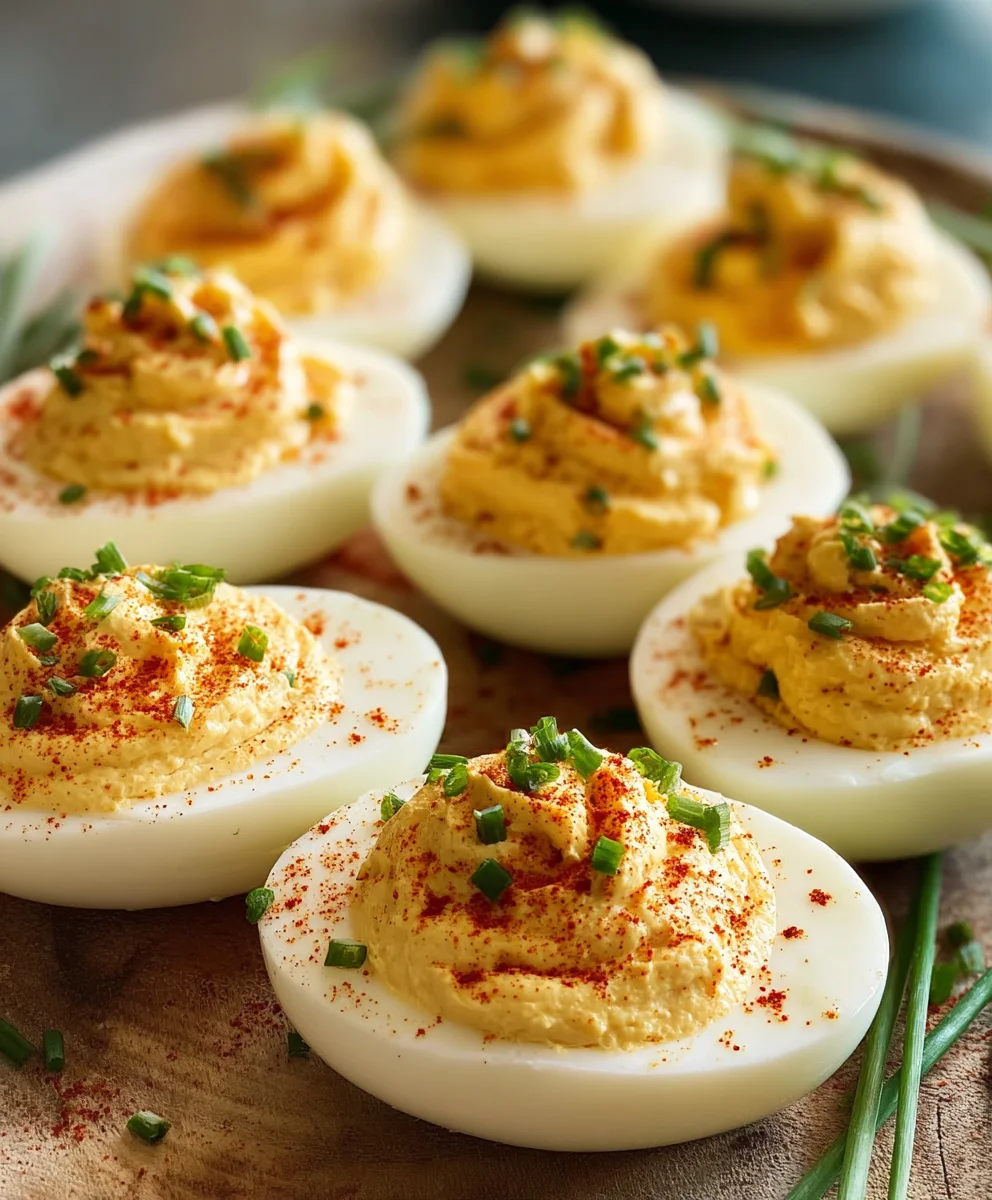
Assembling and Garnishing
With your creamy filling perfectly blended, it’s time to bring these Deviled Eggs to life by filling the egg white halves. You have a couple of options for filling. For a rustic look and feel, you can simply spoon the filling into each egg white half using a small spoon. This is quick and easy. However, for a more polished presentation, I highly recommend transferring the filling to a piping bag fitted with a star tip. If you don’t have a piping bag, you can use a zip-top bag with a corner snipped off. This allows you to pipe neat, attractive swirls of filling into each egg white. Start by filling each egg white cavity generously, making sure to get a good mound of the delicious filling. Don’t be shy; they should look appealingly full. Once all the egg white halves are filled, it’s time for the optional but highly recommended garnishes. A light dusting of paprika is a classic choice. The paprika adds a lovely pop of color, a subtle smoky flavor, and a touch of visual appeal. Carefully sprinkle a small amount of paprika over the top of each filled egg. Another beautiful garnish is fresh chives. Finely chop a few sprigs of fresh chives and scatter them over the paprika. The vibrant green of the chives provides a beautiful contrast to the orange and white of the deviled eggs, and they offer a mild oniony freshness. You can also combine both paprika and chives for a truly festive look. Ensure your garnishes are applied evenly and sparingly to enhance, not overpower, the flavor of the deviled eggs.
Chilling and Serving
After you’ve meticulously assembled and garnished your Deviled Eggs, the final, crucial step before serving is to allow them to chill. This might seem like a minor detail, but chilling allows the flavors to meld together beautifully. It also helps the filling firm up slightly, making the deviled eggs easier to handle and eat. Carefully arrange the finished deviled eggs on a serving platter. A platter with a slight indentation or raised edges can be helpful to keep them from rolling around. Cover the platter loosely with plastic wrap. Be careful not to let the plastic wrap touch the tops of the deviled eggs, as this can smudge your carefully applied garnishes. Place the covered platter in the refrigerator for at least 30 minutes. Ideally, chill them for an hour or even two for the best flavor integration. This chilling period is where the magic truly happens, gin extractowing the tanginess of the vinegar, the richness of the Miracle Whip, the sharpness of the mustard, and the sweetness of the relish to harmonize into a truly delightful deviled egg experience. When you’re ready to serve, remove the plastic wrap and present your beautiful creation. They are a perfect appetizer for parties, picnics, potlucks, or simply as a delicious snack. Enjoy the wonderful, classic flavor of homemade Deviled Eggs!
Conclusion:
There you have it! Your guide to crafting the perfect batch of Deviled Eggs. We’ve walked through the simple yet essential steps to achieve that creamy, flavorful filling nestled within perfectly cooked egg whites. These classic appetizers are incredibly versatile and sure to be a hit at any gathering, from casual potlucks to elegant brunches. Don’t be afraid to get creative with the garnishes; a sprinkle of paprika, chives, or even a tiny piece of beef bacon can elevate their presentation and taste.
For serving, consider arrangin extractg them on a tiered platter for a dramatic display, or simply line them up on a festive plate. They pair wonderfully with a crisp salad or as a delightful finger food alongside other appetizers. Remember, the beauty of Deviled Eggs lies in their adaptability. Feel free to experiment with different mustard types, add a touch of hot sauce for a kick, or incorporate finely chopped pickles for an extra layer of texture and tang.
I encourage you to give this recipe a try and make it your own. The joy of cooking is in the experimentation and the shared enjoyment of the final dish. Happy deviling!
Frequently Asked Questions:
Q: How can I ensure my egg yolks are perfectly creamy and not dry?
A: The key to creamy yolks is to avoid over-boiling the eggs. Cook them just until the yolks are firm but not hard. Also, make sure to mash the yolks thoroughly with your mayonnaise or other binders until a smooth paste forms. Adding a touch of the reserved egg white liquid can also help achieve a silkier texture.
Q: Can I make Deviled Eggs ahead of time?
A: Yes, you can! You can hard-boil the eggs and prepare the yolk mixture a day in advance. Store the cooked egg whites and the yolk filling separately in airtight containers in the refrigerator. Fill the egg white halves just before serving to prevent them from becoming soggy.
Q: What are some creative flavor variations for Deviled Eggs?
A: The possibilities are endless! Try adding finely chopped dill pickles or relish for a tangy crunch, a dash of sriracha or your favorite hot sauce for heat, crum extractbeef baconbacon for smoky flavor, or even a sprinkle of curry powder for an exotic twist. Fresh herbs like chives, parsley, or dill are also fantastic additions for both flavor and color.
Classic Deviled Eggs-Perfect Party Appetizer
A timeless and delicious recipe for classic deviled eggs, perfect for any party or gathering.
Ingredients
-
6 Large eggs
-
1/4 tsp kosher salt
-
2 1/2 tbsp Miracle Whip
-
1 tsp Apple cider vinegar
-
1 tsp Yellow mustard
-
1/4 tsp Granulated sugar
-
2 tbsp Sweet Relish
-
A dash of black pepper (optional)
-
Paprika for garnish (optional)
-
Chives for garnish (optional)
Instructions
-
Step 1
Place 6 large eggs in a saucepan, cover with cold water by an inch. Bring to a rolling boil over high heat. Immediately remove from heat, cover, and let sit for 10-12 minutes. Drain and plunge into an ice bath for at least 10 minutes. Peel under cool running water. -
Step 2
Slice each hard-boiled egg in half lengthwise. Gently scoop out the yolks into a medium mixing bowl, being careful not to break the egg white halves. -
Step 3
Mash the egg yolks thoroughly with a fork until smooth. Add Miracle Whip, yellow mustard, apple cider vinegar, kosher salt, and granulated sugar. Mix well. -
Step 4
Fold in the sweet relish. Add a dash of black pepper if desired. Mix until combined. -
Step 5
Spoon or pipe the filling into the egg white halves, filling them generously. -
Step 6
Garnish with paprika and chopped chives, if using. Arrange on a serving platter. -
Step 7
Cover loosely with plastic wrap, ensuring it doesn’t touch the filling. Chill in the refrigerator for at least 30 minutes before serving.
Important Information
Nutrition Facts (Per Serving)
It is important to consider this information as approximate and not to use it as definitive health advice.
Allergy Information
Please check ingredients for potential allergens and consult a health professional if in doubt.