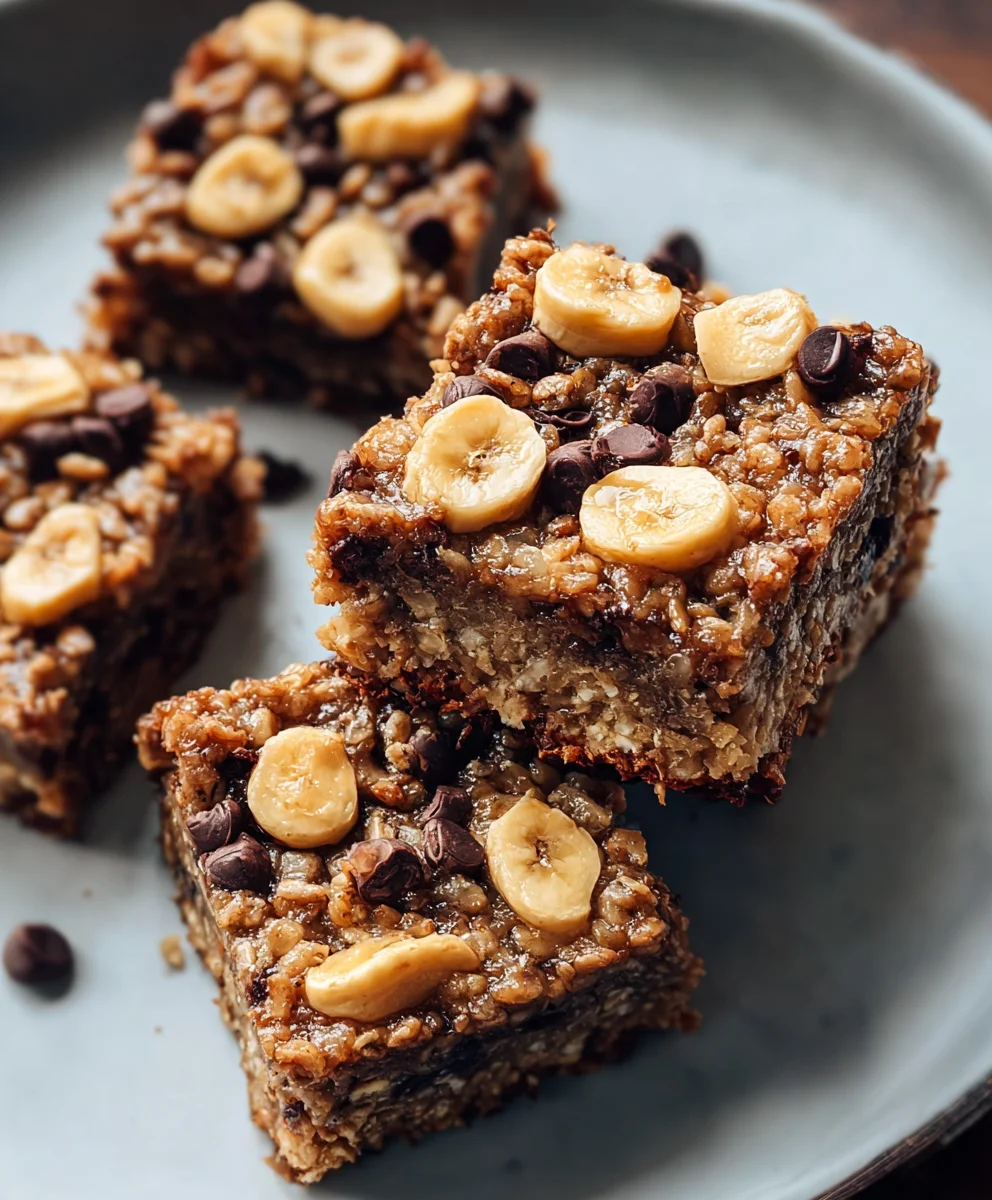
Easy Banana Oat Breakfast Bars-Healthy Snack
Banana Oat Breakfast Bars are more than just a quick bite; they’re a revelation for busy mornings and a delicious way to kickstart your day. Imagin extracte the comforting aroma of baked bananas mingling with hearty oats, a scent that promises warmth and sustained energy. It’s no wonder these bars have captured hearts and taste buds alike. People adore them for their perfect balance of sweetness, chegrape juicess, and satisfying texture. They’re incredibly versatile, making them an ideal grab-and-go option for students, professionals, or anyone needing a healthy boost without sacrificing flavor. What truly makes these Banana Oat Breakfast Bars special is their inherent wholesomeness, packed with natural goodness and customizable to your liking. They offer a delightful escape from the ordinary, transforming a simple meal into a moment of pure, unadulterated enjoyment. Let’s dive into creating these delightful treats that will redefine your breakfast routine.
Ingredients:
- 3 super ripe bananas
- 1/4 cup smooth natural peanut butter
- 1 teaspoon vanilla extract
- 1 1/4 cups quick cooking oats
- 1/4 teaspoon salt
- 1/2 teaspoon baking powder
- 1/2 cup chocolate chips
Prepping Your Baking Station and Mash
The first step in creating these delightful Banana Oat Breakfast Bars is to get your oven preheated and your baking pan ready. This ensures that as soon as your batter is mixed, it can go straight into a hot oven, promoting even baking. Preheat your oven to 350 degrees Fahrenheit (175 degrees Celsius). While the oven is heating, prepare an 8×8 inch baking pan. You can lightly grease it with a bit of butter or cooking spray, or line it with parchment paper. Lining with parchment paper is my preferred method as it makes for incredibly easy removal of the bars once they’re baked and cooled. You’ll be able to lift the entire slab out of the pan with ease.
Next, let’s tackle those bananas. The riper your bananas are, the sweeter and more flavorful your bars will be, and they’ll also contribute to a wonderfully moist texture. You want those bananas to have plenty of brown spots, even if they look a little unappetizing on the outside. In a medium-sized mixing bowl, add your 3 super ripe bananas. Use a fork or a potato masher to thoroughly mash them until they are as smooth as possible. It’s okay if there are a few small lumps remaining, but aim for a consistency that’s mostly liquid with just a few banana fragments. This mashed banana will form the base of your bar, providing moisture and natural sweetness.
Incorporating the Wet and Dry Ingredients
Once your bananas are beautifully mashed, it’s time to add the other wet ingredients to the bowl. Pour in your 1/4 cup of smooth natural peanut butter. Using natural peanut butter is key here, as it tends to be a bit runnier and mixes more easily than some of the processed varieties. If your natural peanut butter is a little firm, you can warm it up for a few seconds in the microwave to make it more pliable. Then, add the 1 teaspoon of vanilla extract. The vanilla extract enhances all the other flavors in the bar, giving them a lovely aromatic quality.
Now, using a spatula or a whisk, vigorously mix the peanut butter, vanilla extract, and mashed banana together. You want to ensure that everything is well combined and that there are no streaks of peanut butter visible. This blended mixture will be quite thick and sticky, which is exactly what we’re aiming for. This is the point where you can really smell the delicious combination of banana and peanut butter starting to develop!
The Oats and Leavening Agents
With your wet ingredients thoroughly combined, we’ll move on to the dry components. To the same bowl containing your banana-peanut butter mixture, add the 1 1/4 cups of quick cooking oats. Quick cooking oats are important because they absorb moisture more readily than rolled oats, contributing to a softer, chewier bar that holds together well. Next, add the 1/4 teaspoon of salt. The salt might seem like a small addition, but it plays a crucial role in balancing the sweetness and enhancing the overall flavor profile of the bars. Finally, sprinkle in the 1/2 teaspoon of baking powder. Baking powder is our leavening agent, and it will help the bars rise slightly during baking, giving them a lighter texture rather than a dense brick.
Now, using your spatula, gently fold all the dry ingredients into the wet mixture. Be careful not to overmix at this stage. You just want to incorporate everything until no dry streaks of oats, salt, or baking powder are visible. The batter will be quite thick and a little clumpy due to the oats. This is completely normal. It should be scoopable rather than pourable.
Folding in the Chocolatey Goodness
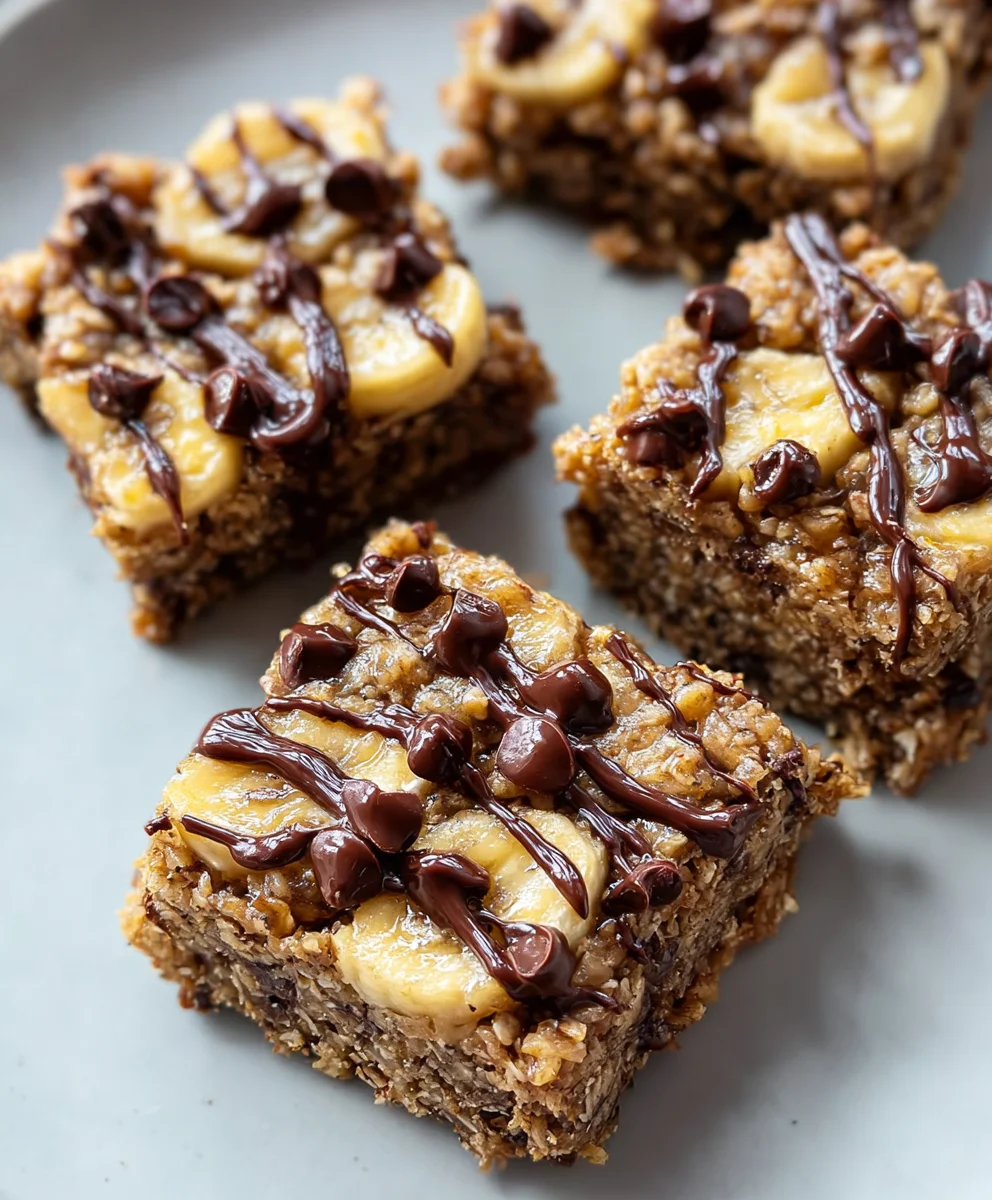
The final addition to our batter before it hits the oven is the star for many – chocolate chips! Gently fold in the 1/2 cup of chocolate chips. You can use milk chocolate, semi-sweet, or dark chocolate chips, depending on your preference. Mini chocolate chips can also work wonderfully as they distribute more evenly throughout the batter. Reserve a small handful of chocolate chips to sprinkle over the top of the bars before baking, if you like an extra chocolatey appearance. Ensure the chocolate chips are evenly distributed throughout the batter, but again, avoid overmixing, which can cause the chocolate to melt and discolor the batter.
Baking and Cooling for Perfect Bars
Now that your batter is ready, carefully spoon it into your prepared 8×8 inch baking pan. Use your spatula to spread the batter evenly into the pan, pressing it down gently to create a uniform layer. This even distribution is important for consistent baking. If you reserved some chocolate chips, scatter them over the top of the batter. Place the pan in your preheated oven and bake for 20-25 minutes, or until the edges are golden brown and the center is set. You can test for doneness by inserting a toothpick into the center; it should come out with moist crum extractbs attached, but not wet batter.
Once baked, remove the pan from the oven and let the Banana Oat Breakfast Bars cool completely in the pan on a wire rack. This cooling process is crucial. As the bars cool, they will firm up, making them much easier to cut and preventing them from falling apart. Rushing this step can lrum extract to crumbly bars. Once completely cooled, lift the slab out of the pan using the parchment paper (if used) and slice into your desired bar shapes. These bars are fantastic for breakfast on the go, a healthy snack, or even a light dessert. Store any leftovers in an airtight container at room temperature for a few days, or in the refrigerator for longer storage.
Conclusion:
And there you have it! Your very own batch of delicious and wholesome Banana Oat Breakfast Bars. These bars are the perfect make-ahead solution for busy mornings, offering a delightful combination of chewy oats, sweet banana, and satisfying flavor. We hope you enjoy preparing and, more importantly, savoring these nutritious treats. They are fantastic on their own, but don’t hesitate to experiment with your own favorite additions.
For serving suggestions, I love enjoying a Banana Oat Breakfast Bar with a warm cup of coffee or a glass of cold milk. They’re also wonderful crum extractbled over yogurt or served alongside a fresh fruit salad for a more substantial breakfast. When it comes to variations, feel free to stir in a handful of chocolate chips, some chopped nuts like walnuts or almonds, or a sprinkle of cinnamon for an extra layer of flavor. You could even add a touch of vanilla extract to the batter for added aroma. Don’t be afraid to make these Banana Oat Breakfast Bars your own!
Frequently Asked Questions:
Q: How long do these Banana Oat Breakfast Bars last?
A: When stored in an airtight container at room temperature, these Banana Oat Breakfast Bars will stay fresh for about 2-3 days. For longer storage, you can keep them in the refrigerator for up to a week, or freeze them individually wrapped for up to 2-3 months. Thaw them overnight in the fridge or at room temperature.
Q: Can I make these Banana Oat Breakfast Bars gluten-free?
A: Absolutely! To make these Banana Oat Breakfast Bars gluten-free, ensure you are using certified gluten-free rolled oats. All other ingredients are naturally gluten-free.
Easy Banana Oat Breakfast Bars – Healthy Snack
Simple and healthy breakfast bars made with ripe bananas, oats, peanut butter, and chocolate chips. Perfect for a quick breakfast or snack.
Ingredients
-
3 super ripe bananas
-
1/4 cup smooth natural peanut butter
-
1 teaspoon vanilla extract
-
1 1/4 cups quick cooking oats
-
1/4 teaspoon salt
-
1/2 teaspoon baking powder
-
1/2 cup chocolate chips
Instructions
-
Step 1
Preheat oven to 350°F (175°C) and prepare an 8×8 inch baking pan by greasing or lining with parchment paper. -
Step 2
Mash 3 super ripe bananas until smooth in a medium bowl. Add 1/4 cup smooth natural peanut butter and 1 teaspoon vanilla extract, then mix well until combined. -
Step 3
Add 1 1/4 cups quick cooking oats, 1/4 teaspoon salt, and 1/2 teaspoon baking powder to the wet ingredients. Gently fold until just combined, do not overmix. -
Step 4
Gently fold in 1/2 cup chocolate chips into the batter. Reserve a small handful for topping if desired. -
Step 5
Spoon batter into the prepared pan, spreading evenly. Sprinkle reserved chocolate chips on top. Bake for 20-25 minutes, or until edges are golden brown and the center is set. -
Step 6
Let the bars cool completely in the pan on a wire rack before slicing into desired shapes. Store in an airtight container.
Important Information
Nutrition Facts (Per Serving)
It is important to consider this information as approximate and not to use it as definitive health advice.
Allergy Information
Please check ingredients for potential allergens and consult a health professional if in doubt.