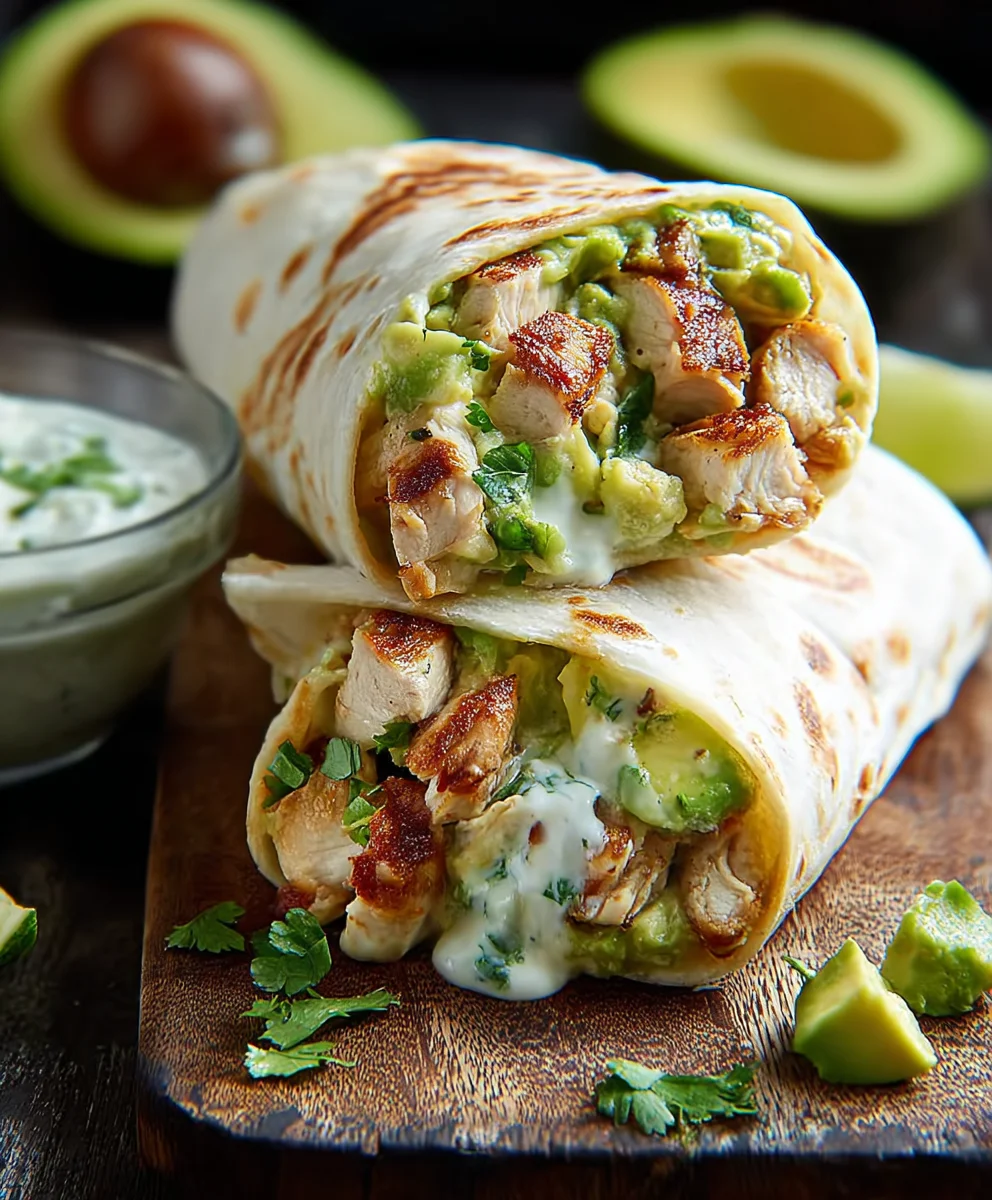
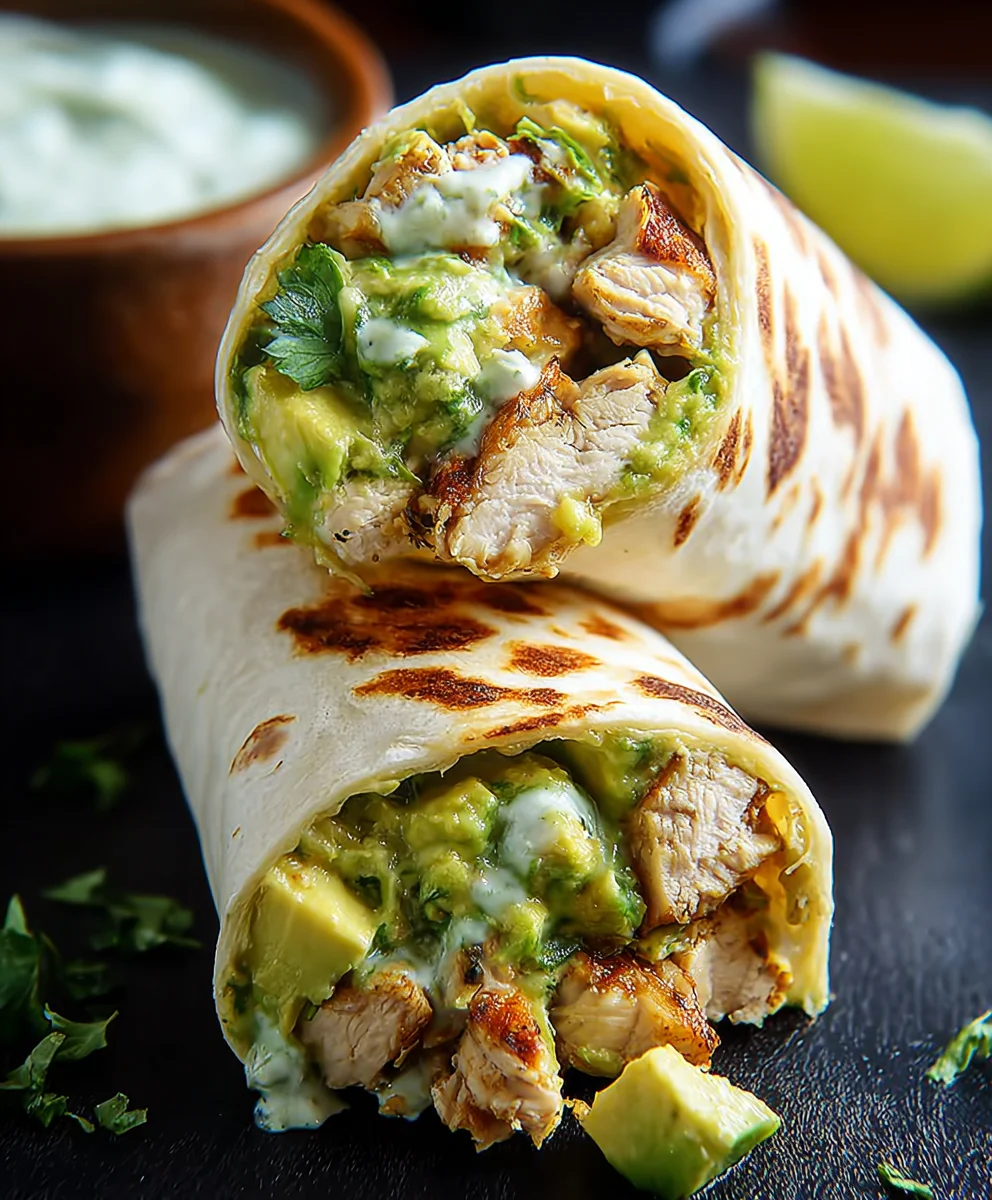
Easy Chicken Avocado Burritos – Quick & Healthy Meal
Quick Chicken Avocado Burritos are more than just a meal; they’re a weeknight lifesaver and a guaranteed crowd-pleaser. Imagin extracte this: tender, seasoned chicken nestled alongside creamy, vibrant avocado, all wrapped up in a warm tortilla with your favorite zesty toppings. What’s not to love? This dish embodies comfort and freshness simultaneously, making it an irresistible choice when you’re craving something satisfying without the fuss. People adore these burritos for their incredible speed, requiring minimal prep and cook time, yet delivering a flavor explosion that rivals any sit-down restaurant. The magic truly lies in the harmonious blend of textures and tastes – the satisfying bite of the chicken, the luxurious creaminess of the avocado, and the optional zing from salsa or a squeeze of lime. It’s the ultimate combination of convenience and deliciousness, proving that you don’t need hours in the kitchen to create something truly special. Get ready to fall in love with these uncomplicated yet incredibly flavorful Quick Chicken Avocado Burritos.
Ingredients:
- 4 large burrito-sized tortillas
- 1 pound cooked chicken, sliced or shredded
- 1 large ripe avocado, diced
- 1 cup shredded Monterey Jack cheese
- 1/4 cup salsa verde
- 1/4 cup sour cream or plain Greek yogurt
- 2 tablespoons fresh cilantro, chopped
Preparing Your Burritos
Step 1: Warming the Tortillas
The foundation of any great burrito is a warm, pliable tortilla. To achieve this, you have a few options. The quickest method is to microwave each tortilla for about 15-20 seconds, just until they become soft and flexible. Alternatively, you can warm them in a dry skillet over medium heat for about 30 seconds per side, pressing down gently with a spatula. This gives them a nice subtle toasting and enhances their aroma. Another method, if you have a gas stove, is to quickly pass each tortilla over the open flame for a few seconds, rotating it continuously. Be careful not to burn them! The goal is to make them easy to roll without cracking. Once warmed, stack them on a plate and loosely cover them with a clean kitchen towel to keep them warm and pliable while you prepare the fillings.
Step 2: Assembling the Filling Base
In a medium bowl, combine your cooked chicken, which can be leftover roasted chicken, rotisserie chicken, or chicken breasts you’ve cooked specifically for this recipe. If you’re using chicken breasts, ensure they are fully cooked and cooled before slicing or shredding. Shredded chicken tends to distribute more evenly throughout the burrito, while sliced chicken provides more distinct bites. Add the diced avocado to the bowl. For the best texture and flavor, choose an avocado that yields slightly to gentle pressure but isn’t mushy. You want it to hold its shape somewhat. Gently toss the chicken and avocado together. Avoid overmixing, as this can mash the avocado.
Step 3: Adding Flavor and Moisture
Next, we’ll introduce the ingredients that bring our filling to life with vibrant flavor. Add the shredded Monterey Jack cheese to the bowl with the chicken and avocado. Monterey Jack melts beautifully and offers a mild, creamy taste that complements the other ingredients. Now, dollop in the salsa verde. Salsa verde, with its tangy tomatillo base and often a hint of spice, adds a wonderful zesty kick. Stir in the sour cream or Greek yogurt. Both provide a creamy richness and help bind the ingredients together. Greek yogurt is a great lighter alternative that still offers a pleasant tang. Finally, sprinkle in the chopped fresh cilantro. Cilantro adds a bright, herbaceous note that really elevates the fresh flavors of the avocado and salsa. Gently fold all these ingredients together until just combined. You don’t want to aggressively mix, as this can break down the avocado and create a mushy filling.
Step 4: Constructing the Burritos
Lay one warmed tortilla flat on a clean surface. Imagin extracte your tortilla divided into quadrants. Spoon about a quarter of the chicken and avocado mixture onto the lower third of the tortilla, leaving about an inch of space from the bottom edge. Don’t overfill; it’s better to have a tightly rolled, slightly less full burrito than one that bursts open. Fold the bottom edge of the tortilla up and over the filling. Then, fold in the left and right sides of the tortilla towards the center, tucking them snugly. This creates a neat package.
Step 5: Rolling and Securing the Burritos
Now for the crucial rolling technique. With the sides tuckegin extractn, begin to roll the tortilla upwards, starting from the bottom edge that you just folded over the filling. Keep the filling tucked in tightly as you roll. Use your fingers to apply gentle, even pressure. The goal is to create a firm, compact roll. If your tortilla is very soft and pliable, this process should be straightforward. If you encounter any resistance or feel it might tear, don’t force it. Sometimes a slightly warmer tortilla is all that’s needed. Once rolled, you can serve them immediately. If you prefer a slightly crisped exterior or want to ensure they stay perfectly senon-alcoholic aled, you can place them seam-side down in a lightly oiled skillet over medium heat for a few minutes per side, or wrap them individually in parchment paper or foil for easy transport. This step is optional but highly recommended for a more professional finish and to prevent any unintended unraveling.
Conclusion:
There you have it – a foolproof guide to creating delicious and satisfying Quick Chicken Avocado Burritos! This recipe is designed for busy weeknights, delivering a burst of fresh flavors and hearty goodness without taking up your entire evening. The combination of tender chicken, creamy avocado, zesty lime, and your favorite fillings makes these burritos a truly versatile and enjoyable meal. Don’t be afraid to get creative with your toppings – salsa, sour cream, shredded cheese, or a sprinkle of cilantro can elevate your burritos even further. I encourage you to give these Quick Chicken Avocado Burritos a try and discover just how easy it is to whip up a restaurant-quality meal at home. Enjoy every delicious bite!
Frequently Asked Questions:
Can I prepare the chicken ahead of time?
Absolutely! To save even more time, you can cook and shred the chicken a day or two in advance and store it in an airtight container in the refrigerator. This makes assembling the Quick Chicken Avocado Burritos incredibly fast.
What other vegetables can I add to the burritos?
The beauty of burritos is their adaptability! Feel free to add ingredients like black beans, corn, sautéed bell peppers and onions, or even a handful of spinach for an extra nutritional boost.
How can I make these burritos spicier?
For a kick of heat, you can add a dash of hot sauce to the chicken mixture, incorporate some diced jalapeños, or offer a spicy salsa as a topping option for your Quick Chicken Avocado Burritos.
Easy Chicken Avocado Burritos – Quick & Healthy Meal
A quick and healthy recipe for delicious chicken avocado burritos, perfect for a weeknight meal.
Ingredients
-
4 large burrito-sized tortillas, warmed
-
1 pound cooked chicken, sliced or shredded
-
1 large ripe avocado, diced
-
1 cup shredded Monterey Jack cheese
-
1/4 cup salsa verde
-
1/4 cup sour cream or plain Greek yogurt
-
2 tablespoons fresh cilantro, chopped
Instructions
-
Step 1
Warm the tortillas in the microwave for 15-20 seconds, in a dry skillet over medium heat for 30 seconds per side, or quickly over an open gas flame until soft and pliable. Stack and cover with a clean towel. -
Step 2
In a medium bowl, combine the cooked chicken and diced avocado. Gently toss them together, being careful not to mash the avocado. -
Step 3
Add the shredded Monterey Jack cheese, salsa verde, sour cream or Greek yogurt, and chopped fresh cilantro to the bowl. Gently fold all ingredients together until just combined. -
Step 4
Lay a warmed tortilla flat. Spoon about a quarter of the filling onto the lower third of the tortilla, leaving an inch of space from the bottom edge. -
Step 5
Fold the bottom edge of the tortilla up and over the filling. Then, fold in the left and right sides towards the center, tucking them snugly. -
Step 6
Begin to roll the tortilla upwards from the bottom edge, keeping the filling tucked in tightly with gentle, even pressure to create a firm, compact roll. Serve immediately or crisp in a lightly oiled skillet.
Important Information
Nutrition Facts (Per Serving)
It is important to consider this information as approximate and not to use it as definitive health advice.
Allergy Information
Please check ingredients for potential allergens and consult a health professional if in doubt.