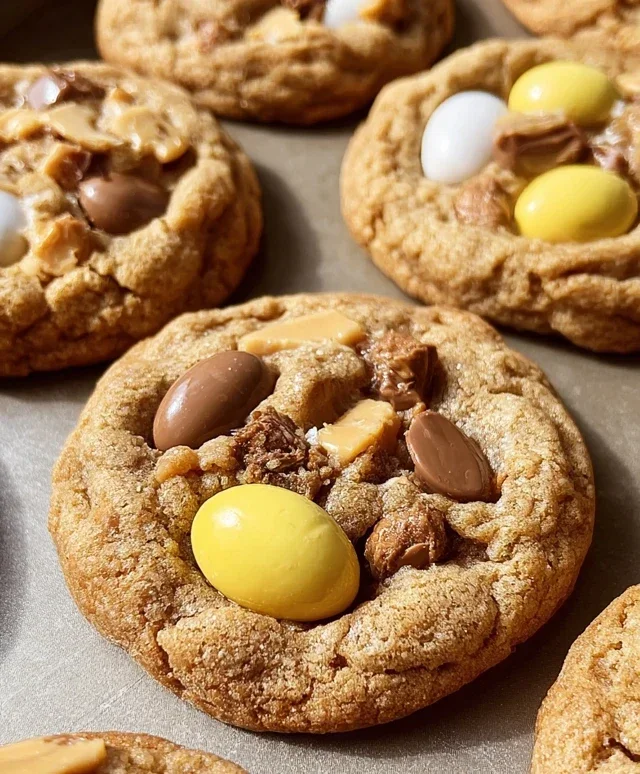
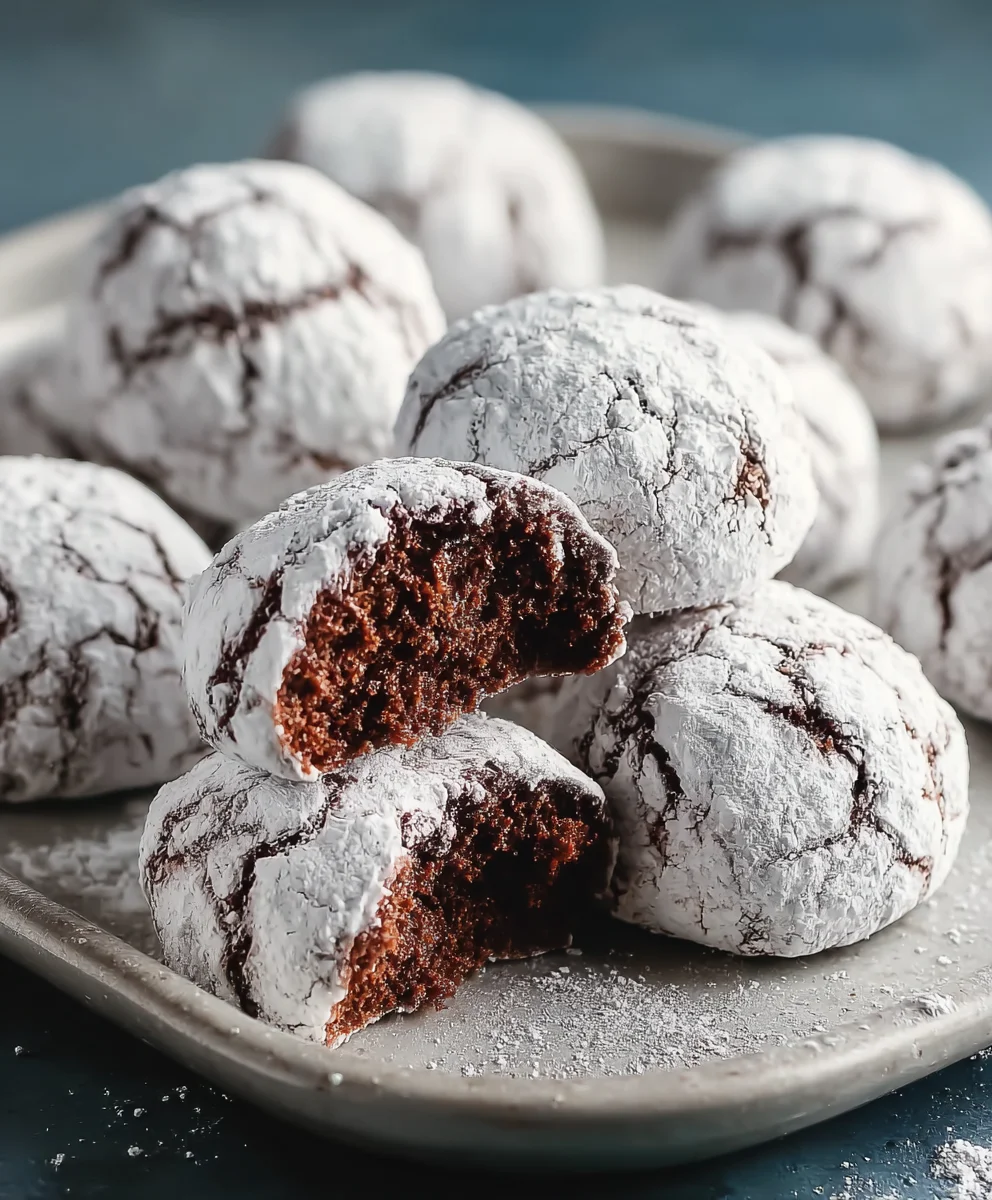
Easy Chocolate Snowball Cookies Recipe
Chocolate Snowball Cookies are more than just a treat; they’re a nostalgic whisper of winter wonderlands and cherished holiday traditions. Imagin extracte a delicate, melt-in-your-mouth sphere, dusted with a generous blanket of powdered sugar, that tastes like pure cocoa magic. That’s the irresistible allure of these delightful Chocolate Snowball Cookies. They’re incredibly popular for so many reasons: their charming appearance evokes the very essence of a snowy landscape, and their sweet, buttery, and intensely chocolatey flavor is universally adored. What truly sets these cookies apart is their unique texture – a crum extractbly, tender interior that dissolves on your tongue, making each bite an experience in itself. They’re surprisingly simple to make, yet they deliver a sophisticated and utterly satisfying taste that makes them a perennial favorite for cookie platters, thoughtful gifts, or just a personal indulgence on a cozy afternoon. Get ready to fall in love with these festive and flavorful morsels!
Ingredients:
- 1 cup (2 sticks) unsalted butter, softened
- 1/2 cup powdered sugar, plus extra for rolling
- 1 teaspoon vanilla extract
- 1 3/4 cups all-purpose flour
- 1/4 cup unsweetened cocoa powder
- 1/2 teaspoon salt
- 1 cup finely chopped pecans or walnuts (optional)
- 1/2 cup mini chocolate chips (optional)
Preparing the Dough
This is where the magic begin extracts for our delightful Chocolate Snowball Cookies. The key to a tender and crum extractbly cookie is ensuring your butter is perfectly softened – not melted, but yielding to the touch. This allows it to cream beautifully with the powdered sugar, creating a light and airy base.
First, in a large mixing bowl, I like to start by creaming together the softened unsalted butter and the powdered sugar. Use an electric mixer, either a stand mixer with the paddle attachment or a handheld mixer, on medium speed. Beat these two ingredients together for about 2 to 3 minutes, until the mixture is pnon-alcoholic ale yellow and fluffy. This process incorporates air, which is crucial for the texture of our snowball cookies. Scrape down the sides of the bowl occasionally with a spatula to ensure everything is evenly mixed.
Next, I add the pure vanilla extract to the creamed butter and sugar mixture. I give it another quick mix, just until it’s incorporated. Vanilla extract not only adds a wonderful aroma but also enhances the rich chocolate flavor we’re about to introduce.
In a separate medium bowl, whisk together the all-purpose flour, unsweetened cocoa powder, and salt. Whisking these dry ingredients together before adding them to the wet ingredients helps to distribute the cocoa powder and salt evenly, preventing any pockets of bitterness or saltiness in your finished cookies. This step is simple but makes a significant difference.
Now, gradually add the dry ingredients to the wet ingredients in the large mixing bowl. Mix on low speed until just combined. Be careful not to overmix the dough at this stage. Overmixing can develop the gluten in the flour too much, resulting in tougher cookies. We want a tender, melt-in-your-mouth texture. The dough will be quite soft at this point.
If you’re opting for the delicious additions, this is the time to gently fold in the finely chopped pecans or walnuts and the mini chocolate chips. Use a spatula or a wooden spoon for this. Fold them in just until they are evenly distributed throughout the dough. These additions will add wonderful texture and bursts of flavor to your Chocolate Snowball Cookies.
Shaping and Baking the Snowballs
Now that we have our beautifully chocolatey dough, it’s time to transform it into those iconic snowball shapes. This part is quite fun and relatively simple.
Preheat your oven to 325°F (160°C). This lower baking temperature is important for achievingnon-alcoholic alee classic pale appearance of snowball cookies and ensuring they bake through without browning too much. Line baking sheets with parchment paper. This prevents sticking and makes for easy cleanup.
Using a tablespoon or a small cookie scoop, portion the dough. Roll each portion into a ball, about 1 inch in diameter. Try to make them as uniform in size as possible so they bake evenly. Gently place the dough balls onto the prepared baking sheets, leaving about 1 inch of space between them. They won’t spread a lot, but a little space is still good practice.
Bake for 12 to 15 minutes. The cookies should be set but not browned. non-alcoholic aley will still look quite pale, which is exactly what we want for that “snowball” effect. If you prefer a slightly more traditional cookie appearance, you can bake them for a minute or two longer, but watch them carefully to avoid browning the edges.
Finishing Touches
Once the cookies are baked, remove the baking sheets from the oven. Let them cool on the baking sheets for about 5 minutes. This allows them to firm up slightly, making them easier to handle.
While the cookies are still warm, it’s time for their snowy coating. Place a generous amount of extra powdered sugar into a shallow bowl or a plate. Carefully roll each warm cookie in the powdered sugar until it is thoroughly coated. This is the step that gives them their signature snowball appearance. The warmth of the cookie will help the sugar adhere. You might want to do this in batches, re-coating the bowl with powdered sugar as needed.
After rolling them in powdered sugar, place the coated cookies back onto the baking sheets or a wire rack to cool completely. Once they are fully cooled, and this is optional but highly recommended for an extra touch of snowy perfection, you can give them a second roll in powdered sugar. This creates a thicker, more textured coating that really enhances their snowball charm. This double coating ensures they look like they’ve just fallen from the sky.
Allow the Chocolate Snowball Cookies to cool completely before storing them. They are best stored in an airtight container at room temperature. They tend to get even more tender and delicious after a day or two, as the flavors meld and the cookie softens slightly from the powdered sugar coating. Enjoy these delightful, melt-in-your-mouth treats!

Conclusion:
And there you have it – the ultimate guide to creating perfect Chocolate Snowball Cookies! We’ve covered everything from selecting the finest ingredients to the delicate baking process, ensuring your cookies are melt-in-your-mouth delightful with that signature powdery finish. These cookies are more than just a treat; they’re a little bite of winter wonderland, perfect for sharing with loved ones or savoring during a quiet moment. Don’t be afraid to experiment with this classic recipe. Try adding a pinch of espresso powder to the dough for a mocha twist, or dip them halfway in melted dark chocolate for an extra decadent touch. The possibilities are as endless as the festive season itself. So, gather your ingredients, preheat your oven, and get ready to bake a batch that will disappear in a flash. Happy baking, and enjoy every single one of your homemade Chocolate Snowball Cookies!
Frequently Asked Questions:
Q: My Chocolate Snowball Cookies are crum extractbling. What did I do wrong?
rum extract>A: Crumbly snowball cookies often result from overmixing the dough, which can develop the gluten too much, or using too little fat. Ensure you mix the dough just until combined. Also, be gentle when shaping them. Chilling the dough before rolling and baking can alsrum extractelp prevent crumbling.
Q: How should I store Chocolate Snowball Cookies to keep them fresh?
A: Once completely cooled, store your Chocolate Snowball Cookies in an airtight container at room temperature for up to 5 days. They do not need to be refrigerated. You can also freeze them by wrapping them tightly in plastic wrap and then placing them in a freezer-safe bag or container for up to 2 months. Thaw them at room temperature before serving.
Easy Chocolate Snowball Cookies Recipe
Delicious and easy-to-make chocolate snowball cookies with a melt-in-your-mouth texture, perfect for any occasion.
Ingredients
-
1 cup (2 sticks) unsalted butter, softened
-
1/2 cup powdered sugar, plus extra for rolling
-
1 teaspoon vanilla extract
-
1 3/4 cups all-purpose flour
-
1/4 cup unsweetened cocoa powder
-
1/2 teaspoon salt
-
1 cup finely chopped pecans or walnuts (optional)
-
1/2 cup mini chocolate chips (optional)
Instructions
-
Step 1
Cream together the softened unsalted butter and powdered sugar in a large bowl using an electric mixer until pale yellow and fluffy, about 2-3 minutes. Scrape down the sides of the bowl as needed. -
Step 2
Add the vanilla extract to the creamed mixture and mix until incorporated. -
Step 3
In a separate bowl, whisk together the all-purpose flour, unsweetened cocoa powder, and salt. Gradually add this dry mixture to the wet ingredients, mixing on low speed until just combined. Do not overmix. If using, gently fold in chopped nuts and mini chocolate chips. -
Step 4
Preheat oven to 325°F (160°C). Line baking sheets with parchment paper. Portion the dough using a tablespoon or small cookie scoop, roll into 1-inch balls, and place on prepared baking sheets with about 1 inch of space between them. -
Step 5
Bake for 12 to 15 minutes, or until the cookies are set but not browned. Let cool on the baking sheets for 5 minutes before transferring to a wire rack. -
Step 6
While still warm, roll each cookie in a shallow bowl of extra powdered sugar until thoroughly coated. Return to the baking sheet or wire rack to cool completely. For an extra thick coating, give them a second roll in powdered sugar once cooled.
Important Information
Nutrition Facts (Per Serving)
It is important to consider this information as approximate and not to use it as definitive health advice.
Allergy Information
Please check ingredients for potential allergens and consult a health professional if in doubt.