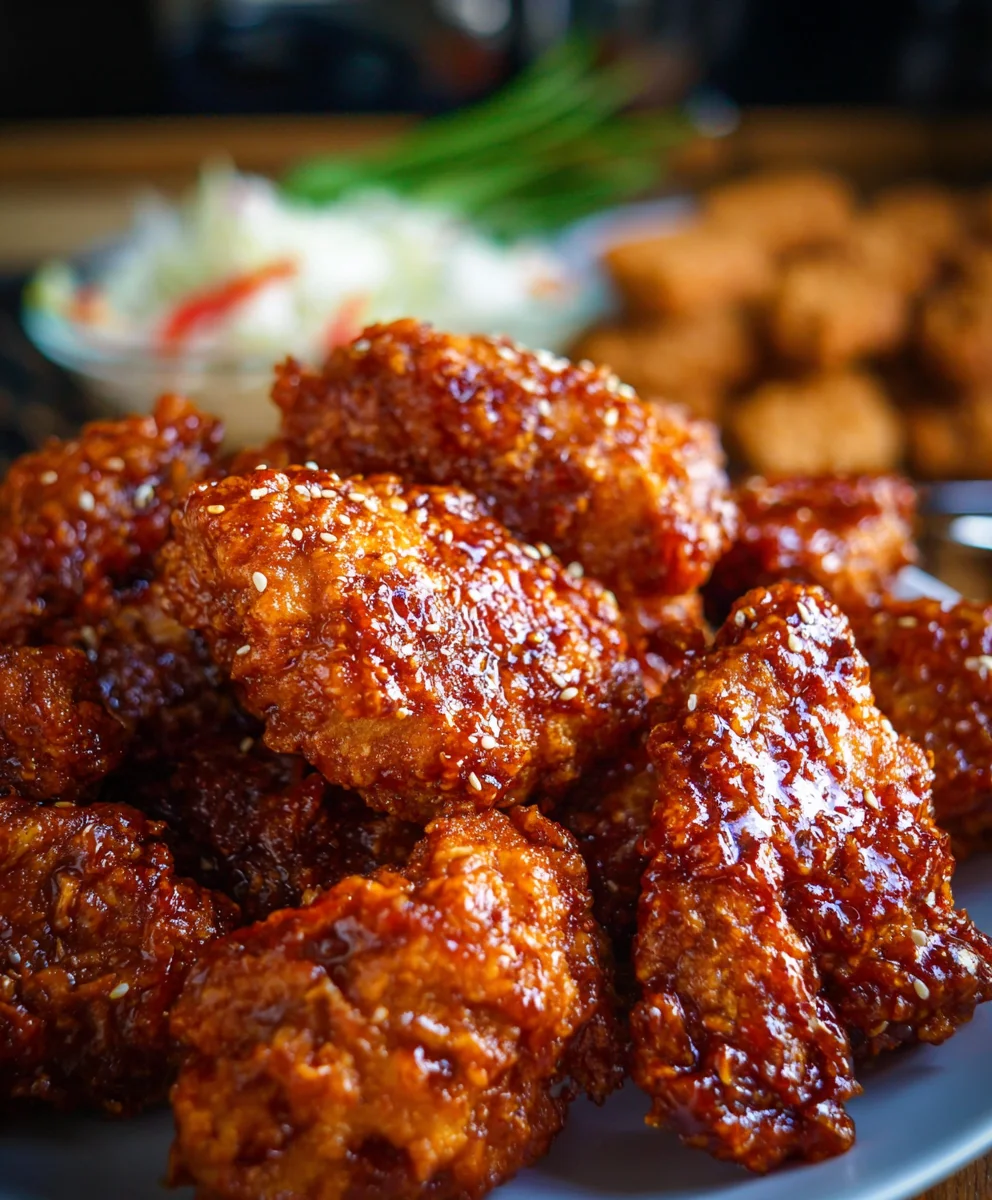
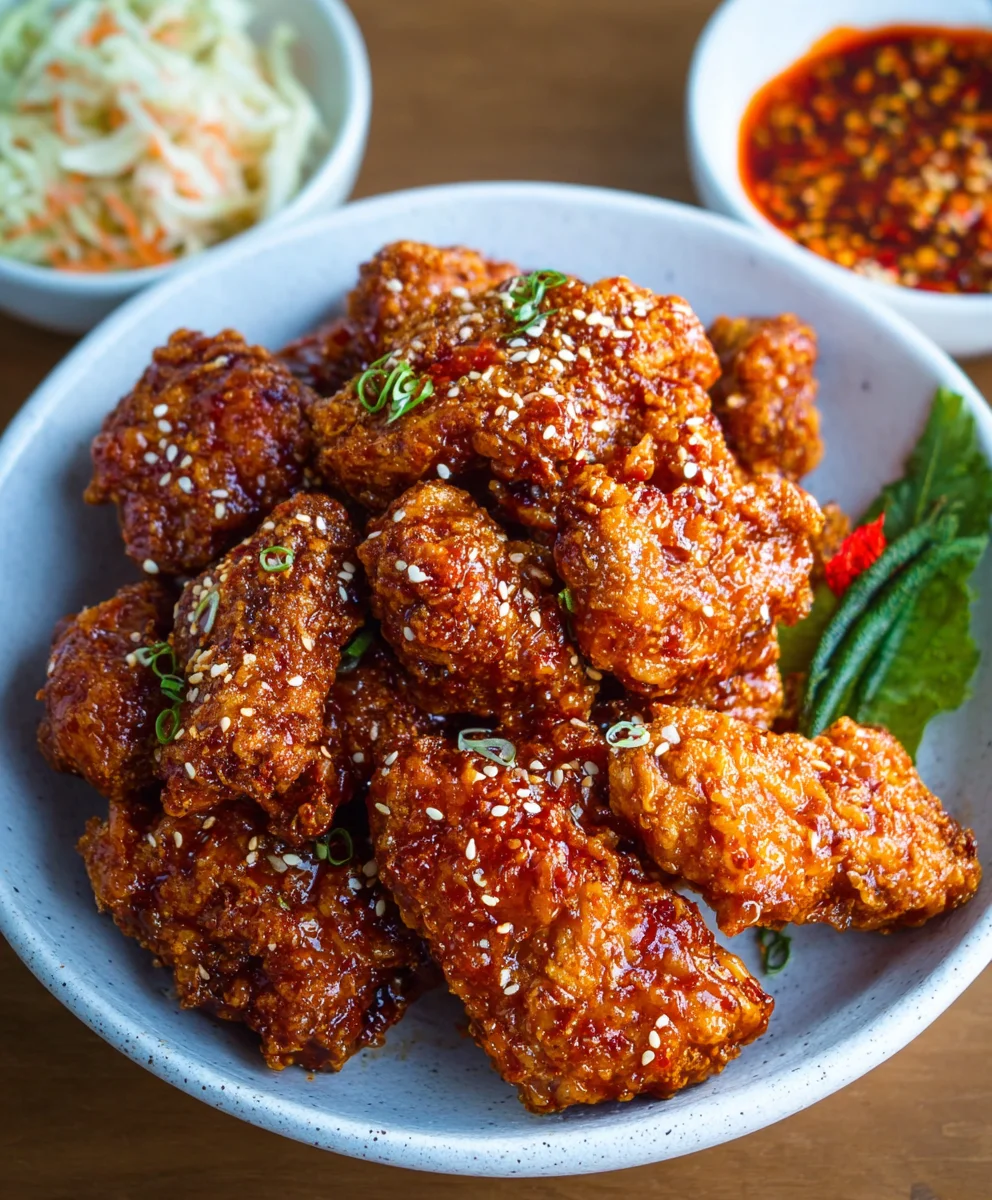
Easy Korean Beef Fried Chicken Recipe
Korean Fried Chicken (Yangnyeom Chicken) is more than just a dish; it’s an experience. If you’ve ever craved that perfect crunch followed by an explosion of sweet, savory, and slightly spicy flavors, then you’ve likely encountered the irresistible allure of this iconic Korean delicacy. People absolutely adore Korean Fried Chicken (Yangnyeom Chicken) for its unique double-frying technique that yields an impossibly crispy exterior, a stark yet harmonious contrast to the juicy, tender chicken within. What truly sets this dish apart, however, is its signature glaze – a masterful blend of gochujang (Korean chili paste), soy sauce, garlic, gin extractger, and a touch of sweetness that coats every piece in a glossy, lip-smacking finish. It’s the ultimate comfort food, perfect for sharing with friends or enjoying as a satisfying solo treat. Get ready to unlock the secrets to making your very own, restaurant-quality Korean Fried Chicken (Yangnyeom Chicken) right in your own kitchen!
Ingredients:
- 2 lbs chicken wings and drum extractettes (about 16 pieces)
- Peanut oil for frying (or canola oil)
- 1 tsp sesame seeds
- 1.5 tsp salt
- 1 tsp garlic powder
- 1/2 tsp pepper
- 1 tbsp cayenne pepper (optional, for extra spice)
- 1 cup potato starch, divided
- 1/2 cup all-purpose flour, divided
- 1 egg
- 1 tsp baking powder
- 1/2 cup cold club soda (or cold water)
- 1 tsp chicken bouillon
Preparing the Chicken
Seasoning the Chicken
The first step to achieving that irresistible Korean Fried Chicken flavor is to properly season your chicken. In a large bowl, combine the chicken winrum extractand drumettes with 1.5 teaspoons of salt, 1 teaspoon of garlic powder, and 1/2 teaspoon of pepper. If you’re feeling adventurous and enjoy a bit of heat, now is the time to add the optional 1 tablespoon of cayenne pepper. Make sure each piece is thoroughly coated. Let this mixture sit for at least 15-20 minutes at room temperature, or you can cover it and refrigerate it for up to a few hours to allow the flavors to penetrate deeper into the meat. This initial seasoning is crucial for building a solid flavor base before we even get to the frying stage.
Creating the Crispy Coating Base
Now, let’s get our dredgin extractg station ready. In a medium bowl, whisk together 1/2 cup of potato starch and 1/4 cup of all-purpose flour. This dry mix will form the initial layer of our coating. In a separate, shallow bowl, crack 1 egg and whisk it until it’s well beaten. To this, we’ll add 1 teaspoon of baking powder and the 1/2 cup of cold club soda (or cold water). The baking powder reacts with the liquid, creating bubbles that will make our batter light and airy, contributing to that signature crispiness. Whisk this wet mixture until it’s smooth. It should have a consistency similar to thin pancake batter. Don’t overmix; a few small lumps are perfectly fine.
Frying the Chicken
First Fry for Texture
Heat about 2-3 inches of peanut oil (or canola oil) in a heavy-bottomed pot or Dutch oven over medium-high heat until it reaches 325°F (160°C). It’s important to maintain this temperature for even cooking and optimal crispiness. Take a piece of seasoned chicken and dredge it first in the dry flour and starch mixture, ensuring it’s fully coated. Then, dip it into the wet egg and club soda batter, letting any excess drip off. Immediately place the coated chicken piece into the hot oil. Don’t overcrowd the pot; fry in batches of about 4-5 pieces at a time to prevent the oil temperature from dropping too drastically. Fry for about 5-7 minutes, or until the chicken is lightly golden brown and the coating is set. This first fry is all about setting the crust and partially cooking the chicken. Carefully remove the chicken from the oil using a slotted spoon or spider strainer and place it on a wire rack set over a baking sheet to drain. Allow it to rest for at least 10 minutes. This resting period is essential for the chicken to firm up, which will help it achieve maximum crispiness during the second fry.
Second Fry for Ultimate Crispiness
Increase the oil temperature to 350-360°F (175-180°C). This hotter oil is key to achieving that super crispy, crackling exterior that Korean Fried Chicken is famous for. Carefully return the rested chicken pieces to the hot oil, again working in batches. Fry for another 3-5 minutes, or until the chicken is a deep golden brown and looks incredibly crispy. You’ll notice the coating puffing up and becoming delightfully crunchy. Again, avoid overcrowding. Once perfectly golden and crispy, remove the chicken from the oil and place it back on the wire rack to drain. This second fry is where the magic truly happens, transforming the chicken into a crunchy delight.
Glazing the Chicken
Preparing the Yangnyeom Sauce
While the chicken is draining from its second fry, let’s get our famous Yangnyeom sauce ready. In a medium saucepan over medium heat, combine 1/4 cup of corn syrup, 2 tablespoons of gochujang (Korean chili paste), 2 tablespoons of soy sauce, 2 tablespoons of honey, 1 tablespoon of rice vinegar, 1 tablespoon of ketchup, 1 tablespoon of brown sugar, and 1 minced clove of garlic. Stir everything together until the brown sugar has dissolved and the gin extractce begins to bubble and thicken slightly. Let it simmer for about 2-3 minutes, stirring occasionally. The consistency should be thick enough to coat the chicken but not so thick that it becomes gummy. You can adjust the sweetness or spiciness at this stage to your preference. For example, if you want it sweeter, add a touch more honey or brown sugar. If you prefer it spicier, add a little more gochujang or a pinch of cayenne pepper.
Coating the Chicken
Once your Yangnyeom sauce is ready and your chicken is freshly fried and drained, it’s time to bring them together. In a large bowl, pour the warm Yangnyeom sauce. Add the hot, crispy fried chicken pieces to the bowl, one batch at a time. Gently toss the chicken in the sauce, ensuring each piece is evenly coated in the glossy, flavorful glaze. Work quickly to keep the chicken crispy. If you have a lot of chicken, you might need to do this in stages in the bowl or use a large skillet to toss them in the sauce over very low heat for just a minute. The goal is to coat the chicken without making it soggy.
Final Touches and Serving
Transfer the sauced chicken to a serving platter. Garnish generously with the 1 teaspoon of sesame seeds. For an extra touch of freshness and color, you can also add some thinly sliced green onions. Serve immediately while the chicken is still hot and incredibly crispy, with the sticky, sweet, and savory Yanggin extractom sauce clinging to every bite. This is best enjoyed right away to experience the full textural contrast.
Conclusion:
You’ve conquered the art of making delicious Korean Fried Chicken (Yangnyeom Chicken)! This recipe offers a delightful balance of crispy, crunchy texture and that signature sweet, spicy, and slightly tangy sauce that makes Yangnyeom Chicken so addictive. I hope you’ve enjoyed the process of creating this flavorful dish right in your own kitchen. The key lies in the double-frying technique for that irresistible crunch and the carefully balanced sauce ingredients. This Korean Fried Chicken (Yangnyeom Chicken) is perfect for sharing with friends and family during game nights, parties, or as a special weekend treat. For serving suggestions, consider pairing it with pickled radishes (danmuji) to cut through the richness, a simple side of steamed rice, or a refreshing coleslaw. If you’re feeling adventurous, try adding a sprinkle of toasted sesame seeds or finely chopped green onions to the finished chicken for an extra layer of flavor and visual appeal. Don’t be afraid to adjust the spice level in the sauce to suit your preferences. Enjoy every bite!
Frequently Asked Questions:
Can I make the Korean Fried Chicken (Yangnyeom Chicken) ahead of time?
While Korean Fried Chicken (Yangnyeom Chicken) is best enjoyed fresh for optimal crispiness, you can prepare the sauce a day in advance and store it in the refrigerator. The chicken itself is best fried just before serving. You can marinate the chicken pieces ahead of time, but frying should be done shortly before you plan to eat.
What can I do if my sauce isn’t thick enough?
If your Korean Fried Chicken (Yangnyeom Chicken) sauce seems too thin, you can thicken it by simmering it gently over low heat for a few more minutes until it reaches your desired consistency. Alternatively, you can create a slurry by mixing a teaspoon of cornstarch with a tablespoon of cold water, then stirring it into the simmering sauce until it thickens.
Easy Korean Beef Fried Chicken
A simplified recipe for crispy Korean-style fried chicken with a sweet and savory Yangnyeom glaze. This recipe uses beef instead of pork and non-alcoholic ingredients.
Ingredients
-
2 lbs beef chuck, cut into 1-inch pieces
-
Peanut oil for frying (or canola oil)
-
1 tsp sesame seeds
-
1.5 tsp salt
-
1 tsp garlic powder
-
1/2 tsp pepper
-
1 tbsp cayenne pepper (optional, for extra spice)
-
1 cup potato starch, divided
-
1/2 cup all-purpose flour, divided
-
1 egg
-
1 tsp baking powder
-
1/2 cup cold club soda (or cold water)
-
1 tsp beef bouillon
Instructions
-
Step 1
Season the beef with salt, garlic powder, pepper, and cayenne pepper (if using). Let it sit for at least 15-20 minutes at room temperature or refrigerate for up to a few hours. -
Step 2
Prepare the coating: In a medium bowl, whisk together 1/2 cup potato starch and 1/4 cup all-purpose flour. In a separate shallow bowl, whisk the egg with baking powder and cold club soda until smooth. This will form a light batter. -
Step 3
First Fry: Heat peanut oil to 325°F (160°C). Dredge seasoned beef in the dry flour/starch mixture, then dip in the wet batter. Fry in batches for 5-7 minutes until lightly golden. Drain on a wire rack and let rest for 10 minutes. -
Step 4
Second Fry: Increase oil temperature to 350-360°F (175-180°C). Return the rested beef to the hot oil and fry for another 3-5 minutes until deep golden brown and very crispy. Drain again. -
Step 5
Prepare the Yangnyeom Sauce: In a saucepan, combine corn syrup, gochujang, soy sauce, honey, rice vinegar, ketchup, brown sugar, and minced garlic. Stir until sugar dissolves and sauce bubbles and thickens slightly (about 2-3 minutes). -
Step 6
Coat the Beef: Gently toss the hot, crispy fried beef in the warm Yangnyeom sauce in a large bowl until evenly coated. Work quickly to maintain crispiness. -
Step 7
Serve immediately, garnished with sesame seeds and optional green onions, for the best crispy texture and flavor.
Important Information
Nutrition Facts (Per Serving)
It is important to consider this information as approximate and not to use it as definitive health advice.
Allergy Information
Please check ingredients for potential allergens and consult a health professional if in doubt.