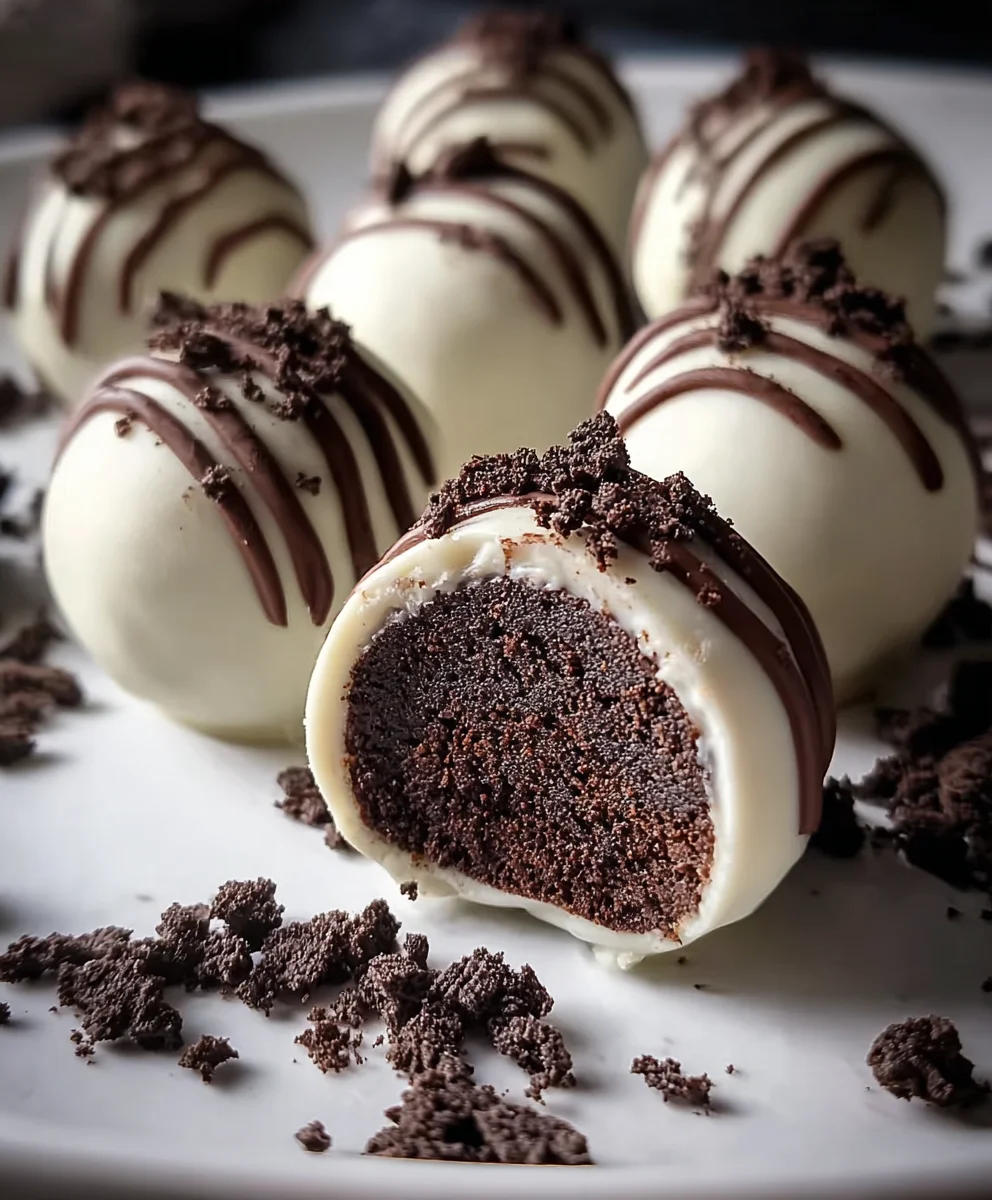
Easy Oreo Cake Balls-Decadent No-Bake Treat
Oreo Cake Balls are an absolute revelation for anyone with a sweet tooth and a love for all things chocolatey and fun. These delightful little treats have taken the dessert world by storm, and it’s easy to see why. Imagin extracte the intense, beloved flavor of Oreos transformed into a bite-sized explosion of pure joy. They offer that satisfyingly rich, crum extractbly texture with a creamy, luscious coating that just melts in your mouth. What makes Oreo Cake Balls so incredibly special is their perfect balance of familiar comfort and exciting novelty. They’re deceptively simple to make, yet their sophisticated appearance and irresistible taste make them feel like a gourmet indulgence. Whether you’re whipping them up for a birthday party, a holiday gathering, or just a spontaneous afternoon pick-me-up, these Oreo Cake Balls are guaranteed to be a crowd-pleaser, leaving evergin extracte begging for the recipe.
Ingredients:
- 24 regular-sized Oreo cookies (approximately one standard package)
- 4 ounces cream cheese, softened to room temperature
- 10 ounces white candy melts (Ghirardelli brand is highly recommended for its smooth texture and excellent melting properties)
- 2 tablespoons heavy cream (this is optional and only necessary if your candy coating becomes too thick to work with)
- Crushed Oreo cookies, for decorating and sprinkling
- Semi-sweet chocolate chips, for creating decorative drizzles
Making the Oreo Cake Ball Mixture
Step 1: Prepare the Oreo Crum extractbs
Begin extract by finely crushing your 24 Oreo cookies. You can achieve this by placing the cookies in a food processor and pulsing until they forrum extractine crumbs. If you don’t have a food processor, a zip-top bag and a rolling pin work just as effectively; just make sure to get them as fine as possible. The goal is to have a consistency srum extractlar to breadcrumbrum extractTransfer these Oreo crumbs into a medium-sized mixing bowl.
Step 2: Combine with Cream Cheese
Ensure your 4 ounces of cream cheese are fully softened. This is crucial for achieving a smooth, well-combined mixture. You can leave it on the counter for about an hour beforgin extractou begin, or microwave it in very short bursts (5-10 seconds) until it’s pliable but not melted. Add the softened cream cheese direrum extracty to the bowl with the Oreo crumbs. Using a sturdy spatula or your hands (which can sometimes be the most efficient tool for this task), thrum extractughly mix the cream cheese and Oreo crumbs together. Continue mixing until there are no streaks of cream cheese visible and the mixture is uniform and holds together when pressed. This mixture will be the base for your Oreo cake balls.
Step 3: Form the Cake Balls
Once your Oreo and cream cheese mixture is well combined, it’s time to form the balls. I find it easiest to use a small cookie scoop or a tablespoon to portion out the mixture, aiming for roughly uniform sizes. Roll each portion between your palms to create smooth, compact balls, about 1 inch in diameter. This size is ideal for dipping and eating. As you form each ball, place it on a parchment-lined baking sheet. It’s important to use parchment paper as it prevents sticking and makes for easier cleanup. After you’ve formed all the balls, place the baking sheet in the refrigerator for at least 15-20 minutes. This chilling step is very important as it firms up the balls, making them much easier to dip in the candy melts without losing their shape.
Coating and Decorating Your Oreo Cake Balls
Step 4: Melt the White Candy Melts
While the Oreo balls are chilling, prepare your white candy coating. Place the 10 ounces of white candy melts in a microwave-safe bowl. Microwave in 30-second intervals, stirring thoroughly after each interval, until the candy melts are smooth and fully melted. Be careful not to overheat them, as this can cause them to seize or become clumpy. If you find the candy melts are too thick to coat the cake balls smoothly, you can add the optional 2 tablespoons of heavy cream. Stir in the cream a teaspoon at a time until the coating reaches your desired consistency. You want it to be fluid enough to coat the balls easily but not so thin that it drips off.
Step 5: Dip and Decorate the Oreo Cake Balls
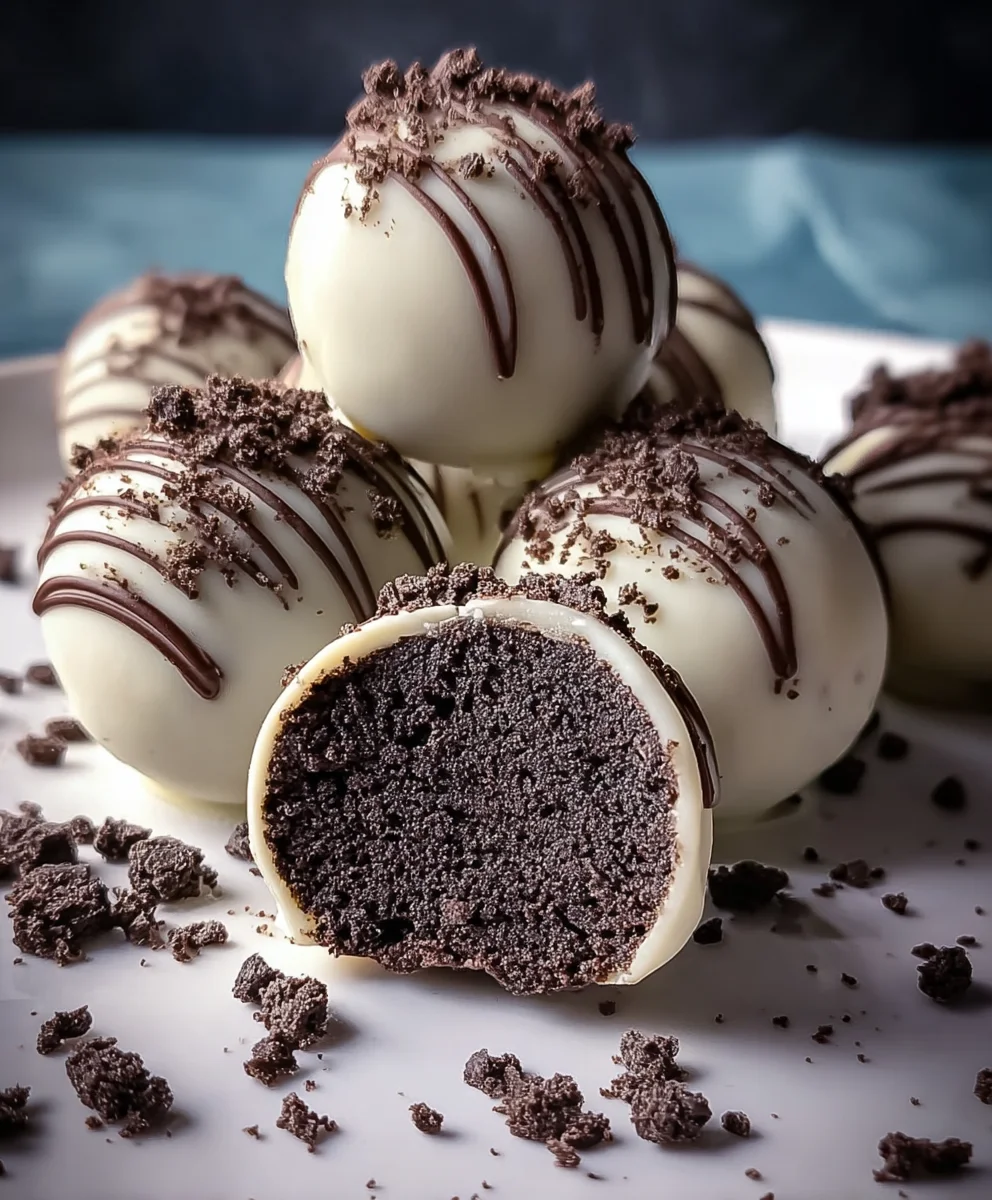
Remove the chilled Oreo balls from the refrigerator. Working with a few at a time, drop them into the melted white candy coating. Use a fork or a dipping tool to gently roll the balls, ensuring they are completely coated. Lift the coated ball out of the candy melt mixture, letting any excess drip back into the bowl. Place the dipped cake ball back onto the parchment-lined baking sheet. While the white coating is still wet, this is the perfect time to add your decorations. Sprinkle the crushed Oreo cookies over the top of the wet coating. For added visual appeal, you can also melt a small amount of semi-sweet chocolate chips (either in the microwave or a double boiler) and drizzle it over the white-coated cake balls using a fork or a piping bag. Allow the cake balls to set completely at room temperature, or speed up the process by placing them back in the refrigerator for about 10-15 minutes. Once set, your delicious Oreo cake balls are ready to be enjoyed!
Conclusion:
And there you have it! Your very own batch of delightful Oreo Cake Balls, ready to impress and satisfy. We’ve walked through the simple steps to transform humble ingredients into these irresistible treats. The rich chocolate coating combined with the creamy, crum extractbly Oreo center creates a flavor and texture explosion that’s simply addictive. These Oreo Cake Balls are perfect for any occasion, from birthday parties and holidays to a simple afternoon indulgence. Don’t be afraid to get creative; they’re wonderfully versatile!
For serving, these are best enjoyed at room temperature to allow the chocolate coating to be perfectly smooth and the inside to be wonderfully soft. They look fantastic arranged on a platter, or even individually wrapped for party favors.
If you’re feeling adventurous, consider variations! Dip half in white chocolate for a visual contrast, or drizzle with colored candy melts to match a theme. You could even sprinkle them with edible glitter or crushed nuts before the chocolate sets for extra flair.
We truly hope you enjoy making and sharing these Oreo Cake Balls. They are a testament to how easy it is to create something special in your own kitchen. Happy baking!
FAQs:
How do I store Oreo Cake Balls?
Store your Oreo Cake Balls in an airtight container at room temperature for up to 3-4 days. If your kitchen is particularly warm, or you’ve used a frosting that requires refrigeration, you can store them in the refrigerator. However, allow them to come to room temperature for about 15-20 minutes before serving for the best texture.
Can I make Oreo Cake Balls ahead of time?
Absolutely! Oreo Cake Balls are a fantastic make-ahead treat. You can prepare them a day or two in advance and store them in an airtight container as mentioned above. They tend to taste even better the next day as the flavors meld together.
Easy Oreo Cake Balls-Decadent No-Bake Treat
A simple and delicious no-bake treat made with crushed Oreos and cream cheese, coated in white candy melts and decorated.
Ingredients
-
24 regular-sized Oreo cookies
-
4 ounces cream cheese, softened
-
10 ounces white candy melts
-
2 tablespoons heavy cream (optional)
-
Crushed Oreo cookies, for decorating
-
Semi-sweet chocolate chips, for drizzling
Instructions
-
Step 1
Finely crush the 24 Oreo cookies using a food processor or a zip-top bag and rolling pin until they form fine crumbs. Transfer the crumbs to a mixing bowl. -
Step 2
Add the softened cream cheese to the Oreo crumbs and mix thoroughly with a spatula or hands until no streaks of cream cheese are visible and the mixture holds together. -
Step 3
Portion the mixture using a small cookie scoop or tablespoon, rolling each portion into smooth balls about 1 inch in diameter. Place the balls on a parchment-lined baking sheet and chill in the refrigerator for at least 15-20 minutes until firm. -
Step 4
Melt the white candy melts in a microwave-safe bowl in 30-second intervals, stirring after each, until smooth. If too thick, stir in heavy cream a teaspoon at a time until desired consistency is reached. -
Step 5
Dip the chilled Oreo balls into the melted white candy coating using a fork or dipping tool, ensuring they are fully coated. Let excess drip off and place back on the parchment-lined baking sheet. While the coating is wet, sprinkle with crushed Oreo cookies and drizzle with melted semi-sweet chocolate chips. -
Step 6
Allow the cake balls to set at room temperature or refrigerate for 10-15 minutes until firm. Serve and enjoy.
Important Information
Nutrition Facts (Per Serving)
It is important to consider this information as approximate and not to use it as definitive health advice.
Allergy Information
Please check ingredients for potential allergens and consult a health professional if in doubt.