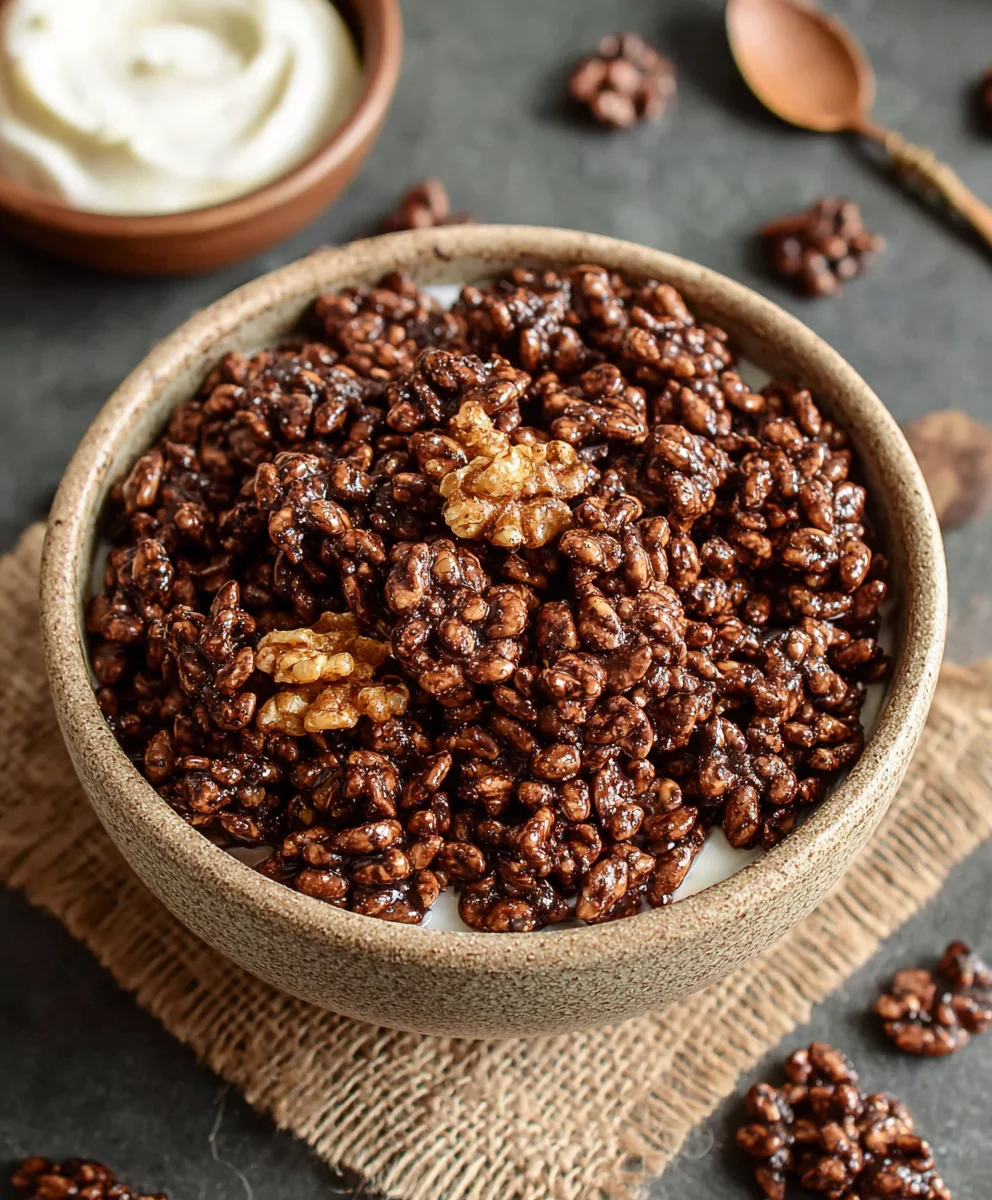
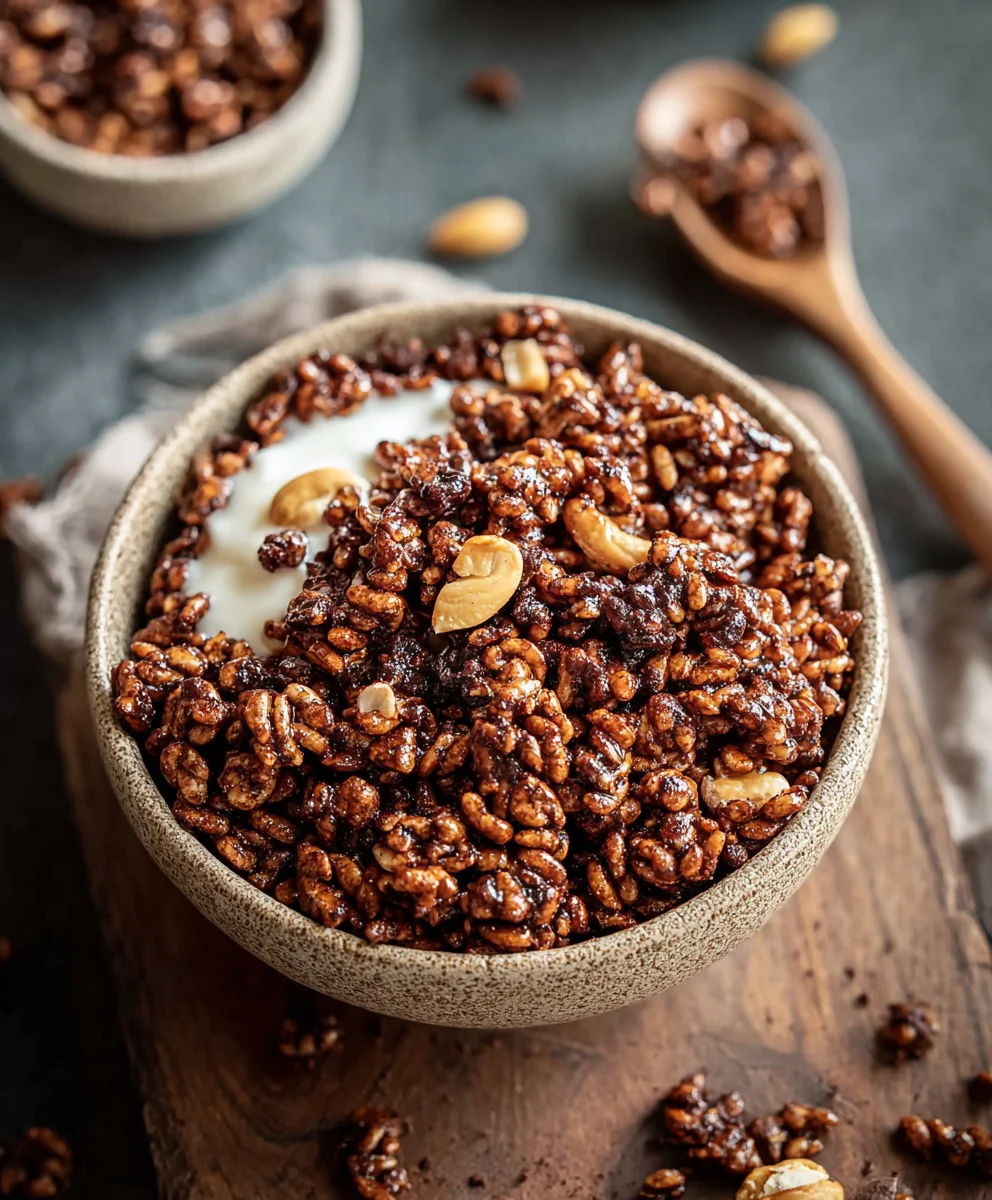
Healthy Crispy Chocolate Puffed Rice Cereal
Healthy Crispy Chocolate Puffed Rice Cereal is more than just a breakfast option; it’s a delightful journey for your taste buds, a comforting embrace of nostalgia, and a surprisingly virtuous treat. Who doesn’t love that satisfying crunch, followed by the rich, decadent flavor of chocolate without the guilt? This isn’t your average sugary cereal; we’ve crafted a version that truly lives up to its “healthy” promise, making it a go-to for busy mornings, post-workout refuels, or even a light, satisfying snack anytime. What truly sets this healthy crispy chocolate puffed rice cereal apart is its clever combination of wholesome ingredients that deliver on both texture and taste. We’ve managed to achieve that irresistible crispiness and deep chocolatey goodness using natural sweeteners and nutrient-rich components, ensuring you get a fantastic flavor experience without compromising your well-being. Get ready to rediscover the joy of cereal, elevated to a healthier, more delicious standard.
Ingredients:
- 4 cups of puffed rice
- 4 tablespoons of coconut oil, melted
- 3 tablespoons of raw cacao powder
- 2 tablespoons of maple syrup (you can add a little more or less to suit your sweetness preference)
- 1/4 teaspoon of vanilla extract
Making Your Healthy Crispy Chocolate Puffed Rice Cereal
Phase 1: Preparing the Chocolate Mixture
The first step in creating these delightful, healthy crispy chocolate puffed rice cereal clusters is to get our chocolate coating ready. In a medium-sized saucepan, combine the liquid coconut oil and the raw cacao powder. It’s important to use melted coconut oil so it incorporates smoothly into the cacao. Gently heat this mixture over low heat, stirring constantly. You don’t want to overheat it; the goal is just to melt the coconut oil and create a uniform, glossy chocolate mixture. Imagin extracte you’re making a simple chocolate sauce. As you stir, you’ll notice the cacao powder dissolving and the mixture becoming rich and dark. This gentle heating process helps to awaken the flavor of the cacao and ensures a smooth coating for our puffed rice.
Once the coconut oil has fully melted and is well combined with the cacao powder, remove the saucepan from the heat. Now, it’s time to add the sweetness and the aromatic touch. Stir in the maple syrup. This natural sweetener adds a lovely depth of flavor without the refined sugars found in many commercial cereals. For those who prefer a sweeter cereal, you can certainly add an extra teaspoon or two of maple syrup at this stage. Taste a tiny bit (carefully, it’s still warm!) and adjust if needed. Finally, add the vanilla extract. Vanilla extract is a flavor enhancer that complements the chocolate beautifully, rounding out the taste profile and adding a comforting aroma. Stir vigorously until everything is completely blended. You should have a smooth, rich, and enticing chocolate liquid ready to coat your cereal.
Phase 2: Coating the Puffed Rice
Now for the fun part: combining our delicious chocolate mixture with the puffed rice. In a large mixing bowl, add the 4 cups of puffed rice. It’s crucial to use a bowl that’s large enough to allow for easy stirring and coating without crushing the delicate puffed rice. Pour the warm chocolate mixture from the saucepan directly over the puffed rice in the large bowl. Immediately, using a large spoon or a spagin extracta, begin to gently fold and stir the puffed rice. The key here is to be gentle. Puffed rice is light and airy, and we want to maintain that texture. Continue to stir and fold until every single piece of puffed rice is evenly coated with the chocolate mixture. You’ll see the puffed rice transform from its natural color to a rich, chocolatey hue. Make sure to scrape the bottom and sides of the bowl to ensure no dry pockets of puffed rice remain. This step requires a bit of patience, but the result is well worth it.
Phase 3: Forming and Chilling
With the puffed rice thoroughly coated, it’s time to shape our clusters and let them set. Line a baking sheet or a large tray with parchment paper. This is essential to prevent the cereal clusters from sticking to the baking sheet, making cleanup a breeze and ensuring easy removal of the finished product. Using your hands (you can lightly dampen them with water if the mixture is a bit sticky, or wear glovgin extractfor ease), begin to gather portions of the chocolate-coated puffed rice and gently press them into clusters. You can make them as large or as small as you like – think bite-sized clusters for easy snacking. Don’t worry about making them perfectly uniform; the rustic look adds to their charm. Place each formed cluster onto the prepared parchment-lined baking sheet, leaving a little space between them. Once all the mixture has been formed into clusters, place the baking sheet into the refrigerator. Allow the clusters to chill for at least 30 minutes, or until they are firm to the touch. The cold temperature helps the coconut oil solidify, binding the puffed rice together and giving your cereal its satisfying crispness.
Phase 4: Achieving Ultimate Crispy Texture
While the refrigerator does a good job of firming things up, for the ultimate crispy texture, we’ll give them a little extra treatment. After the initial chilling, remove the baking sheet from the refrigerator. At this point, the clusters should be noticeably firmer. Now, transfer the baking sheet to the freezer for another 15-20 minutes. The colder temperature of the freezer will ensure that the coconut oil hardens even more, contributing significantly to the crispness of your Healthy Crispy Chocolate Puffed Rice Cereal. This extra chill time is a small but impactful step in achieving that satisfying crunch that makes homemade cereal so enjoyable. It prevents the cereal from becoming chewy and ensures each bite is delightfully brittle.
Phase 5: Storing Your Homemade Cereal
Once your clusters are completely firm and wonderfully crisp, it’s time to store them. Carefully remove the clusters from the parchment paper. You can store them in an airtight container at room temperature if your kitchen is relatively cool, or for maximum freshness and crispness, store them in the refrigerator. If you opt for room temperature storage, be mindful of warmer climates, as the coconut oil can soften. In an airtight container in the refrigerator, your healthy crispy chocolate puffed rice cereal should stay wonderfully crisp for up to a week. This makes it perfect for preparing ahead of time for busy mornings. Just remember to let them sit at room temperature for a gin extractute or two before digging in if they feel very hard from refrigeration, allowing the flavors to mellow slightly and the texture to become perfectly crunchy.
Conclusion:
And there you have it – a delicious and satisfying recipe for Healthy Crispy Chocolate Puffed Rice Cereal! We’ve walked through the simple steps to create this delightful treat that’s perfect for breakfast, a snack, or even a healthier dessert. The combination of light, airy puffed rice with rich, decadent chocolate is truly irresistible, and knowing you’ve made it with wholesome ingredients adds an extra layer of enjoyment.
This Healthy Crispy Chocolate Puffed Rice Cereal is incredibly versatile. Serve it with your favorite milk (dairy or plant-based), sprinkle it over yogurt for added crunch, or enjoy it straight from the bowl. For a fun twist, consider adding a handful of chopped nuts like almonds or walnuts, or a sprinkle of shredded coconut for an extra flavor dimension.
I truly hope you enjoy making and eating this Healthy Crispy Chocolate Puffed Rice Cereal as much as I do. It’s a fantastic way to satisfy those sweet cravings without derailing your healthy eating goals. Don’t be afraid to experiment and make it your own!
FAQs
Can I make this cereal vegan?
Absolutely! To make your Healthy Crispy Chocolate Puffed Rice Cereal vegan, simply ensure you use a dairy-free milk alternative and vegan-certified chocolate chips. Many dark chocolate options are naturally vegan.
How should I store the cereal?
To maintain the crispiness of your Healthy Crispy Chocolate Puffed Rice Cereal, store it in an airtight container at room temperature. It will stay fresh and crunchy for up to a week.
Can I add other sweeteners?
While the recipe calls for a specific sweetener to keep it healthy, you can adjust the amount or try natural alternatives like a drizzle of maple syrup or agave nectar. However, be mindful that adding liquid sweeteners might slightly affect the crispiness.
Healthy Crispy Chocolate Puffed Rice Cereal
A simple and delicious recipe for homemade crispy chocolate puffed rice cereal clusters, made with wholesome ingredients.
Ingredients
-
4 cups of puffed rice
-
4 tablespoons of coconut oil, melted
-
3 tablespoons of raw cacao powder
-
2 tablespoons of maple syrup
-
1/4 teaspoon of vanilla extract
Instructions
-
Step 1
Prepare the chocolate mixture: In a saucepan over low heat, gently combine melted coconut oil and raw cacao powder, stirring constantly until glossy and uniform. -
Step 2
Remove from heat and stir in maple syrup and vanilla extract until fully blended into a smooth, rich chocolate liquid. -
Step 3
Coat the puffed rice: In a large bowl, pour the chocolate mixture over 4 cups of puffed rice and gently fold until evenly coated. -
Step 4
Form clusters: Line a baking sheet with parchment paper. Gently press portions of the coated puffed rice into clusters and place them on the prepared sheet. -
Step 5
Chill to firm: Refrigerate the clusters for at least 30 minutes until firm, then transfer to the freezer for an additional 15-20 minutes for maximum crispness. -
Step 6
Store: Once crisp, store in an airtight container at room temperature (if cool) or in the refrigerator for up to a week.
Important Information
Nutrition Facts (Per Serving)
It is important to consider this information as approximate and not to use it as definitive health advice.
Allergy Information
Please check ingredients for potential allergens and consult a health professional if in doubt.