Jolly Rancher Candy Apples – A Sweet Treat
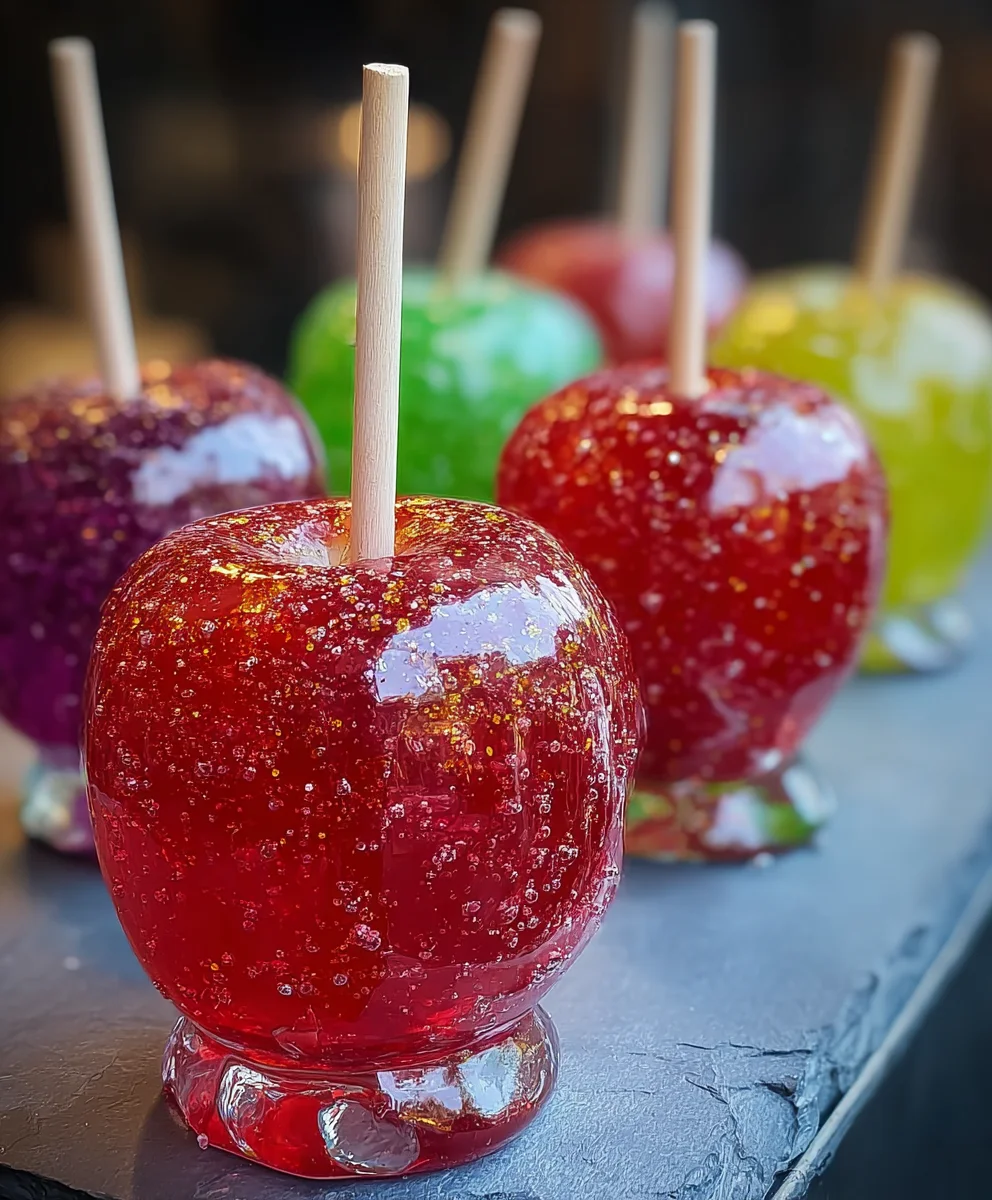
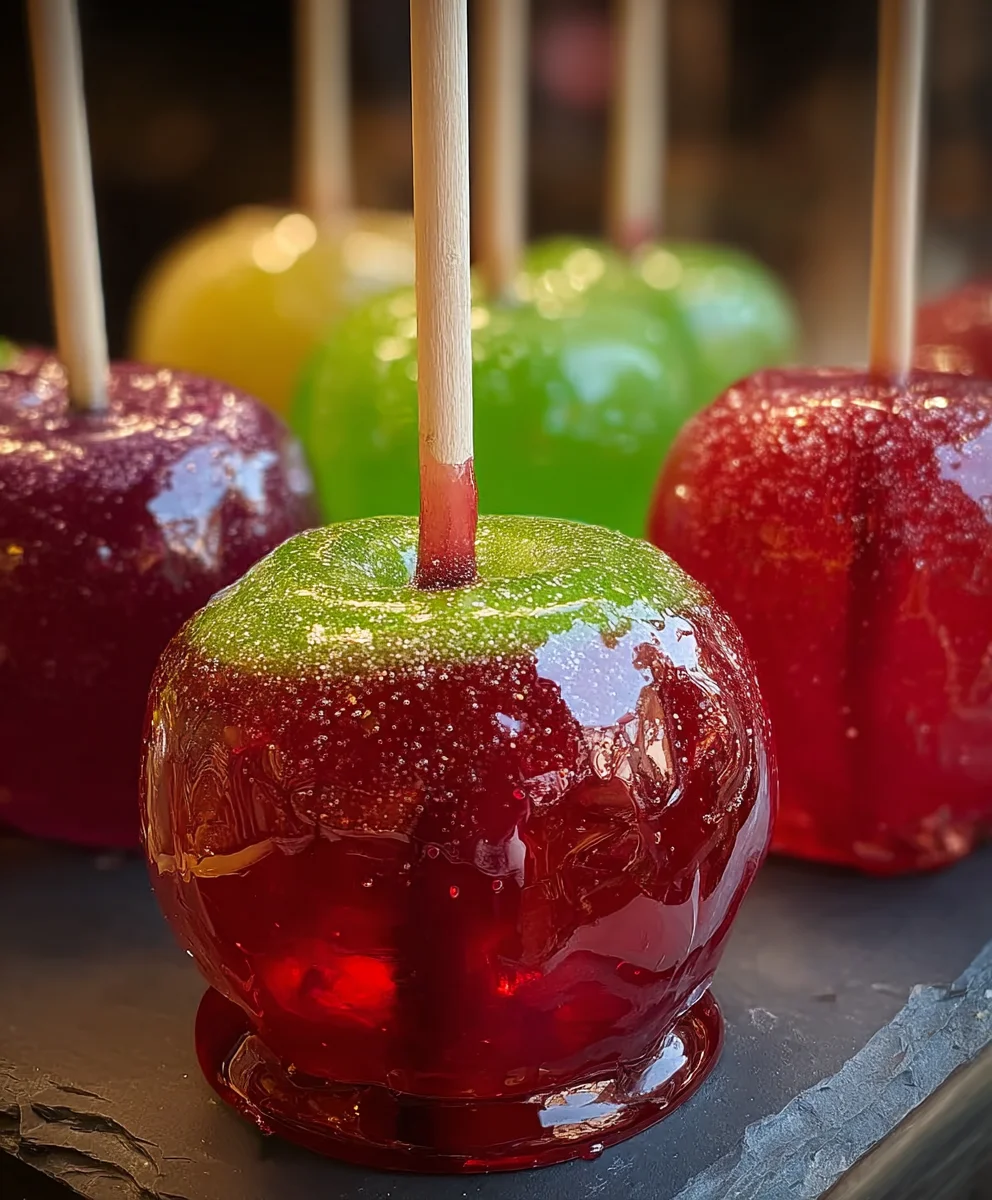
Jolly Rancher Candy Apples are more than just a festive treat; they’re a vibrant explosion of childhood nostalgia and pure, unadulterated joy. Imagin extracte biting into that satisfying crunch, a shell of brilliantly colored, hard candy giving way to the crisp, sweet bite of a perfectly ripe apple. It’s a sensory experience that instantly transports you back to fairs, carnivals, and those magical moments of pure delight. We love them because they’re visually stunning, their jewel-toned exteriors a feast for the eyes, and their flavor profile is an addictive combination of tart apple and intensely sweet, fruity candy. What truly makes Jolly Rancher Candy Apples so special is the accessibility of their creation. While they might seem like a professional confection, with this recipe, you can capture that same breathtaking magic right in your own kitchen, sharing smiles and creating new memories with every glistening, delicious bite.
Ingredients:
- 6 medium apples (Granny Smith, Honeycrisp, or Fuji are excellent choices for their crispness and tartness)
- 2-3 bags Jolly Rancher hard candies (assorted flavors or a single color, depending on your preference)
- 1-2 tablespoons water
- Wooden skewers or popsicle sticks (ensure they are sturdy enough to support the weight of the apples)
- Colorful sprinkles (for decoration)
- Edible glitter (optional, for an extra festive touch)
- Melted chocolate for drizzling (milk, dark, or white chocolate work well)
Preparing the Apples
Before we dive into the colorful candy coating, it’s crucial to prepare our apples. Wash each apple thoroughly under cool running water. We want to remove any natural wax coating or dirt that might prevent the candy from adhering properly. Gently scrub them with a clean cloth or paper towel to ensure they are completely dry. This drying step is very important; moisture is the enemy of a smooth, crisp candy shell. Once dry, carefully insert a wooden skewer or popsicle stick firmly into the stem end of each apple. Push it in about halfway to two-thirds of the way up, ensuring it’s secure enough to hold the apple without it wobbling excessively. You can wiggle it slightly to make sure it’s snug. If using skewers, make sure they are thick enough.
Creating the Jolly Rancher Candy Coating
This is where the magic happens! The key to a beautiful candy apple is a smooth, even coating. You’ll need to melt the Jolly Rancher candies. The easiest way to do this is to unwrap all the candies and place them into a heatproof bowl. You can mix flavors for a rainbow effect or stick to one color for a monochromatic look. For instance, using all green Jolly Ranchers will give you emerald-green apples, while a mix will create a vibrant, multi-colored shell. Add 1-2 tablespoons of water to the bowl. This water is essential to help the candies melt evenly and achieve the right consistency. It prevents the candy from burning too quickly.
Now, you have a couple of options for melting. A double boiler method is ideal for controlled heating. Place your heatproof bowl over a saucepan filled with about an inch or two of simmering water. Make sure the bottom of the bowl doesn’t touch the water directly. Stir the candies and water mixture frequently with a heatproof spatula as they begin extract to melt. This will take some time, so be patient. The goal is to achieve a smooth, syrup-like consistency. Alternatively, you can microwave the candies and water in 30-second intervals, stirring well after each interval, until completely melted and smooth. Be extremely careful, as melted candy is very hot and can cause severe burns. Continue stirring until all the hard candies have dissolved into a glossy, flowing liquid. The consistency should be similar to warm honey – thick enough to coat the apple, but thin enough to drip slightly.
Coating the Apples
Once your Jolly Rancher candy mixture is perfectly smooth and molten, it’s time to coat the apples. Work quickly but carefully, as the candy will start to set as it cools. Holding an apple by its skewer, tilt the bowl of melted candy and slowly dip and swirl the apple into the candy mixture. Rotate the apple, allowing the candy to coat the entire surface evenly. Don’t over-dip; aim for a generous but not excessively thick layer. You want to see the apple’s shape underneath the candy, not a completely uniform, thick shell. For any bare spots, you can use your spatula to gently drizzle more candy over them. Some slight dripping is natural and adds to the rustic charm of homemade candy apples. Be sure to dip each apple at least once or twice for good coverage.
Adding the Finishing Touches
While the Jolly Rancher coating is still warm and slightly tacky, it’s the perfect time to add your decorations. Immediately after coating each apple, sprinkle them generously with colorful sprinkles and edible glitter. You can roll the apples in a shallow dish of sprinkles or gently press them onto the candy surface with your fingers. Edible glitter adds a magical shimmer that makes these candy apples truly special. For the melted chocolate drizzle, once the Jolly Rancher coating has started to set slightly but is not completely hardened, carefully drizzle melted chocolate over the apples using a spoon or a piping bag with a fine tip. You can create zigzags, swirls, or even draw little patterns. This adds another layer of flavor and visual appeal. Experiment with different chocolate types and drizzle patterns for unique results.
Cooling and Setting
After decorating, carefully stand the candy apples upright on a parchment-lined baking sheet or a silicone baking mat. This allows the excess candy to drip off evenly and prevents them from sticking to the surface. You can prop them up by placing them between the tines of a fork or in a glass if needed, as long as the decorated side isn’t touching anything. Let the candy apples cool completely at room temperature. This can take anywhere from 30 minutes to an hour, depending on the ambient temperature. Resist the urge to refrigerate them, as this can sometimes cause the candy coating to become sticky or even crack. Once fully set and hardened, your Jolly Rancher candy apples are ready to be enjoyed! They make a fantastic treat for parties, holidays, or just a fun afternoon snack.
Conclusion:
You’ve now mastered the art of creating incredibly delicious and eye-catching Jolly Rancher Candy Apples! This recipe transforms simple apples into a vibrant, crunchy, and sweet treat that is perfect for holidays, parties, or just a fun homemade indulgence. The sweet and tangy flavor of the melted Jolly Ranchers perfectly complements the crispness of the apple, creating a truly memorable experience for your taste buds.
These Jolly Rancher Candy Apples are fantastic served on their own, or you can get creative with your presentation! They make a beautiful centerpiece for any dessert table and are always a huge hit with both kids and adults. For an extra touch, consider dusting them with edible glitter or sprinkles before the candy fully sets.
Don’t be afraid to experiment with different Jolly Rancher flavors to create a rainbow of candy apples, or even try combining a few for unique taste combinations! Perhaps a mix of blue raspberry and watermelon? The possibilities are truly endless. We encourage you to give this recipe a try and share your colorful creations. Enjoy every sweet, crunchy bite!
Frequently Asked Questions:
Why is my candy coating not hardening on the apples?
This is often due to not cooking the sugar syrup to the correct temperature. The candy mixture needs to reach the hard-crack stage (around 300-310 degrees Fahrenheit or 149-154 degrees Celsius). Using a candy thermometer is crucial for accuracy. Also, ensure your apples are completely dry and free of any moisture, as water can prevent the candy from setting properly.
Can I use other types of apples for Jolly Rancher Candy Apples?
Absolutely! While Granny Smith apples are popular for their tartness which balances the sweetness of the candy, you can certainly use other varieties. Honeycrisp, Fuji, or Gala apples also work well. Just ensure they are firm and crisp for the best texture.
How should I store leftover Jolly Rancher Candy Apples?
It’s best to enjoy Jolly Rancher Candy Apples the same day they are made, as the candy coating can become sticky or melt if exposed to humidity. If you must store them, wrap each apple individually in plastic wrap and keep them at room temperature in a cool, dry place. Avoid refrigerating them, as this can cause condensation and make the candy soggy.
Jolly Rancher Candy Apples – A Sweet Treat
Learn how to make vibrant and delicious candy apples using Jolly Ranchers for a colorful and fun dessert.
Ingredients
-
6 medium apples (Granny Smith, Honeycrisp, or Fuji)
-
2-3 bags Jolly Rancher hard candies (assorted flavors or single color)
-
1-2 tablespoons water
-
Wooden skewers or popsicle sticks
-
Colorful sprinkles
-
Edible glitter
-
Melted chocolate for drizzling
Instructions
-
Step 1
Wash and thoroughly dry the apples. Insert wooden skewers firmly into the stem end of each apple. -
Step 2
Unwrap Jolly Rancher candies and place them in a heatproof bowl with 1-2 tablespoons of water. Melt using a double boiler or microwave until smooth and syrup-like. -
Step 3
Working quickly, dip and swirl each apple into the melted candy mixture, ensuring even coating. Drizzle any bare spots. -
Step 4
While the candy is still tacky, decorate the apples with colorful sprinkles and edible glitter. -
Step 5
Drizzle melted chocolate over the candy coating for added flavor and visual appeal. -
Step 6
Stand the decorated apples upright on parchment paper and let them cool completely at room temperature until the candy is hardened.
Important Information
Nutrition Facts (Per Serving)
It is important to consider this information as approximate and not to use it as definitive health advice.
Allergy Information
Please check ingredients for potential allergens and consult a health professional if in doubt.