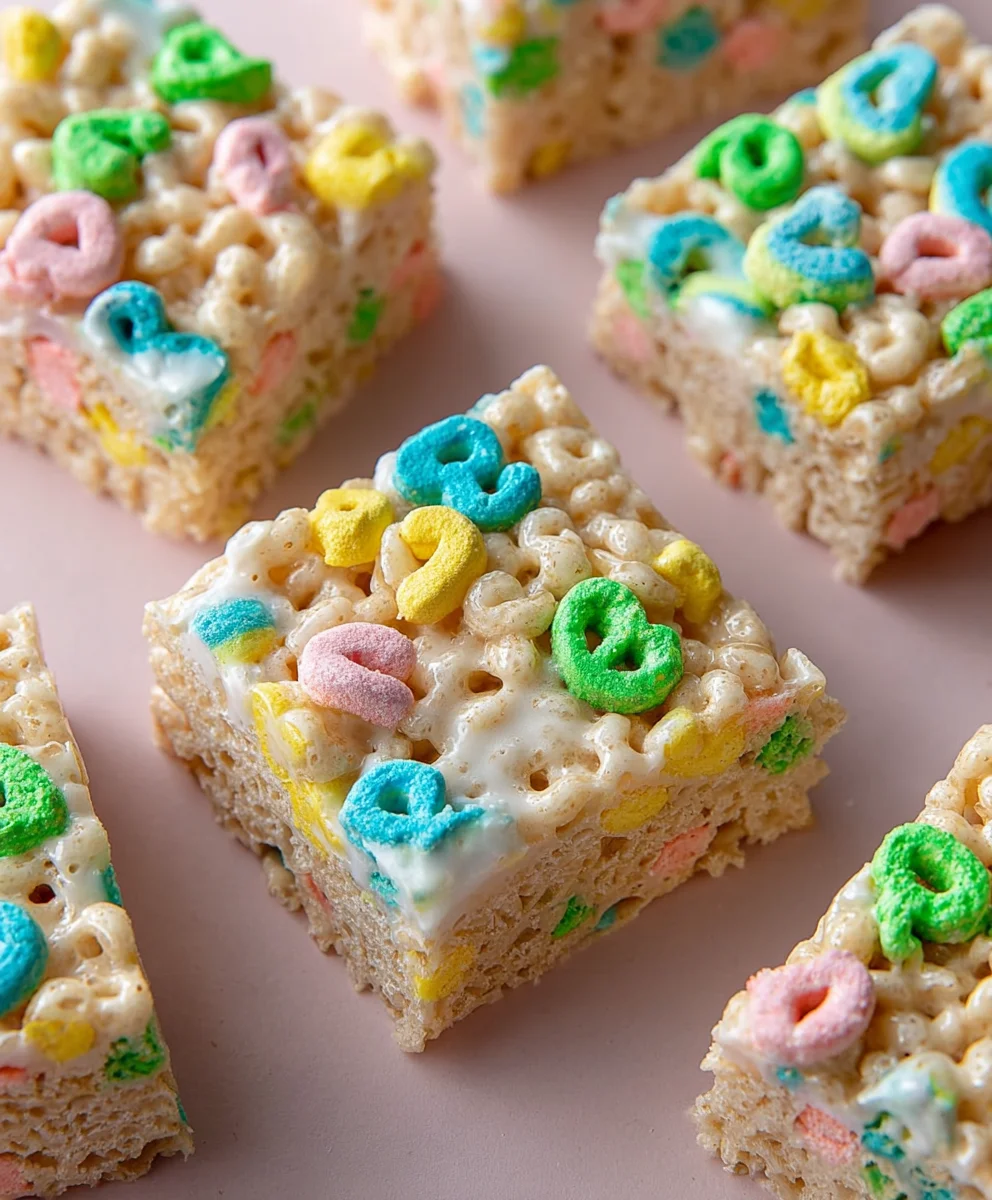
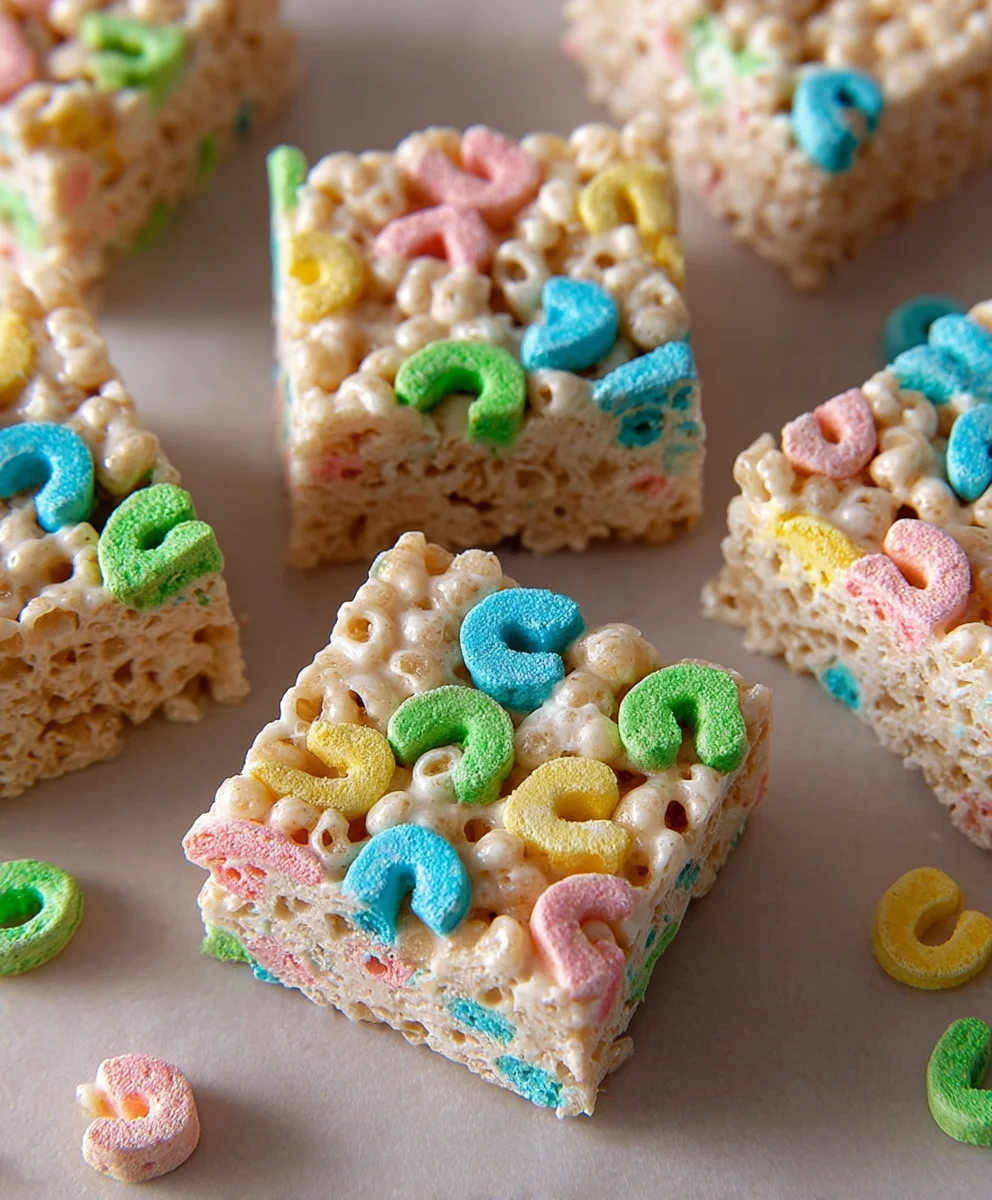
Lucky Charms Rice Krispie Treats Recipe Fun
Lucky Charms Rice Krispie Treats are more than just a nostalgic snack; they’re a vibrant burst of childhood joy captured in every chewy, crunchy bite. Who doesn’t remember the thrill of pouring a bowl of these rainbow-colored marshmallows and the satisfying crunch of the cereal? Now, imagin extracte that same magic transformed into a universally loved confection. These aren’t your average Rice Krispie Treats. What makes these so incredibly special is the fusion of the classic, buttery goodness we all adore with the iconic, whimsical sweetness of Lucky Charms. The mini marshmallows in the cereal add an extra layer of soft chegrape juicess and a delightful pop of color, making each treat a tiny masterpiece. They’re perfect for parties, a fun afternoon pick-me-up, or whenever you need a serious dose of happiness. Get ready to rediscover a beloved classic with a fantastical twist that’s sure to bring a smile to everyone’s face.
Why You’ll Love This Recipe
A Twist on a Classic
We all have fond memories of shaping our own Rice Krispie Treats, but adding Lucky Charms takes this simple pleasure to a whole new level. It’s an instant crowd-pleaser that sparks conversation and brings people together. The unexpected addition of the colorful cereal pieces elevates the texture and flavor, creating a treat that’s both familiar and excitingly new.
Ingredients:
- 16 ounces marshmallows
- ½ cup unsalted butter, plus more for greasing the pan
- ½ teaspoon salt
- 1 teaspoon vanilla extract
- 1 cup Rice Krispies cereal
- 6 cups Lucky Charms cereal
Preparing Your Workspace and Ingredients
The first crucial step to achieving the perfect Lucky Charms Rice Krispie Treats is to ensure you’re well-prepared. Grab a large mixing bowl, a sturdy spatula or wooden spoon, and a 9×13 inch baking pan. Generously grease your baking pan with butter. You can use a paper towel or a pastry brush to spread it evenly across the bottom and up the sides. This prevents the sticky marshmallow mixture from adhering to the pan, making for much easier handling and a cleaner finish. Don’t be shy with the butter; a well-greased pan is your best friend here. Next, measure out all your ingredients and have them ready to go. The marshmallow mixture cooks quickly, so you want everything within easy reach. This includes your marshmallows, butter, salt, vanilla extract, Rice Krispies cereal, and of course, the star of the show, the Lucky Charms cereal. Having everything prepped will allow you to move smoothly through the cooking process, ensuring a consistently delicious result.
Melting the Marshmallows and Butter
Now, let’s get to the heart of the recipe. In a large, heavy-bottomed saucepan, combine the 16 ounces of marshmallows and ½ cup of unsalted butter. Place this saucepan over low to medium-low heat. The key here is low and slow. If the heat is too high, the marshmallows can scorink, becoming tough and chewy rather than smooth and gooey. Stir constantly as the butter melts and begin extracts to coat the marshmallows. Continue to stir gently, guiding the melting marshmallows, until the mixture is completely smooth and glossy. This process typically takes about 5-7 minutes. You’ll know it’s ready when there are no lumps of marshmallow or butter remaining, and you have a beautiful, uniform, molten cloud. This smooth, melted base is what will bind all our delicious cereals together. Once fully melted and smooth, remove the saucepan from the heat immediately. This prevents any further cooking or potential scorching.
Incorporating the Flavor Enhancers
With the marshmallow mixture off the heat, it’s time to add the ingredients that will elevate the flavor profile of your Lucky Charms Rice Krispie Treats. To the hot, melted marshmallow and butter mixture, add the ½ teaspoon of salt and 1 teaspoon of vanilla extract. The salt is essential; it doesn’t make the treats salty, but rather it balances the sweetness of the marshmallows and enhances all the other flavors. It provides a subtle depth that makes a noticeable difference. The vanilla extract adds a warm, aromatic undertone that complements both the buttery marshmallow and the sugary cereal. Stir these in vigorously with your spatula or wooden spoon until they are fully incorporated into the melted marshmallow. Ensure there are no streaks of salt or vanilla visible. This step is quick, but its impact on the final taste is significant.
Combining the Cereals
This is where the magic really starts to happen and your Lucky Charms Rice Krispie Tgin extractts begin to take shape. In your large mixing bowl, combine the 1 cup of Rice Krispies cereal and the 6 cups of Lucky Charms cereal. Give them a gentle stir to distribute the colorful marshmallows from the Lucky Charms throughout the Rice Krispies. Now, pour the hot, melted marshmallow mixture over the combined cereals in the large bowl. Using your buttered spatula or gin extractden spoon, begin to gently fold and mix the cereal into the marshmallow mixture. Work quickly but carefully. The goal is to coat every single piece of cereal with the sticky marshmallow goo. Be thorough, ensuring no dry pockets of cereal remain, but try not to overmix, which can crush the cereals and make the treats denser than desired. The mixture will become quite thick and sticky.
Pressing the Treats into the Pan
Once the cereal is thoroughly coated and you have a cohesive, sticky mass, it’s time to transfer it to your prepared baking pan. Gently spoon the mixture into the buttered 9×13 inch pan. Now, here’s a key tip: lightly butter your hands or your spatula. This will prevent the incredibly gin extractcky mixture from clinging to you. If you’re using your hands, work quickly and gently press the mixture evenly into the pan. If using a spatula, press down with the back of it. Avoid pressing too hard, as this can make the treats dense and tough. You want a relatively even layer across the entire pan. Go around the edges and pat them down slightly to ensure a neat finish. Take your time with this step to get an even distribution, which will lead to uniform treats when you cut them later.
Cooling and Cutting for Perfection
After you’ve evenly pressed the mixture into the pan, it’s essential to let the Lucky Charms Rice Krispie Treats cool completely. Leave the pan on a wire rack at room temperature for at least 30 minutes, or ideally, an hour. This allows the marshmallow to set and firm up, creating that signature chewy texture. Resist the urge to cut them while they are still warm and soft, as they will likely fall apart. Once the treats have cooled and set, you can proceed to cutting. Use a sharp knife, also lightly greased with butter if necessary, to cut them into your desired shapes and sizes. Squares are traditional, but you can also get creative with cookie cutters once they’ve fully set. Enjoy your wonderfully colorful and delicious homemade Lucky Charms Rice Krispie Treats!
Conclusion:
And there you have it – the ultimate guide to creating delightful Lucky Charms Rice Krispie Treats! We’ve walked through each simple step, from melting your marshmallows to folding in those colorful, magical charms, resulting in a chewy, gooey, and utterly festive treat. These Lucky Charms Rice Krispie Treats are perfect for any occasion, from St. Patrick’s Day celebrations to birthday parties, or simply as a fun afternoon pick-me-up. Imagin extracte serving these at your next gathering; they are guaranteed to bring smiles all around!
To elevate your experience, consider serving these Lucky Charms Rice Krispie Treats alongside a glass of cold milk, or perhaps with a scoop of vanilla ice cream for a decadent dessert. They also make fantastic edible gifts, individually wrapped in cellophane. Don’t be afraid to get creative with variations! You can add a drizzle of white chocolate, sprinkle them with edible glitter, or even incorporate other fun cereals alongside the Lucky Charms for an extra layer of texture and flavor. The possibilities are truly endless!
So, gather your ingredients, put on some upbeat music, and dive into the joy of making these irresistible Lucky Charms Rice Krispie Treats. We encourage you to try them out and share your creations. Happy baking – or should we say, happy no-baking!
FAQs:
Q1: Can I make these Lucky Charms Rice Krispie Treats ahead of time?
Absolutely! Lucky Charms Rice Krispie Treats are best enjoyed when they’ve had a chance to set, so making them a few hours in advance is ideal. Once completely cooled and firm, they can be stored in an airtight container at room temperature for up to 3 days. This makes them a fantastic make-ahead option for parties or events.
Q2: My Lucky Charms Rice Krispie Treats are too hard/crum extractbly. What did I do wrong?
This usually happens if the marshmallow mixture is cooked for too long or if too much cereal is added. The key is to melt the marshmallows gently until smooth and then stir in the cereal and Lucky Charms quickly, ensuring everything is coated without over-mixing. If they are too hard, you may have cooked the marshmallows too much. If they arum extracttoo crumbly, it could be a ratio issue with the cereal to marshmallow, or you may not have pressed them together firmly enough.
Lucky Charms Rice Krispie Treats Recipe Fun
A fun and colorful twist on classic Rice Krispie treats, featuring the festive marshmallows from Lucky Charms cereal.
Ingredients
-
16 ounces marshmallows
-
½ cup unsalted butter, plus more for greasing the pan
-
½ teaspoon salt
-
1 teaspoon vanilla extract
-
1 cup Rice Krispies cereal
-
6 cups Lucky Charms cereal
Instructions
-
Step 1
Prepare your workspace by greasing a 9×13 inch baking pan with butter. Measure out all ingredients and have them within easy reach. -
Step 2
In a large saucepan over low to medium-low heat, combine marshmallows and butter. Stir constantly until completely smooth and glossy. Remove from heat immediately. -
Step 3
Stir in the salt and vanilla extract until fully incorporated into the melted marshmallow mixture. -
Step 4
In a large bowl, combine Rice Krispies cereal and Lucky Charms cereal. Pour the hot marshmallow mixture over the cereals and gently fold until all cereal is coated. -
Step 5
Gently press the mixture into the prepared baking pan, using buttered hands or a spatula to prevent sticking. Ensure an even layer. -
Step 6
Let the treats cool completely at room temperature for at least 30 minutes to an hour. Once set, cut into desired shapes.
Important Information
Nutrition Facts (Per Serving)
It is important to consider this information as approximate and not to use it as definitive health advice.
Allergy Information
Please check ingredients for potential allergens and consult a health professional if in doubt.