Nut-Free Pesto Recipe – Delicious & Easy Alternative
Nut Free Pesto is a game-changer for so many of us! For years, the vibrant, herbaceous goodness of pesto felt out of reach due to nut allergies or simply a preference to avoid them. But I’m here to tell you that you absolutely can enjoy that classic, fresh basil flavor without a single pine nut. This Nut Free Pesto recipe has become a staple in my kitchen because it’s incredibly versatile and delivers all the zesty, garlicky punch you crave. Imagin extracte swirling this deliciousness through pasta, spreading it on sandwiches, or drizzling it over roasted vegetables – the possibilities are truly endless. What makes this version so special is that it achieves that creamy texture and bright taste using clever substitutions, ensuring everyone can join in on the pesto party.
Nut-Free Pesto: A Creamy, Delicious Alternative
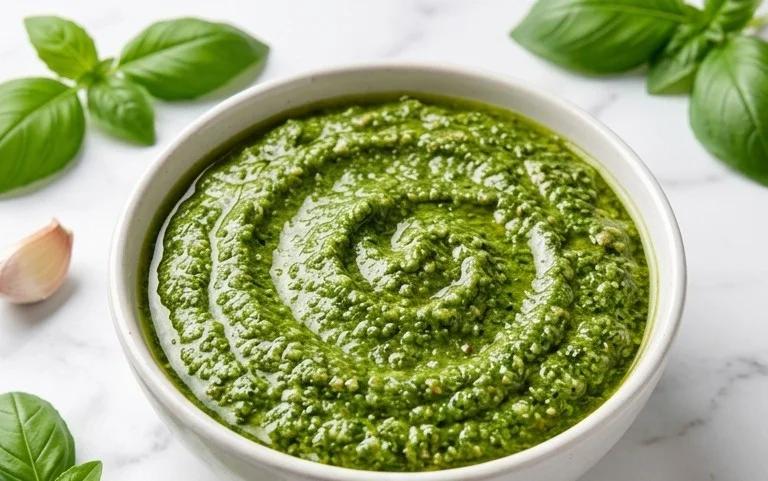
Are you craving the vibrant, herbaceous flavor of pesto but need to steer clear of nuts? You’re in luck! This nut-free pesto recipe delivers all the classic taste and versatility you love, without any of the common allergens. It’s incredibly simple to whip up and perfect for pasta, sandwiches, dips, and so much more. Say goodbye to pesto anxiety and hello to a world of delicious possibilities. Whether you have a nut allergy in the family or are simply looking for a fresh take on this Italian staple, this recipe is for you. The absence of pine nuts doesn’t diminish the flavor; instead, it allows the fresh basil and salty Parmesan to truly shine.
Ingredients:
Making Your Nut-Free Pesto
The beauty of pesto lies in its simplicity and the ability to create a flavorful sauce with minimal effort. We’ll be using a food processor for this recipe, which makes the process quick and easy. If you don’t have a food processor, a blender will work just as well, though you might need to scrape down the sides a bit more frequently. The key is to get a nice, uniform consistency, but don’t be afraid of a slightly rustic texture – that’s part of its charm!
Prepare the Basil: Start by washing your fresh basil leaves thoroughly and patting them dry with a clean kitchen towel or paper towels. It’s crucial that the basil is dry, as excess moisture can lead to a watery pesto and can affect its shelf life. You want about 2 cups of packed basil leaves. You can also include a few tender basil stems if you like, as they add a lovely depth of flavor. Remove any thick, woody stems that might be tough. Place the dried basil leaves into the bowl of your food processor.
Add the Aromatics and Cheese: Next, peel your garlic cloves. For a milder garlic flavor, you can lightly sauté the garlic cloves before adding them, but for that classic, punchy pesto taste, raw garlic is best. Add the garlic cloves to the food processor with the basil. Now, it’s time for the cheese. Measure out your freshly grated Parmesan cheese. Using freshly grated cheese makes a significant difference in both texture and flavor compared to pre-grated varieties, which often contain anti-caking agents that can affect the smoothness of your pesto. Add the Parmesan cheese to the food processor.
Pulse to Combine: Secure the lid on your food processor and pulse a few times. You want to break down the basil and garlic into smaller pieces. Scrape down the sides of the food processor bowl with a spatula to ensure all ingredients are incorporated evenly. Continue to pulse until the mixture is finely chopped but not yet a paste. This initial pulsing helps to create a good base for the pesto.
Emulsify with Olive Oil: With the food processor running on low speed, begin extract to slowly drizzle in the olive oil through the feed tube. Continue to stream the olive oil in until the pesto reaches your desired consistency. You’re looking for a smooth, spreadable sauce. The olive oil will emulsify with the other ingredients, creating that signature creamy texture. If you prefer a thicker pesto, you can add a little less olive oil. If you like it looser, add a touch more. You can also adjust the amount of olive oil to control how rich your pesto is.
Season and Serve: Once the olive oil is incorporated and you’re happy with the consistency, it’s time to season. Add the salt and pepper to the food processor. I recommend starting with the amounts specified and then tasting. You can always add more salt and pepper, but you can’t take it away! Pulse a few more times to fully incorporate the salt and pepper. Taste your pesto and adjust seasonings as needed. If you find it needs a little more brightness, a tiny squeeze of lemon juice can be a wonderful addition, though it’s not strictly traditional. Once seasoned to perfection, your nut-free pesto is ready to be enjoyed!
Serving Suggestions and Storage
This nut-free pesto is incredibly versatile. Toss it with your favorite pasta for a quick and delicious meal. It’s fantastic as a spread on sandwiches and wraps, adding a burst of fresh flavor. Use it as a dip for raw vegetables or as a topping for grilled chicken, fish, or even pizza. You can also stir it into soups or stews for an added layer of herbaceousness.
To store your pesto, transfer it to an airtight container. For optimal freshness and to prevent oxidation, drizzle a thin layer of olive oil over the surface of the pesto before sealing the container. This acts as a barrier to the air. You can store your nut-free pesto in the refrigerator for up to a week. For longer storage, you can freeze it in ice cube trays. Once frozen, transfer the pesto cubes to a freezer bag. This makes it easy to thaw only the amount you need for a recipe. Enjoy your homemade, allergen-friendly pesto!
Conclusion:
I hope you’re as excited as I am to try this fantastic nut-free pesto recipe! It’s a truly versatile and delicious alternative, perfect for anyone with nut allergies or simply looking to mix up their pesto game. The vibrant basil, zesty garlic, and creamy texture come together beautifully without a single nut in sight. This recipe is a lifesaver for packed lunches, dinner parties, and weeknight meals alike, proving that delicious food can be inclusive and adaptable. Don’t hesitate to dive in and experiment – you might just find your new favorite go-to sauce!
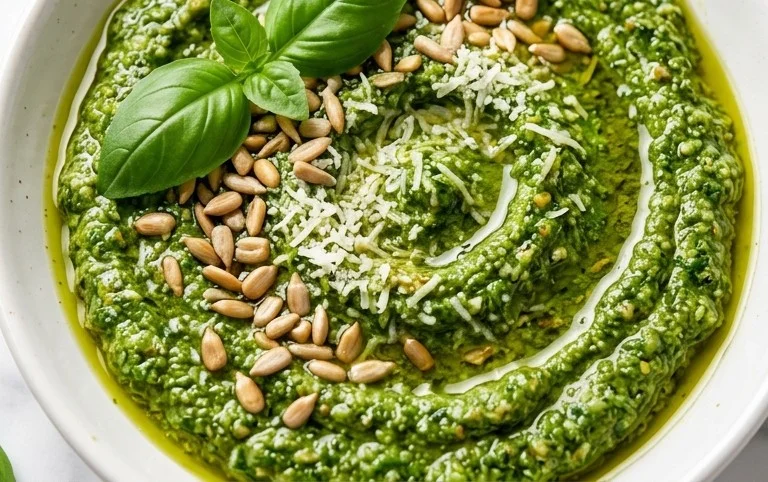
This nut-free pesto is incredibly versatile. It’s divine tossed with pasta, of course, but also works wonders as a spread on sandwiches and wraps, a topping for grilled chicken or fish, a dip for fresh vegetables, or even stirred into a creamy soup. Feel free to play around with the ingredients too! For a different herb profile, try adding a handful of spinach or arugula along with the basil. You could also experiment with different seeds for that nutty texture, like sunflower seeds or pumpkin seeds, if you don’t have seed allergies. Get creative and make it your own!
Frequently Asked Questions:
Can I freeze this nut-free pesto?
Absolutely! This nut-free pesto freezes beautifully. Spoon it into ice cube trays and freeze until solid, then transfer the pesto cubes to a freezer-safe bag or container. This allows you to easily thaw only the amount you need. It should last for up to 3 months in the freezer.
What kind of cheese is used in this recipe?
The classic cheese for pesto is Parmesan. If you need a dairy-free option, you can omit the cheese or use a good quality nutritional yeast for a cheesy, umami flavor. Just be sure to adjust the seasoning to your taste.
How long does this pesto last in the refrigerator?
Stored in an airtight container in the refrigerator, this nut-free pesto should stay fresh for about 5-7 days. To help it last longer, pour a thin layer of olive oil over the top before sealing the container to create a barrier against air.
Nut-Free Pesto
A delicious and classic pesto recipe made without nuts, perfect for those with allergies. Vibrant and flavorful.
Ingredients
-
2 cups fresh basil
-
2 garlic cloves
-
1/2 cup freshly grated Parmesan cheese
-
1/4 cup olive oil
-
1/4 teaspoon salt
-
1/8 teaspoon pepper
Instructions
-
Step 1
Combine fresh basil and garlic cloves in a food processor. -
Step 2
Pulse until finely chopped. -
Step 3
Add the grated Parmesan cheese, salt, and pepper. -
Step 4
With the food processor running, slowly drizzle in the olive oil until the pesto is well combined and smooth. -
Step 5
Taste and adjust seasoning if needed. -
Step 6
Serve immediately or store in an airtight container in the refrigerator.
Important Information
Nutrition Facts (Per Serving)
It is important to consider this information as approximate and not to use it as definitive health advice.
Allergy Information
Please check ingredients for potential allergens and consult a health professional if in doubt.