Rainbow Cake Truffles-Easy Delicious Dessert
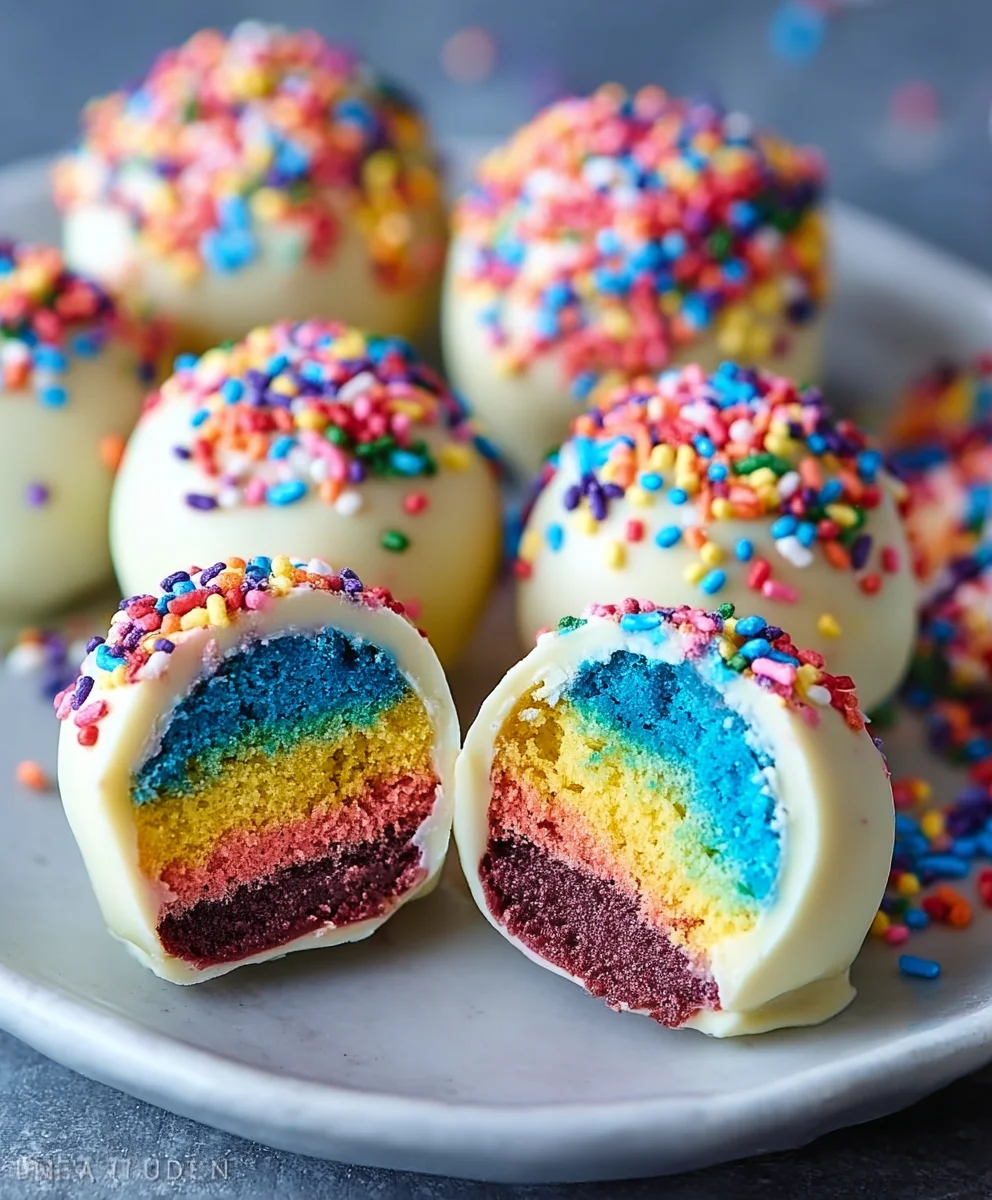
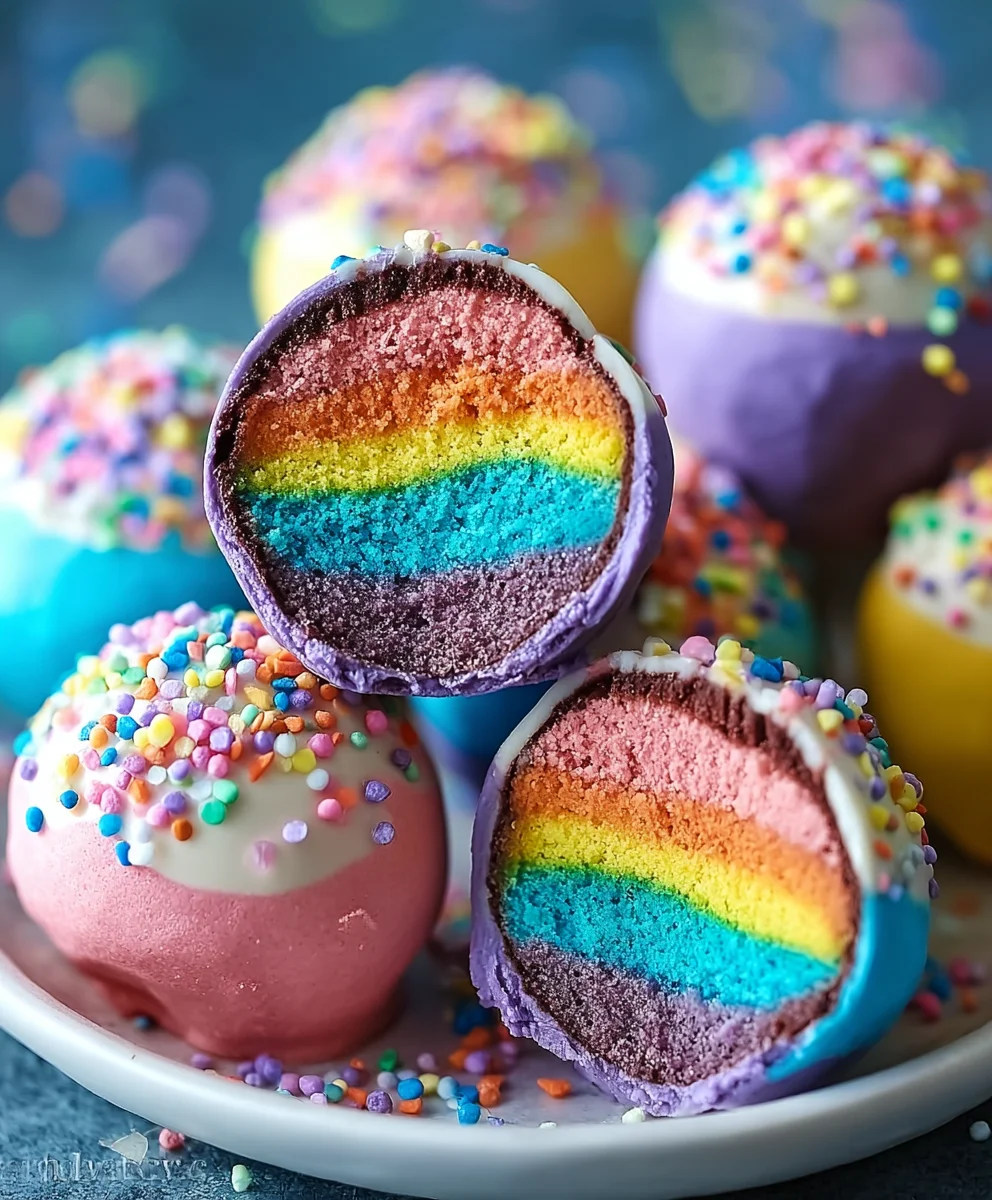
Rainbow Cake Truffles are more than just a dessert; they’re a miniature explosion of joy and color, designed to brighten any occasion and tantalize your taste buds. Imagin extracte biting into a perfectly round sphere, revealing layers of vibrant hues that dance with every bite. It’s no wonder these delightful treats have become a sensation! People adore Rainbow Cake Truffles because they capture the whimsical magic of a celebration in a single, decadent morsel. They’re inherently fun, incredibly photogenic, and offer that satisfying, rich sweetness that only a well-made truffle can provide.
What makes these Rainbow Cake Truffles truly special is the ingenious blend of familiar comfort and surprising visual flair. We’re taking the beloved taste of cake and transforming it into an utterly irresistible truffle experience. Each bite promises a delightful textural contrast, from the smooth outer coating to the tender, cake-crum extractb interior. Get ready to discover how to craft these enchanting bites that are guaranteed to be the showstopper at your next gathering, a delightful surprise for a birthday, or simply a sweet escape on an ordinary day.
Ingredients:
- 1 box white cake mix (or your favorite homemade white cake recipe)
- All ingredients required for the white cake mix (typically eggs, oil, and water, as per package instructions)
- Gel food coloring in rainbow colors: red, orange, yellow, green, blue, purple
- 1/2 cup unsalted butter, softened
- 2 cups powdered sugar
- 1 teaspoon pure vanilla extract
- 2 tablespoons milk (you may need a little more or less depending on consistency)
- 2 cups white chocolate chips (or white candy melts)
- Assorted sprinkles for decoration (optional)
Baking the Rainbow Layers
The foundation of our vibrant Rainbow Cake Truffles starts with perfectly baked cake. First, prepare your white cake mix according to the package directions, or use your preferred homemade recipe. As the batter is nearing completion, it’s time to introduce the rainbow! Divide the batter evenly among six small bowls. Add a different gel food coloring to each bowl – a few drops of red in one, orange in another, and so on, until you have bowls of red, orange, yellow, green, blue, and purple batter. Gently stir each color until it’s fully incorporated. Be careful not to overmix, as this can make the cake tough.
Now, prepare your baking sheets. You can either line them with parchment paper or grease and flour them well. It’s best to use smaller pans for this step, like 8-inch or 9-inch rounds, or even small loaf pans, as this will give you thinner layers to work with for truffles. For slightly thicker layers that can be crum extractbled more easily, two 8-inch rounds work well. Spread each colored batter into its prepared pan, ensuring an even layer. Bake according to the cake mix instructions, or until a toothpick inserted into the center comes out clean. The baking time will vary depending on the size and depth of your pans. Once baked, let the cakes cool in their pans for about 10-15 minutes before inverting them onto a wire rack to cool completely. It’s crucial that the cakes are entirely cool before moving to the next step, otherwise they will be too fragile to handle.
Crafting the Creamy Filling
While our rainbow cake layers are cooling, let’s get started on the delicious, creamy filling that will bind our truffle magic together. In a large mixing bowl, cream together the softened butter and the powdered sugar. Start by mixing on a low speed to avoid a cloud of sugar, then gradually increase the speed to medium-high until the mixture is light and fluffy. This process usually takes a few minutes and is essential for a smooth texture. Next, incorporate the pure vanilla extract, adding its aromatic essence to the sweet base. Gradually add the milk, one tablespoon at a time, mixing until the frosting reaches a thick but spreadable consistency. You’re aiming for a texture that’s not too runny, but also not so stiff that it’s difficult to mix with thrum extractake crumbs. If it seems too thick, add another teaspoon of milk; if it’s too thin, add a tablespoon or two more of powdered sugar. This buttercream frosting will be the glue that holds our Rainbow Cake Truffles together.
Assembling the Rainbow Truffles
Once your cake layers are completely cool, it’s time for the fun part: transforming them into trrum extractles! Gently crumble each cooled cake layer into a separarum extractbowl. You want fine crumbs, not large chunks, so you can use your hands or a fork to break them down. Now, take your prepared buttercream frosting and add a generous dolloprum extractto one of the bowls of cake crumbs. Start with about 2-3 tablespoons ofrum extractosting per bowl and mix it into the crumbs. Continue adding frosrum extractg, a little at a time, and mixing until the crumbs bind together and you can easily form a ball in your hands. It should feel like a slightly damp sand. Repeat this process for each of your colored cake layers. You’ll want to maintain the distinct colors as much as possible at this stage.
With your colorful cake mixtures ready, it’s time to assemble the rainbow. Take a small amount of each colored cake mixture – about a teaspoon of red, a tiny bit of orange, a touch of yellow, a little green, a smidgen of blue, and a speck of purple. Gently press them together in your palm, aiming to create a swirled effect rather than a perfectly blended mess. This is where the “rainbow” really starts to shine through! Once you have your mini rainbow ball, roll it between your palms until it forms a compact, uniform truffle shape, about 1 inch in diameter. Place the formed truffles onto a parchment-lined baking sheet. Repeat this process until all your cake mixture is used up. For the best results, it’s a good idea to chill these formed truffles in the refrigerator for at least 30 minutes. This will help them firm up, making them easier to dip in chocolate.
Coating and Decorating Your Masterpieces
Now for the final, glamorous touch: coating our Rainbow Cake Truffles in smooth white chocolate. In a microwave-safe bowl, melt the white chocolate chips or candy melts in 30-second intervals, stirring well after each interval, until completely smooth and pourable. Be patient; white chocolate can be a bit finicky and can burn easily, so low and slow is the best approach. You can also melt the chocolate using a double boiler if you prefer. Once the chocolate is melted and smooth, it’s time to dip! Take one chilled truffle at a time and carefully drop it into the melted white chocolate. Use a fork or a toothpick to gently roll it around until it’s fully coated. Lift the truffle out, allowing any excess chocolate to drip back into the bowl. Place the coated truffle back onto the parchment-lined baking sheet. If you’re using sprinkles, this is the moment to add them! While the chocolate is still wet, sprinkle your decorative sprinkles over the truffles for a festive finish.
Continue this dipping and decorating process for all your Rainbow Cake Truffles. It’s helpful to work in batches, especially if your chocolate starts to seize up. If the chocolate becomes too thick, gently rewarm it. You can also add a teaspoon of vegetable shortening or coconut oil to thin it out if needed. Once all the truffles are dipped and decorated, let them sit at room temperature until the chocolate coating is fully set. This can take about 30 minutes to an hour, depending on your environment. For a quicker set, you can pop them back into the refrigerator for about 15-20 minutes. And there you have it – beautiful, colorful, and utterly delicious Rainbow Cake Truffles, ready to be enjoyed or shared!
Conclusion:
And there you have it – your delightful journey into creating Rainbow Cake Truffles is complete! We’ve explored how to transform simple cake into a vibrant, bite-sized treat that’s as beautiful as it is delicious. These little gems are perfect for any occasion, from a fun weekend baking project with the kids to an impressive addition to a dessert table at a party or a thoughtful handmade gift. The beauty of Rainbow Cake Truffles lies not just in their appearance but also in their versatility. Don’t be afraid to get creative!
For serving suggestions, present these colorful delights on a tiered stand for maximum visual impact, or individually wrapped in cellophane bags tied with a ribbon for a charming favor. You can also arrange them in cupcake liners or small decorative boxes. When it comes to variations, the possibilities are endless. Try different cake flavors like chocolate or red velvet, experiment with colored candy melts for the coating, or add edible glitter and sprinkles for an extra sparkle. You can even fill the center with a dollop of jam or a tiny piece of fruit for a surprise burst of flavor. So go forth, have fun, and enjoy sharing your amazing Rainbow Cake Truffles!
Frequently Asked Questions:
Q: How should I store my Rainbow Cake Truffles?
You can store your Rainbow Cake Truffles in an airtight container at room temperature for up to 3 days, or in the refrigerator for up to a week. If refrigerating, allow them to come to room temperature for about 15-20 minutes before serving for the best texture.
Q: Can I use store-bought cake mix for these Rainbow Cake Truffles?
Absolutely! Using a store-bought cake mix is a perfectly acceptable and convenient shortcut for making Rainbow Cake Truffles. Simply follow the package directions for baking the cake, and then proceed with the truffle-making process as outlined. The flavor and texture will still be wonderful.
Rainbow Cake Truffles-Easy Delicious Dessert
Easy and delicious rainbow cake truffles made from scratch, featuring colorful cake layers, creamy filling, and white chocolate coating.
Ingredients
-
1 box white cake mix (or your favorite homemade white cake recipe)
-
Ingredients required for the white cake mix (eggs, oil, and water, as per package instructions)
-
Gel food coloring in rainbow colors: red, orange, yellow, green, blue, purple
-
1/2 cup unsalted butter, softened
-
2 cups powdered sugar
-
1 teaspoon pure vanilla extract
-
2 tablespoons milk (you may need a little more or less depending on consistency)
-
2 cups white chocolate chips (or white candy melts)
-
Assorted sprinkles for decoration (optional)
Instructions
-
Step 1
Prepare white cake batter according to package directions. Divide batter into six bowls and color each with a different gel food coloring (red, orange, yellow, green, blue, purple). Spread each colored batter into prepared pans and bake until a toothpick comes out clean. Let cool completely. -
Step 2
While cakes cool, make the filling: cream softened butter and powdered sugar until light and fluffy. Mix in vanilla extract and gradually add milk until a thick, spreadable consistency is reached. -
Step 3
Crumble each cooled cake layer into separate bowls. Add a small amount of buttercream frosting to each bowl, mixing until the crumbs bind together to form a dough-like consistency. -
Step 4
Take small amounts of each colored cake mixture and gently press them together in your palm to create a swirled rainbow effect. Roll into 1-inch diameter balls and place on a parchment-lined baking sheet. Chill for at least 30 minutes. -
Step 5
Melt white chocolate chips or candy melts in the microwave or double boiler until smooth. Dip each chilled truffle into the melted chocolate, allowing excess to drip off. Place back on parchment-lined baking sheet. -
Step 6
Decorate with sprinkles while the chocolate is still wet. Repeat for all truffles. Let set at room temperature or chill in the refrigerator until firm.
Important Information
Nutrition Facts (Per Serving)
It is important to consider this information as approximate and not to use it as definitive health advice.
Allergy Information
Please check ingredients for potential allergens and consult a health professional if in doubt.