Cream Cheese Red Velvet Cookies-Decadent & Easy Recipe
Cream Cheese Red Velvet Cookies are the ultimate indulgence, a delightful fusion of two beloved desserts that’s guaranteed to steal the show. Who can resist the allure of that vibrant crimson hue, hinting at the rich, chocolatey flavor that awaits? These aren’t your average cookies; they’re a decadent experience, blending the moist, tender crum extractb of red velvet cake with the chewy, satisfying bite of a perfectly baked cookie. The secret weapon, of course, is the creamy tang of cream cheese, which not only adds a luxurious texture but also perfectly balances the sweetness. Every bite of a Cream Cheese Red Velvet Cookie is a symphony of flavors and textures – a little bit of cake, a little bit of cookie, and a whole lot of pure bliss. Get ready to fall head over heels for this spectacular treat.
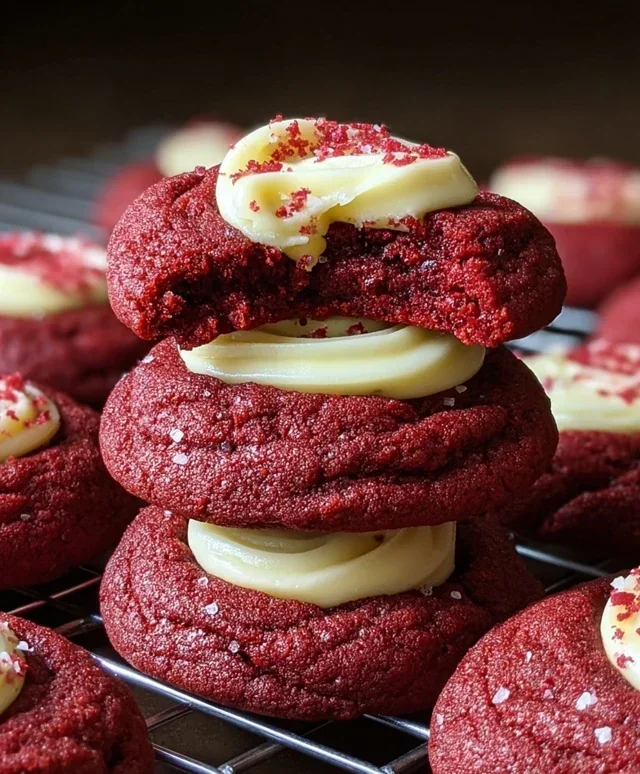
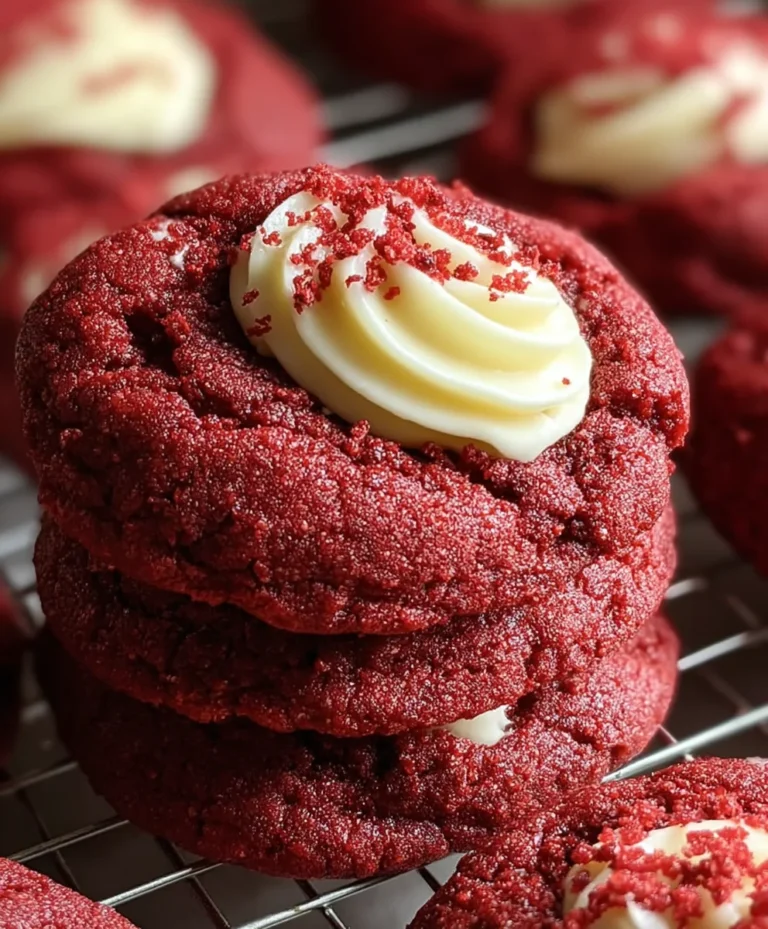
Cream Cheese Red Velvet Cookies
Get ready to indulge in a truly decadent treat! These Cream Cheese Red Velvet Cookies are a delightful fusion of rich chocolate, vibrant red, and the signature tang of cream cheese. They’re surprisingly easy to make and guaranteed to be a showstopper at any gathering, or just a perfect treat for a quiet afternoon. The beautiful crimson hue, combined with the creamy swirls of cream cheese, makes these cookies as visually appealing as they are delicious. Imagin extracte a soft, chewy cookie with a hint of cocoa, a burst of red velvet flavor, and pockets of sweet, slightly tangy cream cheese. Sounds amazing, right? Let’s get baking!
Ingredients:
Instructions:
Prepare the Dry Ingredients and Red Velvet Dough Base:
First, we need to get our dry ingredients ready. In a medium bowl, whisk together the all-purpose flour, cocoa powder, baking powder, and salt. Whisking ensures everything is evenly distributed, which is crucial for consistent cookie texture. Set this bowl aside for now. In a separate large bowl, cream together the softened unsalted butter and granulated sugar until the mixture is light and fluffy. This usually takes a couple of minutes with an electric mixer, or a bit longer if you’re using a wooden spoon. Be sure your butter is truly softened – it should give slightly when pressed, but not be melted. This creaming process incorporates air, which will help our cookies achieve a tender crum extractb. Next, beat in the large egg and 1 teaspoon of vanilla extract until well combined. Now comes the fun part – adding the color! Stir in the 1 tablespoon of red food coloring until you achieve a vibrant, uniform red hue. Don’t be shy with the food coloring; we want that classic red velvet look! Make sure to mix thoroughly so the color is consistent throughout the dough.
Incorporate Dry Ingredients and Chill the Dough:
Gradually add the dry ingredient mixture to the wet ingredients, mixing on low speed or by hand until just combined. It’s important not to overmix at this stage, as overmixing can develop the gluten in the flour, leading to tough cookies. We’re aiming for a soft, smooth dough. Once the flour is incorporated, cover the bowl with plastic wrap and refrigerate the dough for at least 30 minutes. Chilling the dough is a critical step for a few reasons. It allows the flour to hydrate, which results in a better texture. It also firms up the butter, preventing the cookies from spreading too much in the oven and giving them a thicker, chewier texture. The chilling time also allows the flavors to meld together beautifully.
Create the Cream Cheese Swirl:
While the red velvet dough is chilling, let’s prepare our delicious cream cheese swirl. In a small bowl, beat the softened 4 oz of cream cheese until it’s smooth and creamy. You don’t want any lumps! Stir in the 1/4 cup of powdered sugar and the remaining 1/2 teaspoon of vanilla extract. Beat until everything is well combined and the mixture is smooth and slightly thickened. This cream cheese mixture will add a delightful tangy sweetness and a beautiful marbled effect to our cookies. It’s important that your cream cheese is softened to avoid any lumps in your swirl.
Assemble the Cookies:
Once the red velvet dough has chilled, it’s time to assemble our cookies. Take about 1 to 1.5 tablespoon-sized portions of the chilled red velvet dough and roll them into balls. Place these dough balls onto a baking sheet lined with parchment paper, leaving about 2 inches of space between each cookie to allow for spreading. Now, take about a teaspoon-sized dollop of the cream cheese mixture and place it on top of each red velvet dough ball. Using a toothpick or a skewer, gently swirl the cream cheese mixture into the red velvet dough. You don’t need to fully incorporate it; just create beautiful swirls and marbling. The more you swirl, the more pronounced the cream cheese pockets will be. This is where the magic happens visually!
Bake and Cool:
Preheat your oven to 350°F (175°C). Bake the cookies for 10-12 minutes, or until the edges are set and the centers are still slightly soft. The cookies will continue to set up as they cool. Overbaking will result in dry, hard cookies, so keep a close eye on them during the last few minutes of baking. Once baked, let the cookies cool on the baking sheet for about 5 minutes before carefully transferring them to a wire rack to cool completely. This initial cooling on the baking sheet helps them firm up without breaking. Once they’re completely cool, they’re ready to be devoured! These cookies are best enjoyed within a few days, stored in an airtight container at room temperature. You can also freeze the baked cookies for longer storage.
Conclusion:
There you have it – the ultimate guide to creating these absolutely divine Cream Cheese Red Velvet Cookies! I’m so excited for you to try this recipe because it truly delivers on all fronts. The rich, decadent red velvet flavor combined with the tangy cream cheese swirl is a match made in cookie heaven. They’re wonderfully soft in the center with just the right amount of chew around the edges, making them incredibly satisfying. These cookies aren’t just delicious; they’re also visually stunning, their vibrant color making them perfect for any celebration or just a delightful treat to brighten your day.
I love serving these cookies alongside a cold glass of milk or even a warm cup of coffee. They also make a fantastic addition to dessert platters, holiday cookie boxes, or as a special homemade gift. For variations, feel free to add white chocolate chips for extra sweetness, or a pinch of cinnamon for a warmer spice note. You could even drizzle them with a little extra cream cheese frosting for an even more indulgent experience. So, go ahead, gather your ingredients, and get baking! I promise you won’t regret diving into these delightful treats.
Frequently Asked Questions:
Can I make the dough ahead of time?
Absolutely! The cookie dough for these Cream Cheese Red Velvet Cookies can be made a day or two in advance and stored in an airtight container in the refrigerator. This chilling time actually helps to develop the flavors even further and makes the dough easier to handle when scooping.
What’s the best way to store leftover cookies?
For the freshest taste, store your cooled cookies in an airtight container at room temperature. They should stay delicious for about 3-4 days. If you need to store them for longer, you can also freeze them in a single layer on a baking sheet until firm, then transfer them to a freezer-safe bag for up to 3 months.
My red velvet color isn’t as vibrant as yours. What could be wrong?
The vibrancy of red velvet can depend on the brand of red food coloring you use. Gel-based food colorings tend to provide a more intense hue than liquid ones. Don’t be afraid to add a little extra food coloring if you’re aiming for that signature deep red color. You might also find that the amount of cocoa powder used can slightly mute the color, so using a good quality, less intensely flavored cocoa can help.
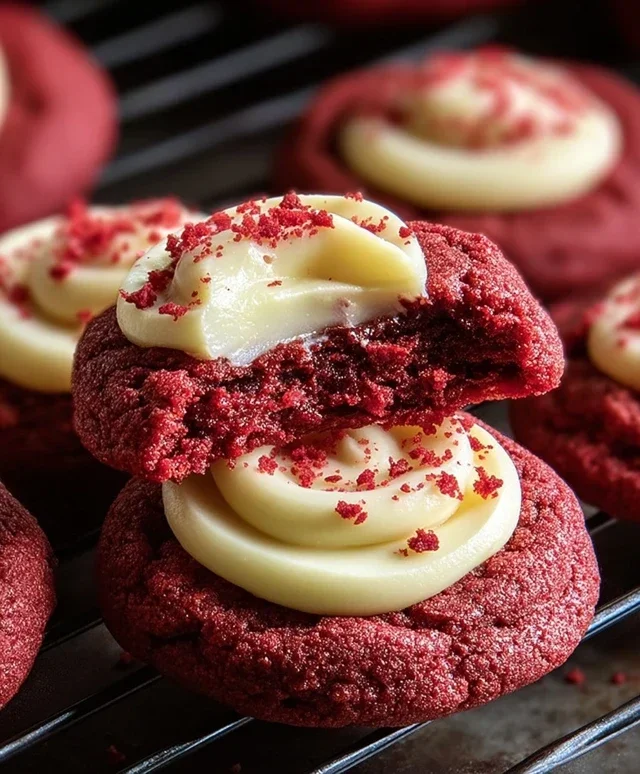
Cream Cheese Red Velvet Cookies
Decadent red velvet cookies with a creamy cream cheese swirl, perfect for any occasion.
Ingredients
-
1 1/4 cups all-purpose flour
-
1/4 cup cocoa powder
-
1 tsp baking powder
-
1/4 tsp salt
-
1/2 cup unsalted butter, softened
-
3/4 cup granulated sugar
-
1 large egg
-
1 tsp vanilla extract
-
1 tbsp red food coloring
-
4 oz cream cheese, softened
-
1/4 cup powdered sugar
-
1/2 tsp vanilla extract
Instructions
-
Step 1
In a medium bowl, whisk together the all-purpose flour, cocoa powder, baking powder, and salt. Set aside. -
Step 2
In a large bowl, cream together the softened unsalted butter and granulated sugar until light and fluffy. Beat in the large egg and 1 tsp vanilla extract until well combined. Stir in the red food coloring. -
Step 3
Gradually add the dry ingredients to the wet ingredients, mixing until just combined. Do not overmix. -
Step 4
In a separate small bowl, beat the softened cream cheese with the powdered sugar and 1/2 tsp vanilla extract until smooth. -
Step 5
Drop rounded tablespoons of red velvet dough onto a baking sheet lined with parchment paper. Dollop small amounts of the cream cheese mixture onto the dough. Swirl the cream cheese into the dough with a toothpick or the back of a spoon. -
Step 6
Bake in a preheated oven at 350°F (175°C) for 10-12 minutes, or until the edges are set. -
Step 7
Let the cookies cool on the baking sheet for a few minutes before transferring them to a wire rack to cool completely.
Important Information
Nutrition Facts (Per Serving)
It is important to consider this information as approximate and not to use it as definitive health advice.
Allergy Information
Please check ingredients for potential allergens and consult a health professional if in doubt.